Apple Final Cut Pro 6 User Manual
Page 1387
602
Color Correction and Video Quality Control
7
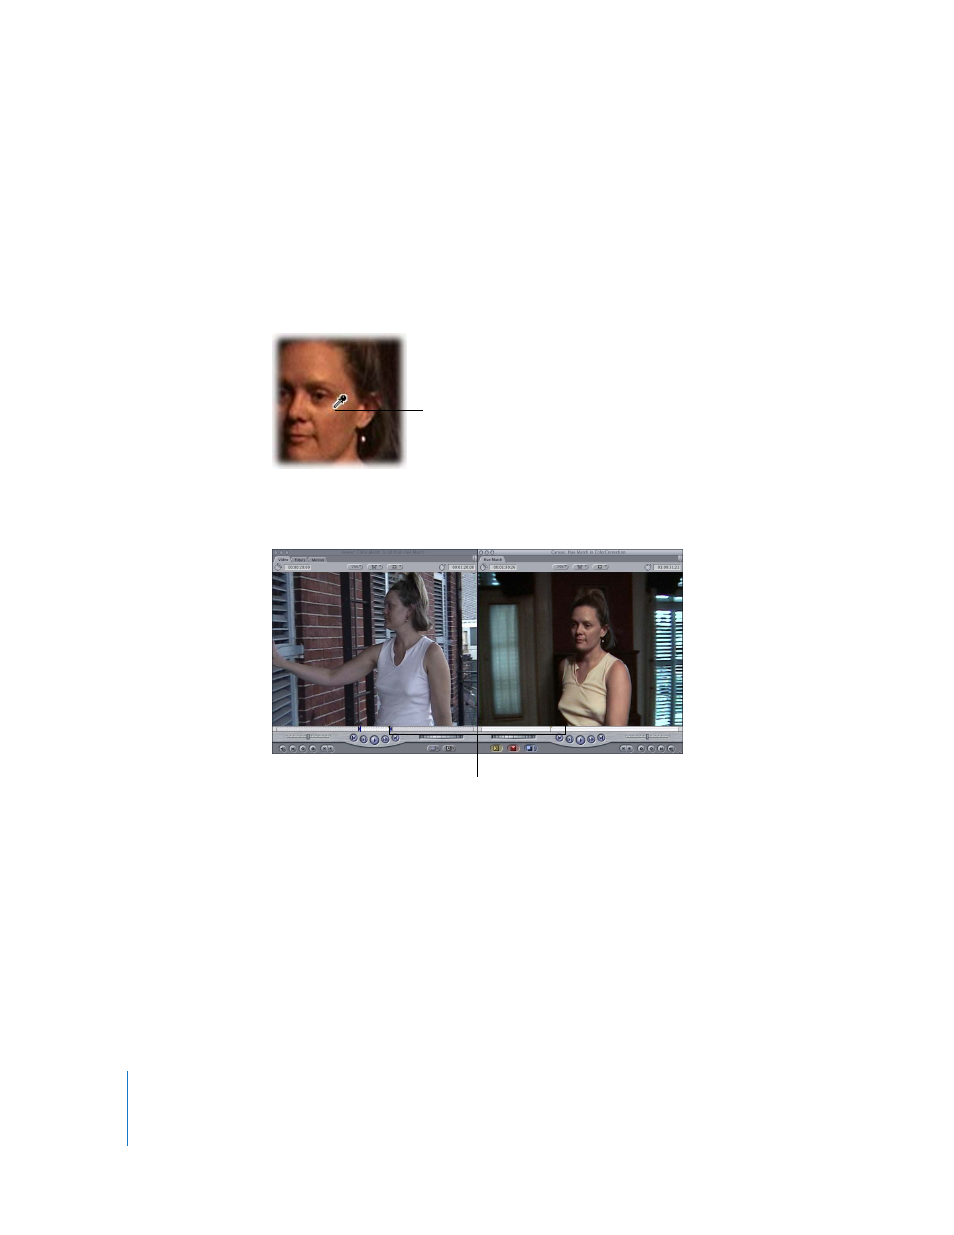
With the Whites Auto-Balance eyedropper selected, move the pointer into the Canvas
where clip 2 is displayed. When the pointer becomes an eyedropper, click a highlight in
the actor’s face in clip 2 that matches, as closely as possible, the highlight you selected
in clip 1.
Note: For best results, it’s extremely important to select an area of color in the clip
being corrected that accurately matches the level of the area of color you selected as
the match color.
8
The Whites control adjusts, dipping into the blues to compensate for the overly warm
lighting. The color balance of clip 2 now approximates that of clip 1 much more closely.
If you’ve achieved the results you wanted, you can stop. Often, however, using the Match
Hue controls is simply the first step, and you will make other adjustments afterward.
∏
Tip: Holding down the Shift key while adjusting the color balance control you’re
working with will lock the angle along which the color balance indicator moves,
allowing you to keep the exact hue of your adjustment the same.
Click a highlight in clip 2
that closely matches the
highlight you selected in
clip 1.
The color balance of both
shots is now similar.