Spectra Precision FAST Survey Reference Manual User Manual
Page 56
p54
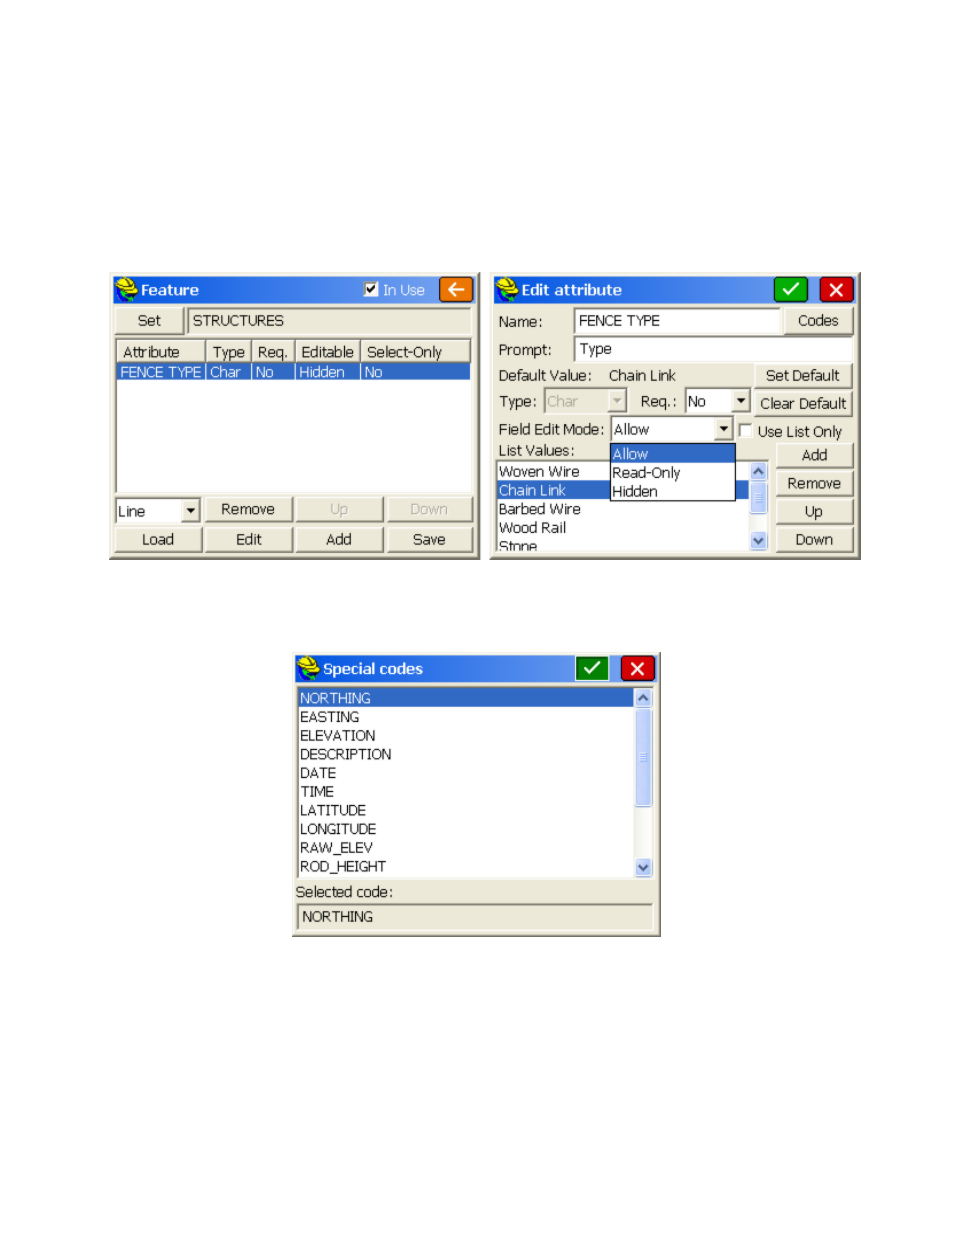
used, and there may be 6 options, with a default option. These can be set up, one time, by using the Add
option within New Attributes. Once setup, whenever a fence is chosen, the attributes can be selected from a
list. These attributes will be stored in the raw file and most importantly, will output to an ESRI Shape file
(Map Screen, File pull down, Export SHP File). You can even control the prompt and what the default
attribute is (in this example, “Chain Link”) and if you wanted Chain Link to be first in the list, you could
highlight it and click "Up". You can choose whether each attribute entry is required, or just optional. In
"Field Edit Mode", the "Hidden" option lets you hide individual attributes on specific jobs so that prompted
options are limited to only what you need. The "Read-Only" option ghosts the attribute and does not allow
entry or editing, but still displays it in the field and specifically stores the default value shown. The setup
screen for new attributes is shown below.
Fence type is a user-defined attribute. But many attributes of the feature are known by FAST Survey (e.g. the
current instrument being used, the date and time, etc.). These types of known attributes appear in a list of
special codes, selectable above by tapping "Codes", and shown in the figure below.
When you are collecting the points with an “FL” code, and the program detects that you have shot a
“point-only” feature, or if you are shooting a line, that you have ended the line (e.g. FL END), then you will be
prompted for the attributes. If, however, you select the Point option (lower left) for codes that involve
linework, you will get prompted for attributes at each vertex, and then once for the line as a whole. In this
way, you can be prompted for attributes of each pole on a power line, and then once for the entire power line
(separate set of attributes).