Spectra Precision FAST Survey Reference Manual User Manual
Page 119
p117
2.
A progress window should pop up, indicating that FAST Survey is ready to read from the laser. Aim the laser and
fire at a target point. Keep firing until your laser returns a valid reading, and the progress window disappears.
3.
To test whether your shot was successful, verify that the values on your screen correspond to the values on your
laser’s internal display. Note that not all lasers return azimuth and vertical offset data, in which case this
information will have to be entered manually.
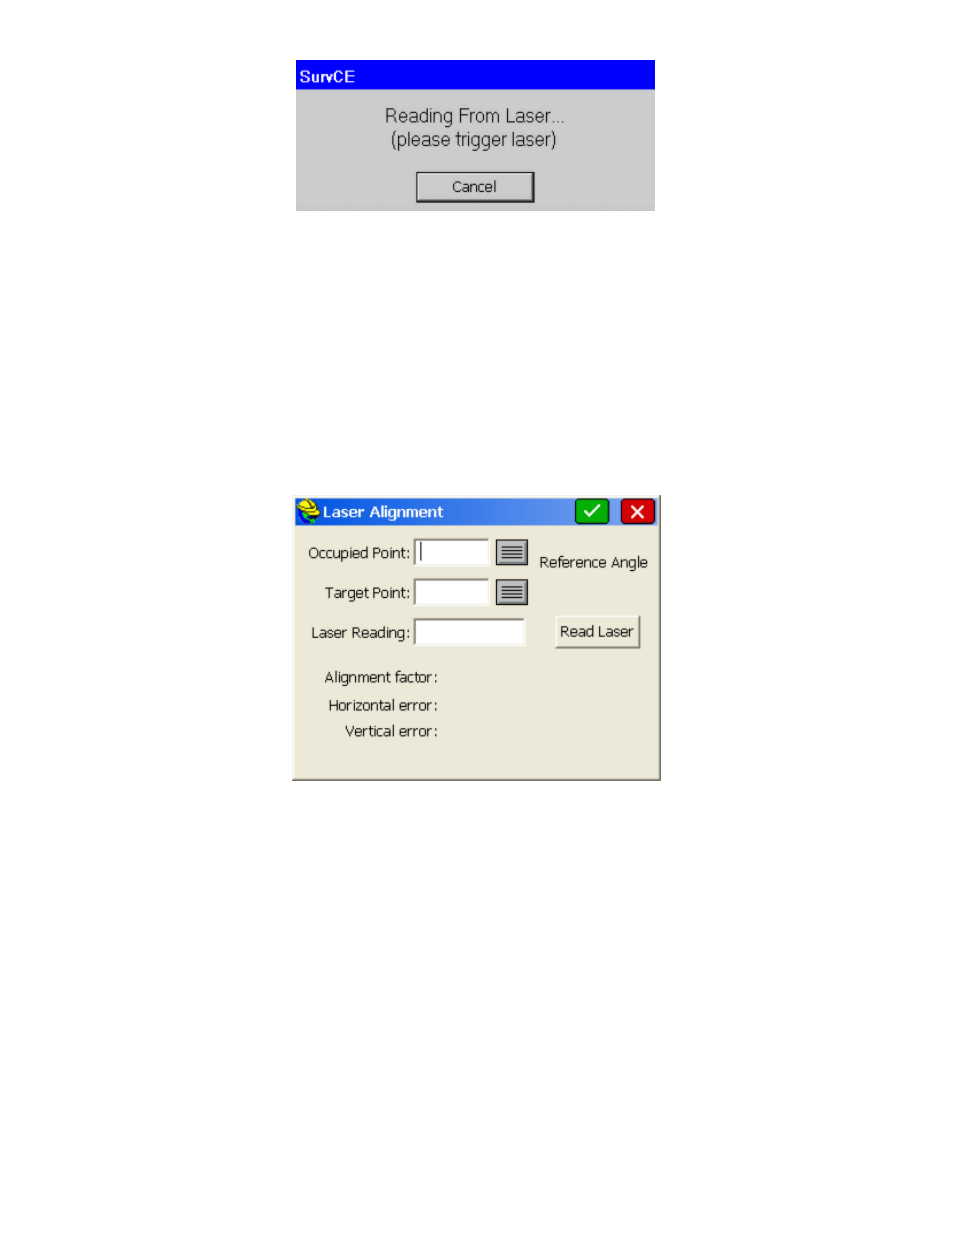
Laser Alignment
This option is only relevant to lasers with internal compasses. The purpose of this option is to allow you to compensate
for any discrepancy between the laser’s internal compass and the North determined by GPS. The alignment factor will
be automatically added to all azimuth values returned by the laser. The alignment factor can either be entered manually,
or calculated using the laser and GPS. To calculate this factor using the laser, follow these steps:
1.
If you don’t already have two known points in your vicinity, use GPS to store two points within 50 feet of each
other.
2.
From the LASER tab of the Peripherals window, select Align Laser.
3.
Choose an Occupied Point from your point list, and prepare to fire your laser from that point.
4.
Choose a Target Point from your point list, and prepare to fire your laser at that point.
5.
Click Read Laser, and when the "Reading Laser" progress bar appears, fire your laser at the target point from your
occupied point. An azimuth reading will appear in the Laser Reading box, and two values will be calculated. The
Reference Angle is the azimuth of the vector from the occupied point to the target point. The Alignment Factor is
the difference between the azimuth read by the laser and the Reference Angle.
6.
Press OK, and the Alignment Factor that was calculated will appear in the Laser Alignment box.
7.
Click OK again to save the new alignment settings.
Laser-Specific Configurations
If you’re having trouble establishing communication with the laser, you may need to change certain settings on your
laser’s instrument panel. Here are laser-specific setup instructions for some of the lasers supported by FAST Survey.
Laser Atlanta:
Make sure your Laser Atlanta baud-rate and message formats agree with those you specified in
FAST Survey. Also, make sure the laser format is set to Laser Atlanta Original (LA1KA). Consult your Laser
Atlanta manual for instructions on how to do this.
Laser Impulse:
Make sure your Laser Impulse baud-rate and message formats agree with those you specified in
FAST Survey. Supported formats are IP200, and CR400. Consult your Laser Impulse manual for instructions on
how to do this.
Leica Disto:
Make sure your Leica Disto’s baud-rate agrees with those you specified in FAST Survey. Consult your