Acquisition system settings – Rockwell Automation 5370-CVIM2 Module User Manual
Page 65
Chapter 3
Image Acquisition Parameters
3–26
Note that the scale value that you entered (0.0052221) is rounded to four
places (0.0052) in the
Scale
field; however, the original value is stored in
memory exactly as you entered it.
After entering the predetermined scale values for both axes, pick the
button to exit the
Calibrate
panel and return to the selected
Camera
setup
panel. Subsequent linear measurements by gages using images from the
selected camera will be returned in Inches (in this example).
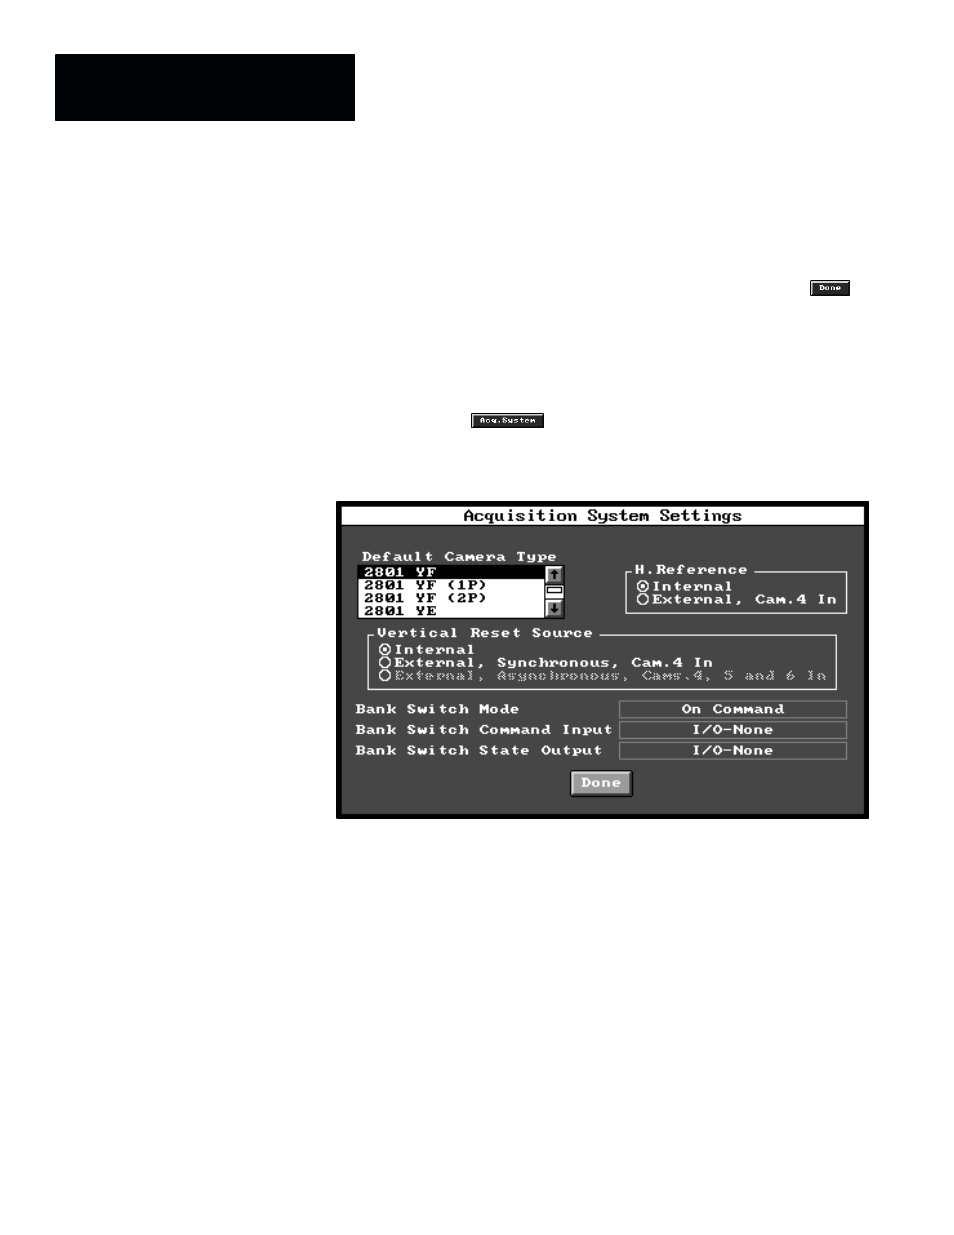
When you pick the
button in the
Acquisition Editor
panel, the
Acquisition System Settings
panel appears, as shown in Figure 3.19.
Figure 3.19 Selecting the Acquisition System Settings Panel
The
Acquisition Systems Settings
panel selects the default camera type,
the horizontal and vertical sync sources, and camera bank switching
parameters. The panel contains a scrolling list and several parameter
selection fields, which are described briefly as follows:
•
Default Camera Type panel –– This scrolling list panel enables you to
select a default camera type. This camera type sets the horizontal and
vertical timing and scan modes for the entire system.
•
Horizontal Reference box –– This box selects either the internal or an
external horizontal reference source.
•
Vertical Reset Source box –– This box selects either the internal or an
external vertical reset source.
•
Bank Switch Mode –– This field selects the bank switch mode. The
choices are “
On Command
” or “
Automatic
.”
Acquisition System Settings