Camera setup panel – Rockwell Automation 5370-CVIM2 Module User Manual
Page 41
Chapter 3
Image Acquisition Parameters
3–2
•
Acquisition Systems Settings panel –– The
button accesses
the
Acquisition System Settings
panel, from which you can select a
default camera, enable synchronizing the CVIM2 system with external
devices or another CVIM2 system, and/or select parameters for switching
between camera banks 1 – 3 and 4 – 6.
•
Toolset Trigger panel –– This scrolling list enables you to edit various
trigger parameters for a particular toolset. The adjacent
button
selects the
Toolset Trigger
edit panel for the highlighted toolset trigger.
•
Camera Type panel –– This scrolling list enables you to edit various
timing parameters for a particular camera type. The adjacent
button selects the
Camera Type
edit panel for the highlighted camera
type. The
button selects the highlighted camera type for the purpose
of creating a non–standard camera type and editing its parameters. The
button deletes the highlighted camera type (non–standard only).
The following sections provide detailed information about all of the items
listed above.
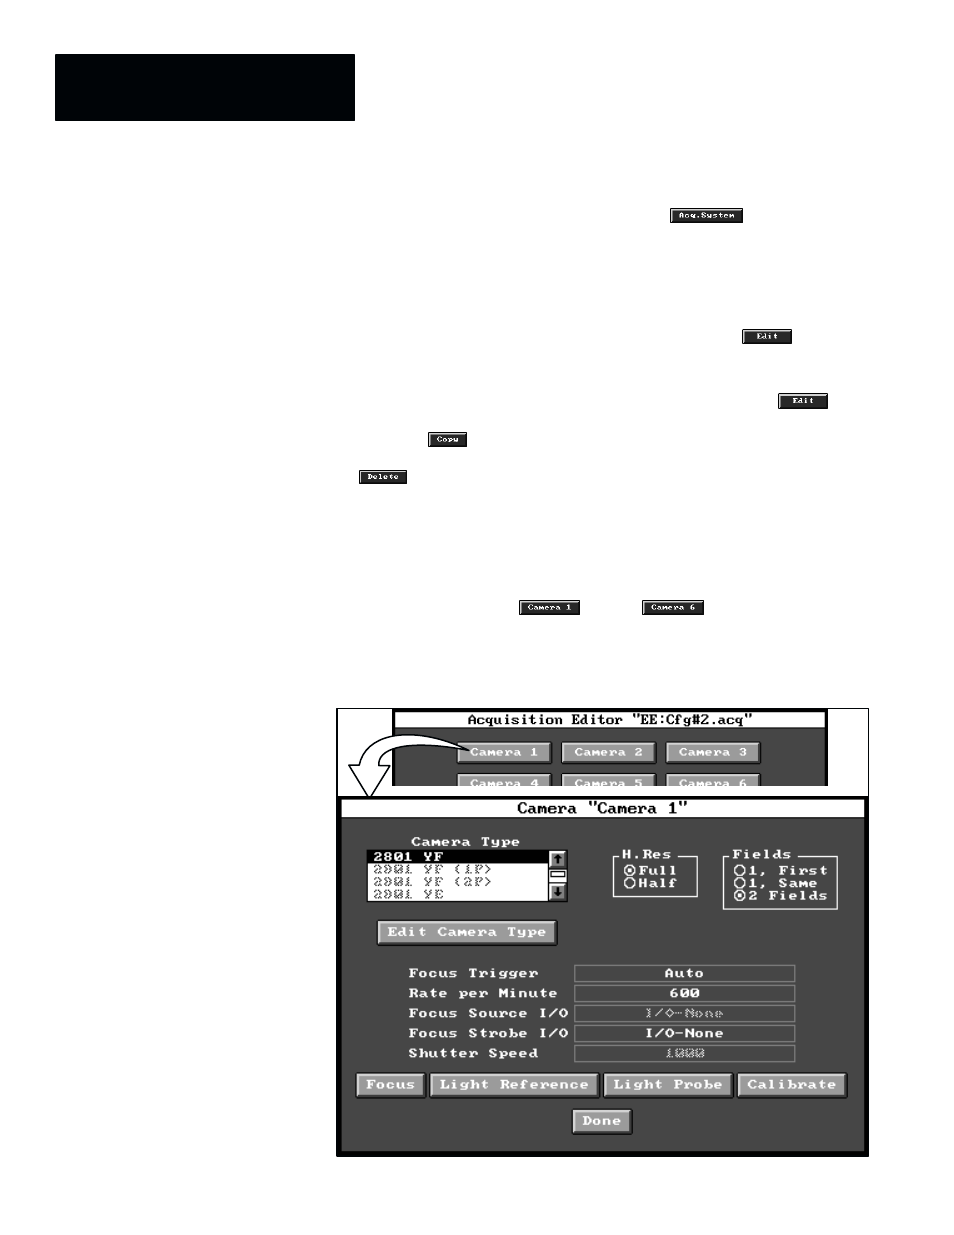
When you pick one of the
through
buttons in the
Acquisition Editor
panel, a
Camera
setup panel for the selected camera
number appears, as shown by the
Camera “Camera 1”
panel in Figure 3.2.
Figure 3.2 Example: Selecting Camera Setup Panel for Camera 1
ЗЗЗЗЗЗ
ЗЗЗЗЗЗ
ЗЗЗЗЗЗ
ЗЗЗЗЗЗ
Camera Setup Panel