Apple Final Cut Pro 5 User Manual
Page 865
78
Part I
Media and Project Management
Organizing track strips this way is especially helpful if you organize your audio tracks
according to their content. For example, you could set up View 1 to display only the
track strips for audio tracks in your program containing dialogue clips. View 2 could
then show only the track strips for audio tracks containing music clips, View 3 could
show track strips for tracks containing sound effects, and View 4 could show track strips
for tracks containing ambience clips. This way, you can quickly jump back and forth
between related groups of track strips as you refine your audio mix.
Note: New audio tracks added to your sequence after you’ve customized your views
are displayed by default in all four views. To hide them, you must go to each view and
hide new tracks with the corresponding visibility controls.
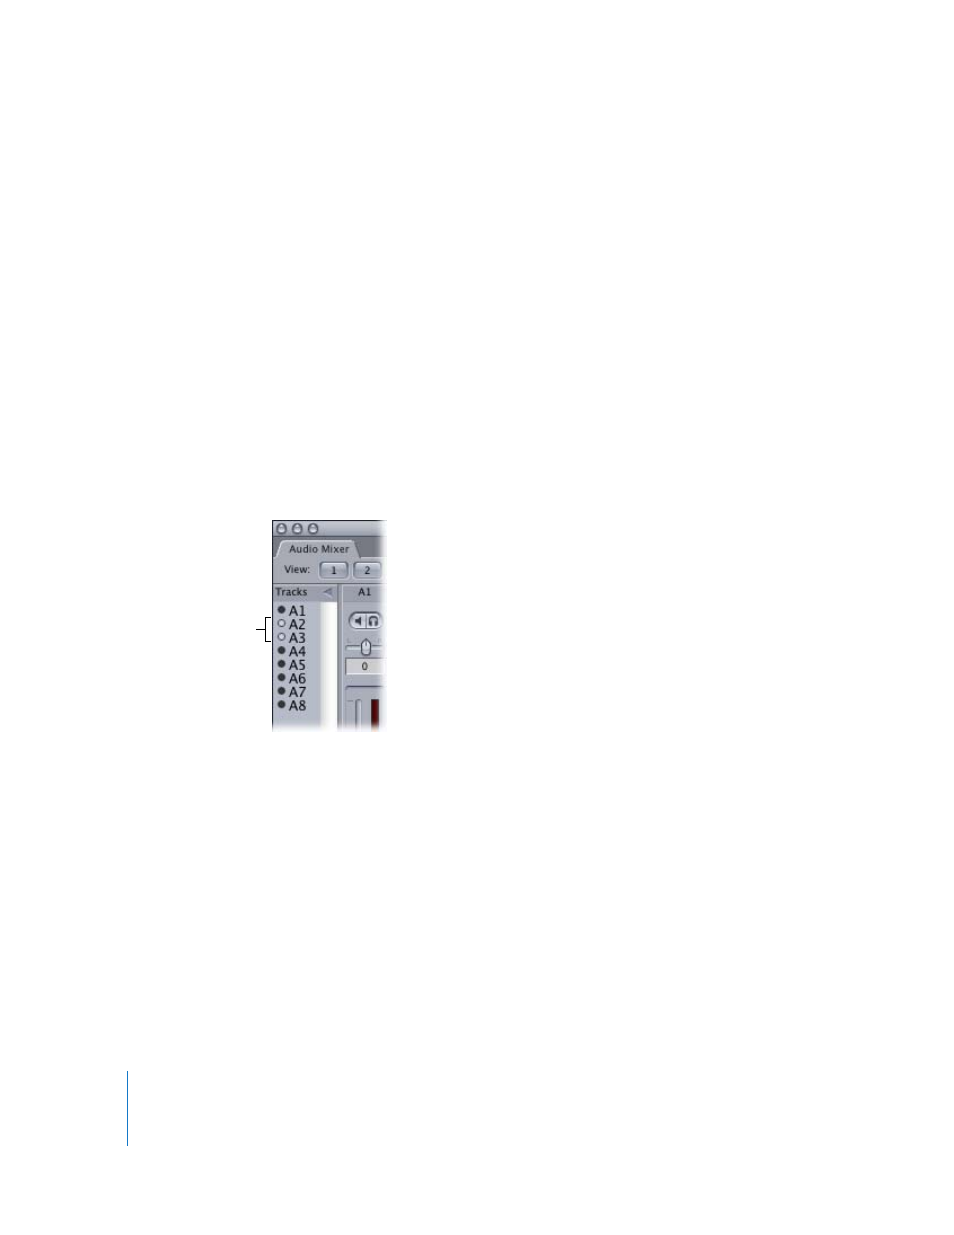
To show or hide individual audio track strips:
1
If necessary, click the disclosure triangle in the upper-left corner of the Audio Mixer to
display the Track Visibility area.
2
Click the Track Visibility control to the left of the track label for the track strip you want
to show or hide.
To customize and save different Audio Mixer views:
1
Click the View button you want to customize.
2
Click the Track Visibility controls for the track strips you want to show or hide.
The settings are remembered whenever you switch back to that view.
To reset all tracks to be visible in a particular Audio Mixer view:
m
Control-click a Track Visibility control, then choose Show All from the shortcut menu.
These tracks
are hidden.