Settings and options in the media manager window, P. 80) – Apple Final Cut Pro 5 User Manual
Page 1431
80
Part I
Media and Project Management
 Any combination of the above: The Media Manager can handle a diverse range of
selections, such as a bin and several sequences, a sequence and multiple clips in the
Browser, noncontiguous clip items in a sequence, and so on.
Important:
Media files that do not have a source timecode track or reel name are never
trimmed shorter, transcoded, or made offline. This is because a media file without a reel
name and timecode may not come from a source that would allow you to recapture
the media, so Final Cut Pro errs on the side of safety so that you don’t accidentally lose
any of this media file.
Settings and Options in the Media Manager Window
The Media Manager has a number of options, many of which affect one another. Some
options become unavailable for some operations, and in other cases, some options
become permanently enabled. When certain options are grayed out, it’s usually to
ensure that clips outside your selection don’t lose the media they need when you
process your media files.
To open the Media Manager:
m
Select items in the Browser or in a sequence, and then do one of the following:
 Choose File > Media Manager.
 Control-click a clip or sequence in the Browser or Timeline, then choose Media
Manager from the shortcut menu that appears.
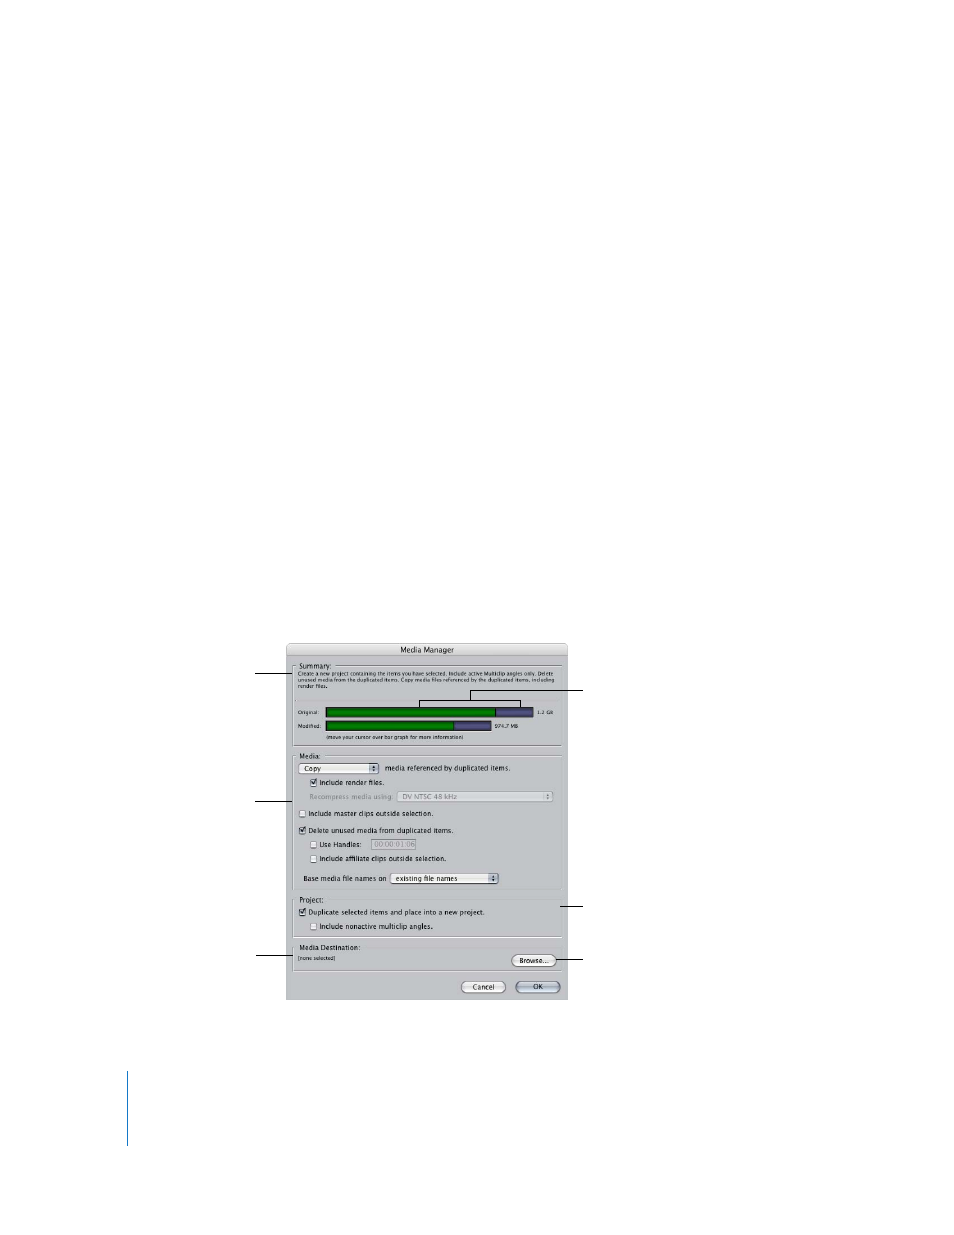
The Media Destination
area displays the location
on disk where new media
files will be written.
The Summary area
provides a text and
graphical overview
of the selected options
and how they affect your
project and media files.
Click here to choose a location
to store selected items.
The Media area is where
you choose what you
want to do to the items
that you’ve selected.
The Project area determines
whether or not a duplicate
project will be created.
Green segments represent
media files; blue segments
represent render files.