Apple Final Cut Pro 5 User Manual
Page 1673
322
Part IV
Settings and Preferences
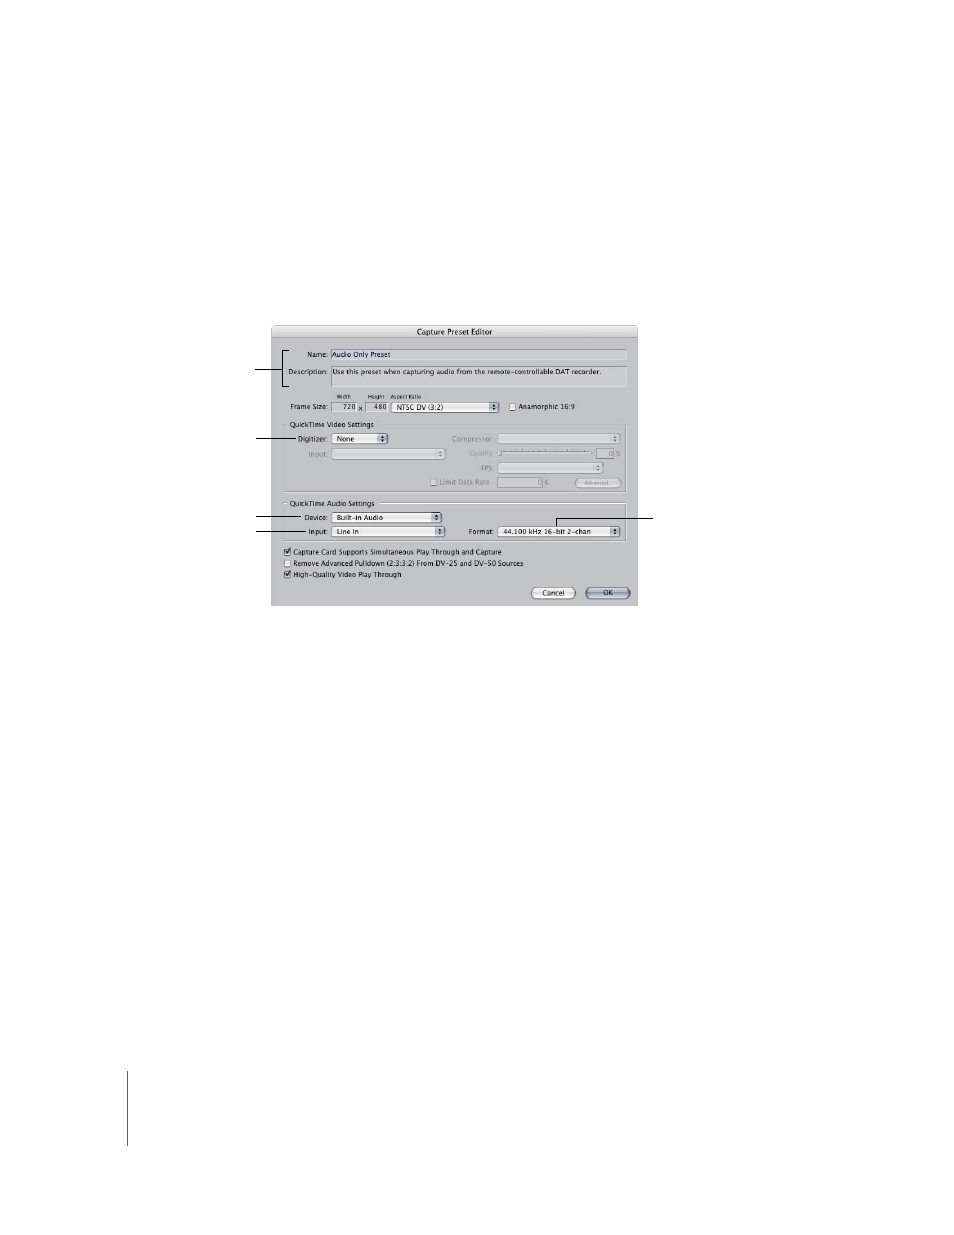
To create a device-controllable, audio-only capture preset:
1
Choose Final Cut Pro > Audio/Video Settings, then click the Capture Presets tab.
2
Select a preset, then click Duplicate.
Final Cut Pro automatically duplicates the selected preset and opens a new Capture
Preset Editor window.
3
In the Capture Preset Editor, adjust the following settings, then click OK.
a
If you’re synchronizing your audio deck to your computer by genlocking it to a video
capture interface, choose your video capture interface from the Digitizer pop-up
menu in the QuickTime Video Settings section. Otherwise, you can choose None.
b
In the QuickTime Audio Settings section, choose an audio interface from the Device
pop-up menu. The audio capture interface can be identical to your video capture
interface, or you can use a different device.
c
Choose the input on your audio interface you used to connect your audio deck from
the Input pop-up menu. (Some video and audio capture interfaces have more than
one set of audio inputs to choose from.)
d
Choose an audio configuration (sample rate, bit depth, and number of channels)
from the Format pop-up menu.
If you are doing a digital transfer from your audio device to your computer, you
should choose the sample rate of your audio source. If you are digitizing audio from
analog inputs on your audio interface, choose a sample rate that matches the
majority of the media files in your project, or the sample rate of your sequence.
For detailed information about other settings in the Capture Preset Editor, see “
Enter a name
and appropriate
description for your
audio capture preset.
Choose None, unless you
are genlocking your
audio to your video
interface.
Choose an audio device
from this pop-up menu.
Choose an input from the
selected audio device.
Choose the desired audio
configuration from this
pop-up menu.