Creating curved motion paths using bezier handles – Apple Final Cut Pro 5 User Manual
Page 1062
Chapter 13
Adjusting Parameters for Keyframed Effects
275
II
Adding, Moving, and Deleting Keyframes in Motion Paths
You can edit a motion path directly in the Canvas by adding, dragging, or deleting
motion path keyframes. The playhead doesn’t need to be over a keyframe for you to
move or delete it, nor does the playhead location prohibit you from adding additional
motion path keyframes using the Pen tool.
To add a keyframe to a motion path without moving the playhead, do one of
the following:
m
Select the Pen tool (press the P key), then click anywhere on a motion path to create a
new keyframe.
m
With the Selection tool active, hold down the Option key to temporarily activate the
Pen tool, then click anywhere on a motion path.
To move a keyframe in a motion path without moving the playhead:
m
Using the Selection tool, drag a motion path keyframe anywhere in the Canvas.
∏
Tip: You can drag a motion path keyframe outside the visible area of the Canvas to
move the clip offscreen. Zoom out of the Canvas to shrink the viewable area and make
this easier.
To delete a keyframe in a motion path without moving the playhead, do one of
the following:
m
Select the Pen tool (press the P key), then Option-click an existing keyframe.
m
Control-click a keyframe, then choose Delete from the shortcut menu.
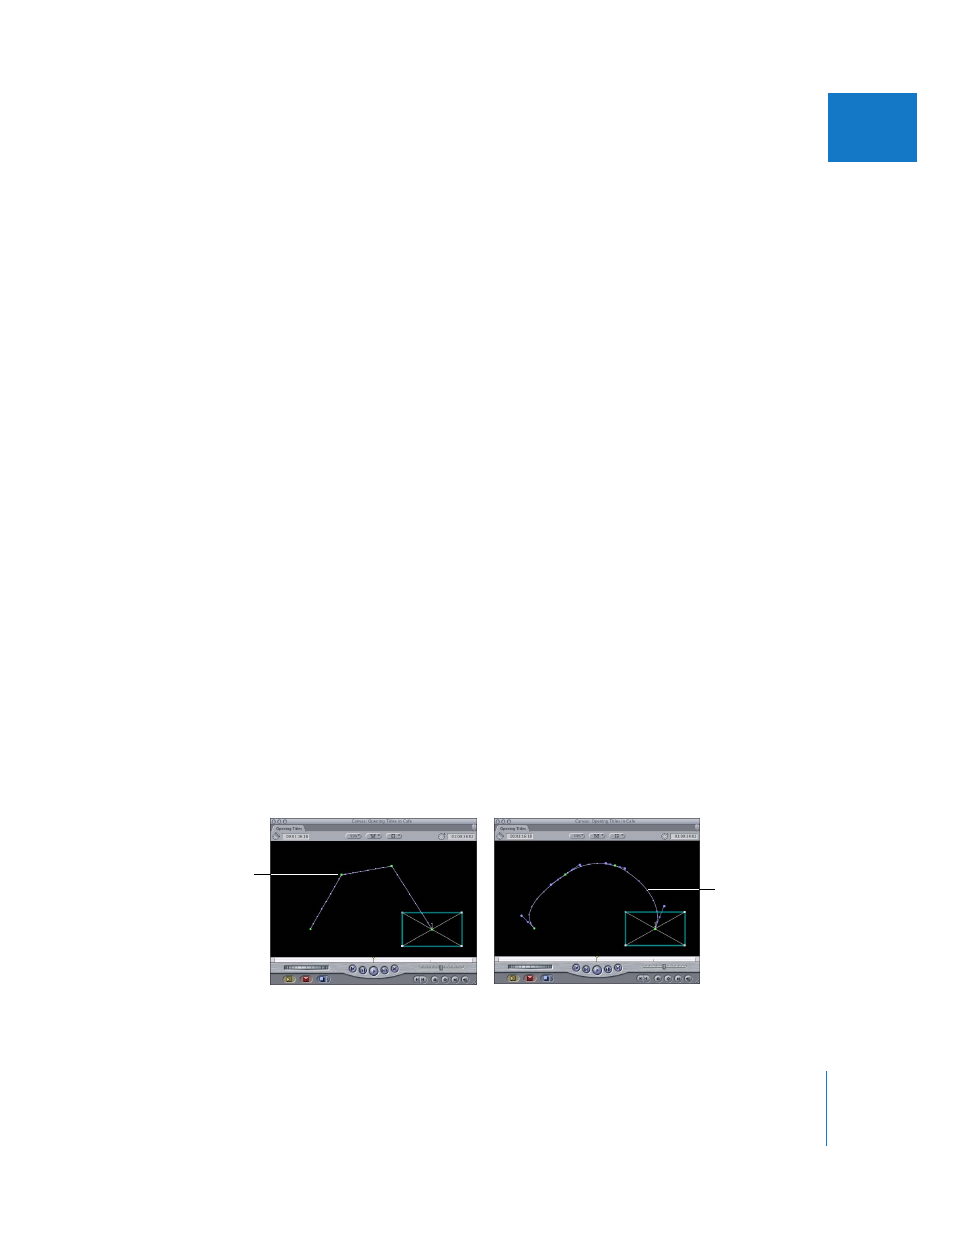
Creating Curved Motion Paths Using Bezier Handles
When you add a keyframe to a motion path, it’s a Bezier point (also known as a corner
point) by default. You can change corner points into curves by using the Pen Smooth
tool to add Bezier handles to these points, smoothing the motion path that the anchor
point of the clip follows. When you use Bezier handles to create curved motion paths in
the Canvas, you won’t need to use as many keyframes to define complex motion paths.
A motion path
with keyframes as
corner points
Adding Bezier
handles creates
a curved motion
path.