Apple Final Cut Pro 5 User Manual
Page 1255
468
Part II
Project Interchange
7
In the Timeline, position the playhead over the second clip so that it opens in the Viewer.
There are three approaches you can take to compare the colors of the first and
second shots:
 Press Control–Up Arrow to flip back and forth between this clip and the first one to
see the differences in color and luminance levels in the Canvas. As you do this, the
image on your external video monitor updates to show these two images. By
flipping back and forth quickly, you can spot differences in hue and contrast.
 With Final Cut Pro set to the Multiple Edits layout, compare both clips side by side on
your computer screen. The previous clip appears in the Frame Viewer 2 tab to the
left, while the current clip appears in the Canvas. Although this won’t give you as
accurate a view of your clip as will looking at it on an external video monitor, it will
give you a good basis for comparing the relative differences between both clips.
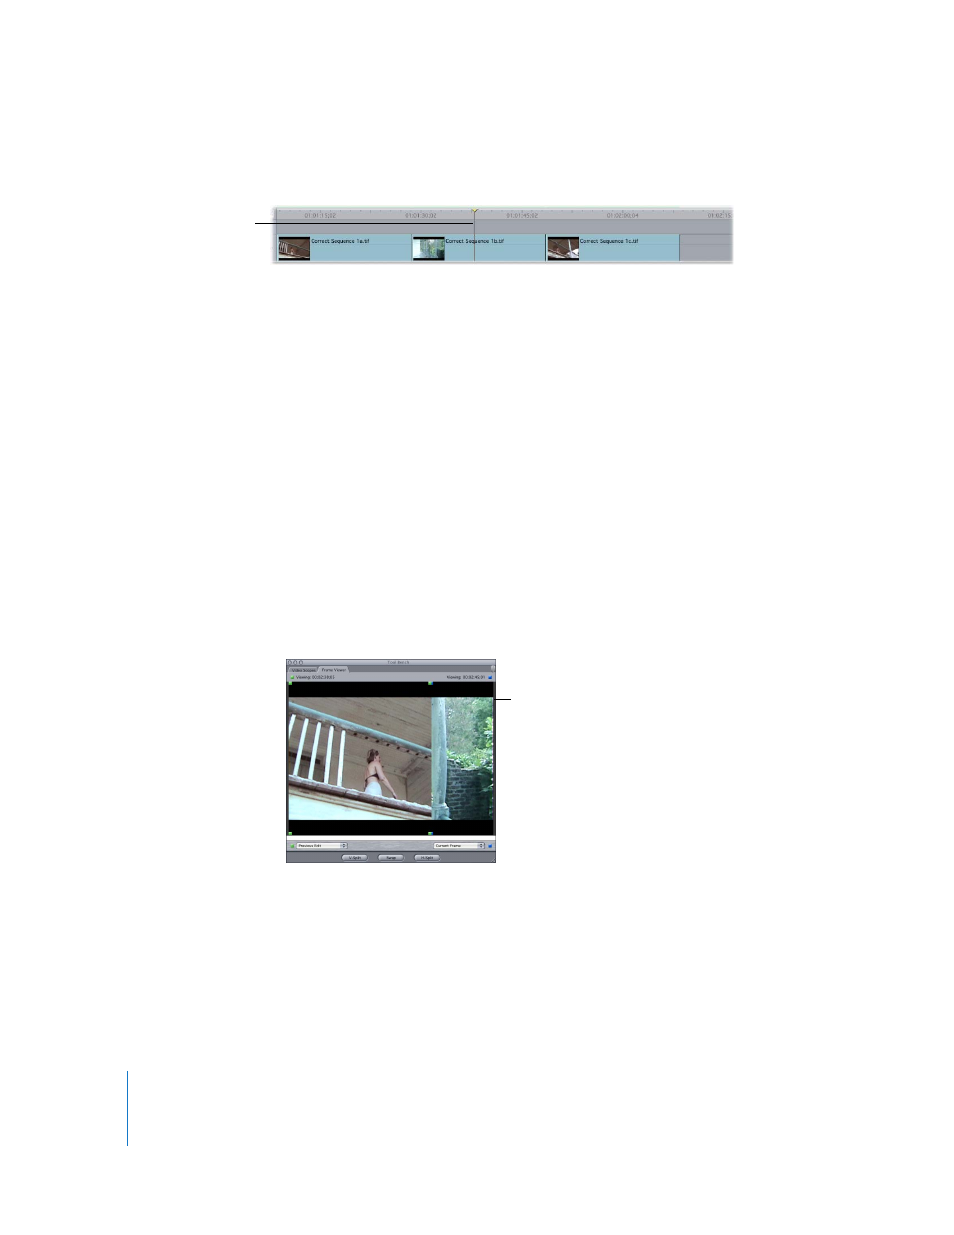
 Put Frame Viewer 2 into split-screen mode. Clicking the V-Split or H-Split button splits
the Frame Viewer in half, by default showing the previous edit on the left or top, and
the current frame at the position of the playhead to the right or bottom. This allows
you to closely compare elements in both clips literally one on top of another. The
split screen can be freely adjusted horizontally, vertically, or as a rectangular picture-
in-picture which can be moved anywhere within the frame.
∏
Tip: To view the contents of a Frame Viewer tab on an external video monitor, select
the Frame Viewer tab you want to view and press Shift-F12.
For more information on using the Frame Viewer, see “
Move the playhead so it’s
in the second clip.
Split-screen mode