Creating a multiclip – Apple Final Cut Pro 5 User Manual
Page 591
256
Part II
Rough Editing
Creating a Multiclip
Once you have clips prepared, you can group them together into a multiclip.
To create a multiclip:
1
Assign angle numbers to each clip you want to include in your multiclip.
For more information, see “
Deriving Clip Angle Numbers From Reel Names and
2
If you want to align your clips by In or Out points, open each clip in the Viewer and set
the appropriate In point or Out point.
3
In the Browser, select the clips you want to include in your multiclip.
∏
Tip: You can also select one or more bins containing clips, or even other multiclips.
4
Do one of the following:
 Choose Modify > Make Multiclip.
 Control-click one of the selected clips, then choose Make Multiclip from the
shortcut menu.
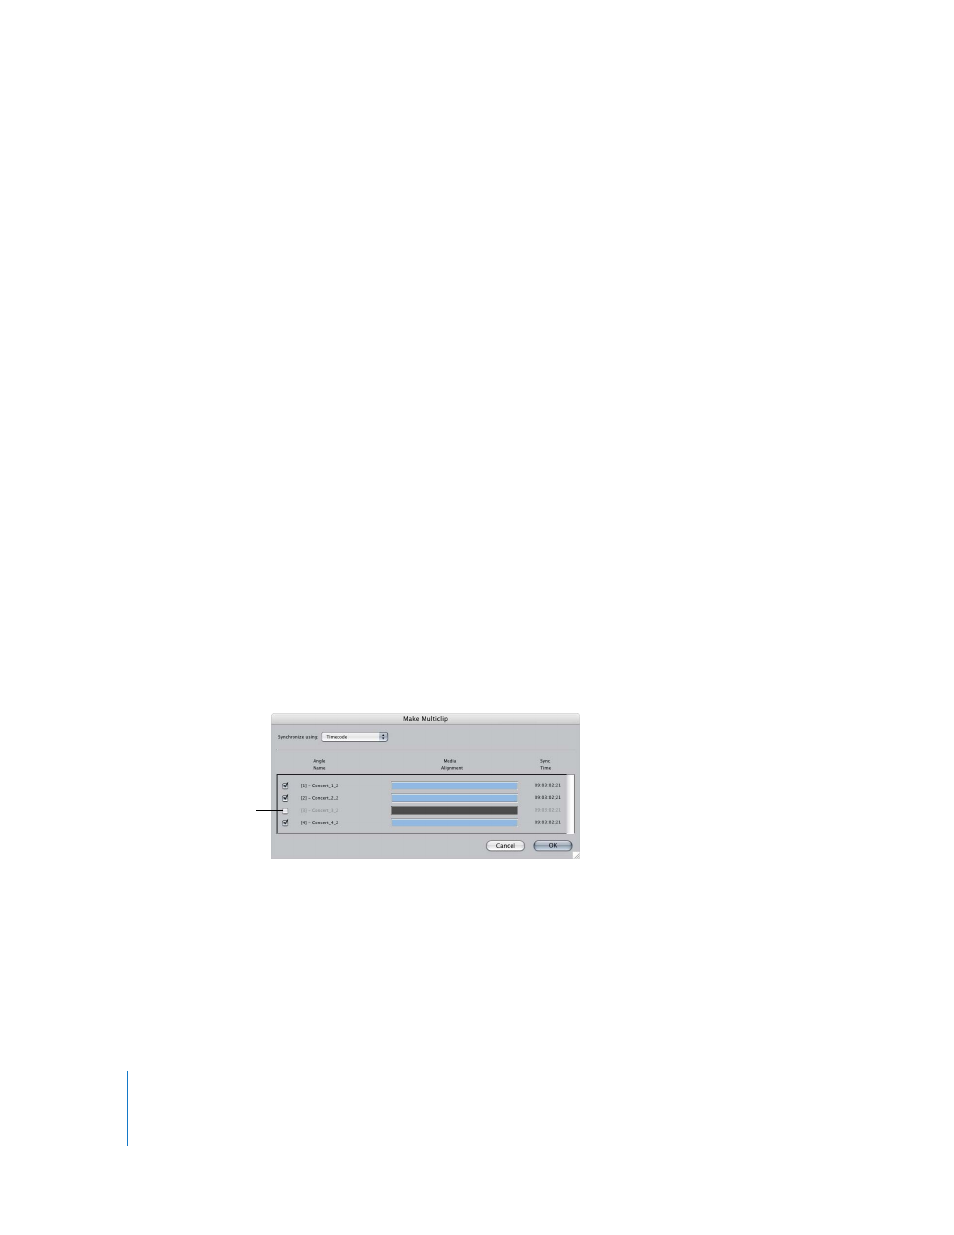
The Make Multiclip dialog appears, showing the angle order and relative media
alignment of the selected clips. If a clip’s Angle property is empty, Final Cut Pro looks at
the reel name or media filename to derive an angle number. See “
Numbers From Reel Names and Filenames
” on page 252 for more information.
5
Choose a synchronization method from the “Synchronize using” pop-up menu.
For more information about angle synchronization, see “
6
If you don’t want to include a clip in your multiclip, deselect the checkbox next to the clip.
7
Click OK.
A new multiclip called “Multiclip N” appears in the Browser (where N is the
automatically assigned multiclip number). This number increments each time you
create a new multiclip. You can change the name of the multiclip at any time. For more
information about naming multiclips, see “
Identifying and Naming Multiclips in the
This clip will not be
included when the
multiclip is created.