Working with the timeline keyframe editor, Working, With the timeline keyframe editor – Apple Final Cut Pro 5 User Manual
Page 1073
286
Part II
Project Interchange
Working With the Timeline Keyframe Editor
The keyframe editor allows you to edit the keyframe graph lines belonging to a clip’s
filters and motion parameters directly in the Timeline. It’s ideal for making adjustments
that don’t require more than one parameter to be displayed simultaneously, especially
when you want to make the adjustment in relation to other elements in the Timeline,
such as markers and superimposed clips.
To view a specific parameter’s keyframe graph line in the keyframe editor:
1
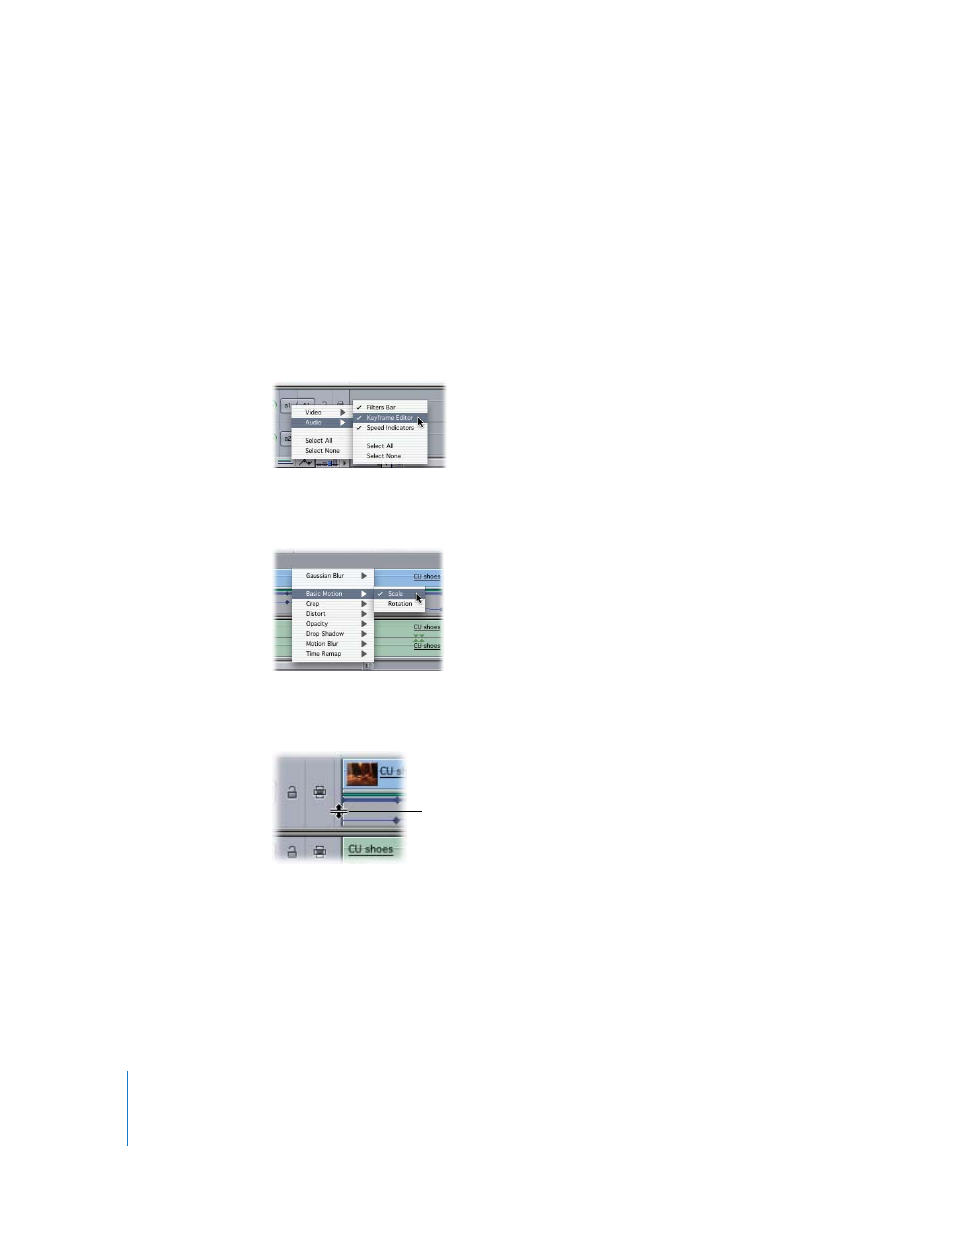
Control-click the Clip Keyframes control in the Timeline, choose Video or Audio, then
choose Keyframe Editor from the submenu.
2
Control-click the keyframe editor area beneath the clip you want to work on, and
choose the filter or motion parameter you want to display.
To resize a track’s keyframe editor:
m
Click in the Keyframe Editor Resize column and, with the resize pointer, drag up or down.
Making adjustments to keyframe graph lines in the Timeline keyframe editor is the
same as working in the keyframe graph area of the Filters and Motion tabs in the
Viewer. For more information on how to edit effects graphs, see “
page 256. For more information on how to smooth keyframes in effects graphs, see
“
Smoothing Keyframes With Bezier Handles
Drag the resize pointer
up or down in the
Keyframe Editor Resize
column.