Preview ink coverage – Adobe InDesign CS3 User Manual
Page 589
INDESIGN CS3
User Guide
582
•
To view all separations at once, click and drag the pointer across all of the eye icons (or empty boxes) next to the
separation names.
The Separations Preview panel can also be controlled using keyboard shortcuts.
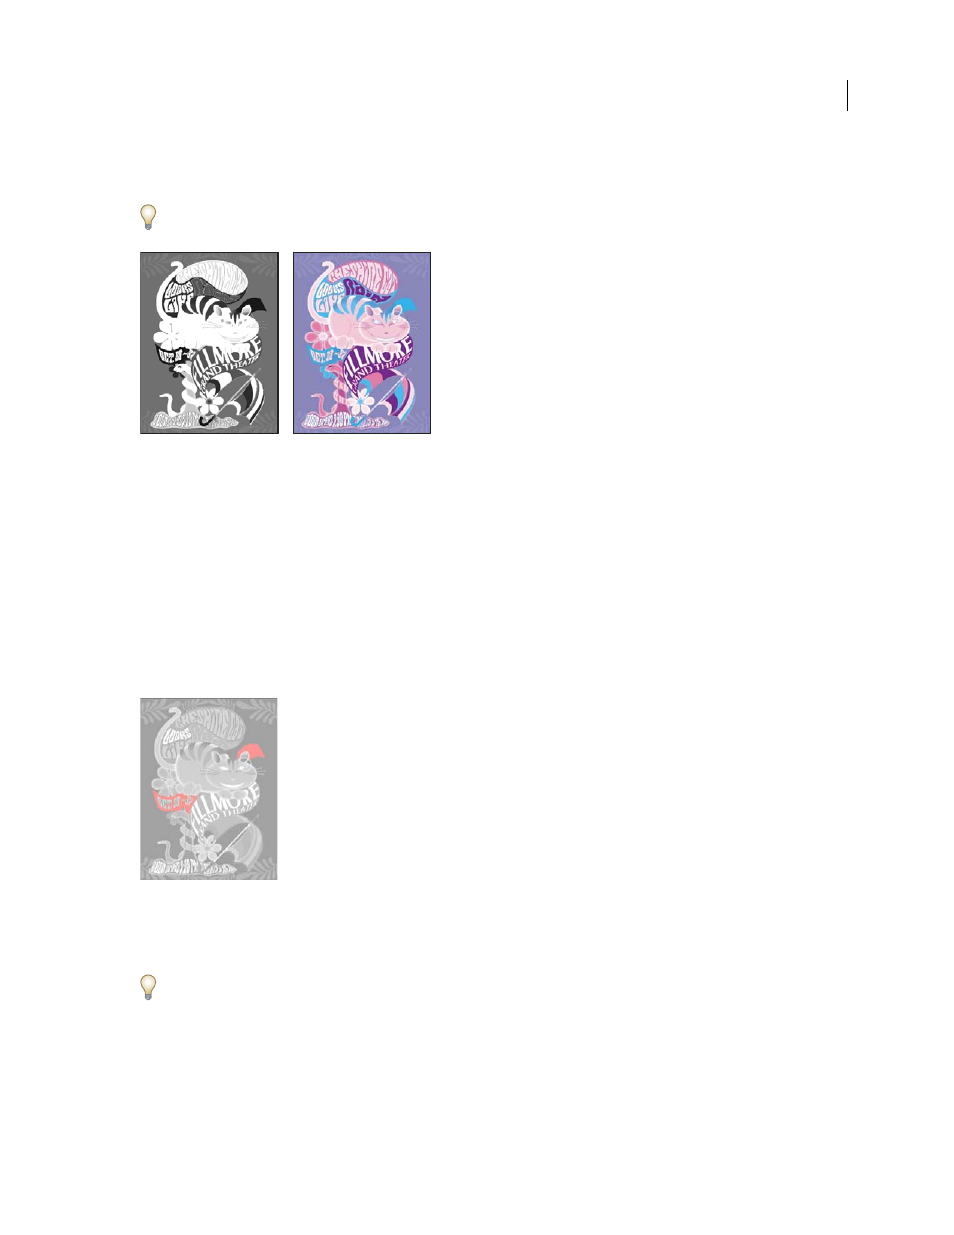
Previewing a single separation (left) and multiple separations (right)
See also
“Keys for using the Separations Preview panel” on page 647
Preview ink coverage
1
Choose Window > Output > Separations Preview.
2
For View, choose Ink Limit. Enter a value for maximum ink coverage in the box that appears next to the View
menu. (Ask your commercial printer for the correct value to enter.)
3
Verify ink coverage in the document preview. Areas that exceed the ink coverage limit are shown in shades of red
(dark red areas exceed the ink coverage limit by more than light red areas). All other areas appear in grayscale.
Areas that exceed the specified ink coverage limit are shown in red.
4
To check ink coverage for a specific area, use the pointer to hover over that area in the document window. Ink
coverage percentages appear in the panel next to each ink name.
You can adjust ink coverage by converting some spot colors to process colors. To adjust ink coverage in placed
graphics, edit the graphics in their source applications.
See also