Move a graphics frame or its content – Adobe InDesign CS3 User Manual
Page 393
INDESIGN CS3
User Guide
386
See also
“Using placeholders to design pages” on page 76
“Define object styles” on page 178
Move a graphics frame or its content
When you move a frame using the Selection tool, the frame’s content moves with it. The following techniques include
ways to move a frame or its content independent of each other. These techniques are useful for adjusting how a
graphic is cropped or masked by its frame. For information about using the Position tool, see “Crop content using
the Position tool” on page 315.
If a selection tool doesn’t work the way you expect it to, try deselecting everything first. Do this by pressing
Ctrl+Shift+A (Windows) or Command+Shift+A (Mac OS).
❖
Do any of the following:
•
To move a frame together with its content, use the Selection tool
.
•
To move imported content without moving the frame (that is, to pan content behind its frame), use the Direct
Selection tool
. The Direct Selection tool automatically changes to the Hand tool when placed over an imported
graphic, but not when placed over text or vector graphics created in InDesign.
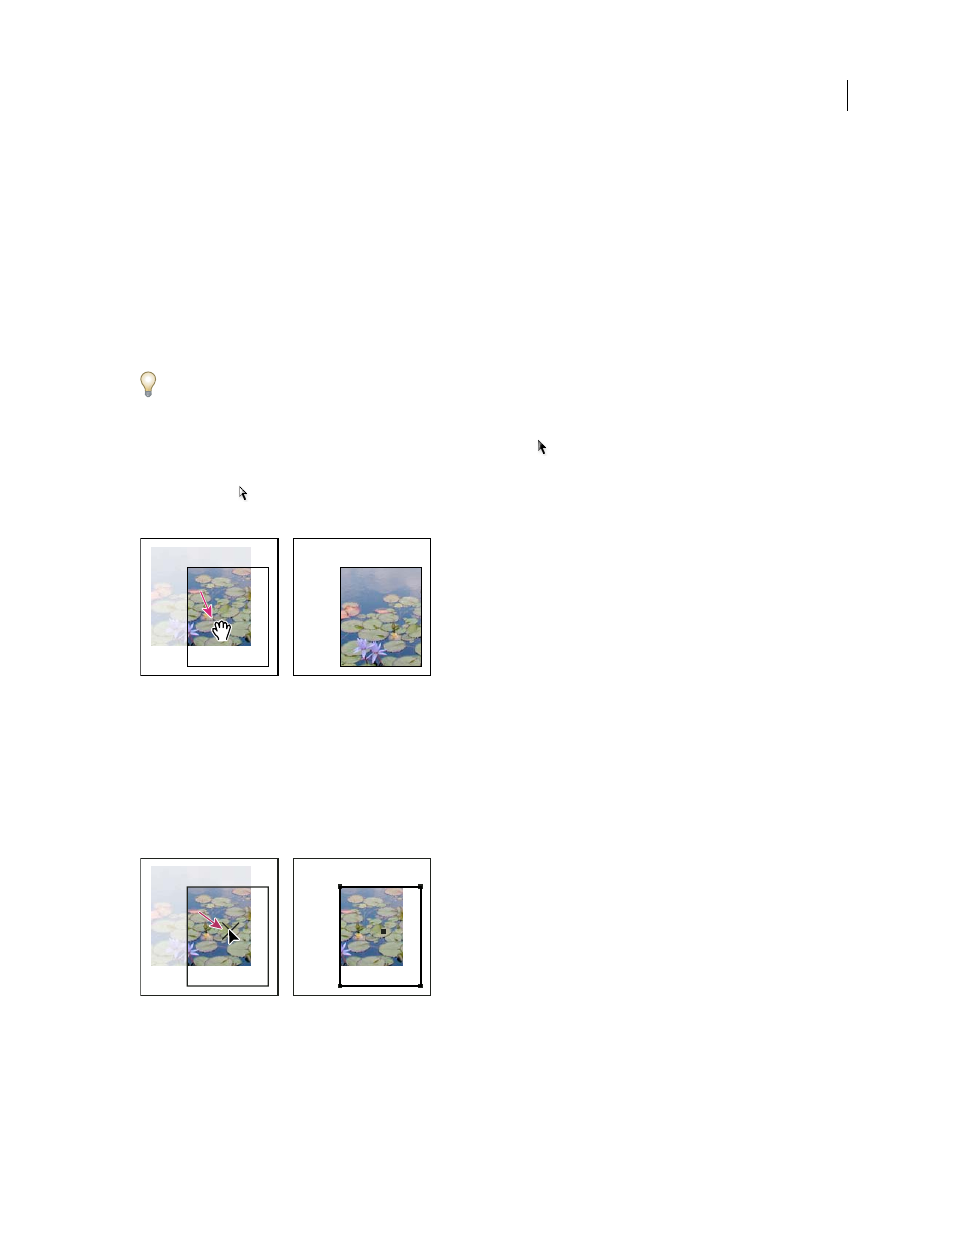
Moving the content, but not its frame
Note: If you hold down the mouse button on a graphic before you move it, a dynamic graphics preview (a ghosted-back
image) of the outside of the frame appears, but the preview of the image that moves inside the frame is not ghosted. This
makes it easier to see how you are positioning the entire image within a frame.
•
To move a frame without moving its content, select the Direct Selection tool, click the frame, click its center point
to make all of the anchor points solid, and then drag the frame. Don’t drag any of the frame’s anchor points; doing
so changes the shape of the frame.
Moving the frame, but not its content
•
To move multiple frames, use the Selection tool to select the objects, and then drag them. If you use the Direct
Selection tool to select multiple objects, only the item you drag is affected.