Adobe InDesign CS3 User Manual
Page 552
INDESIGN CS3
User Guide
545
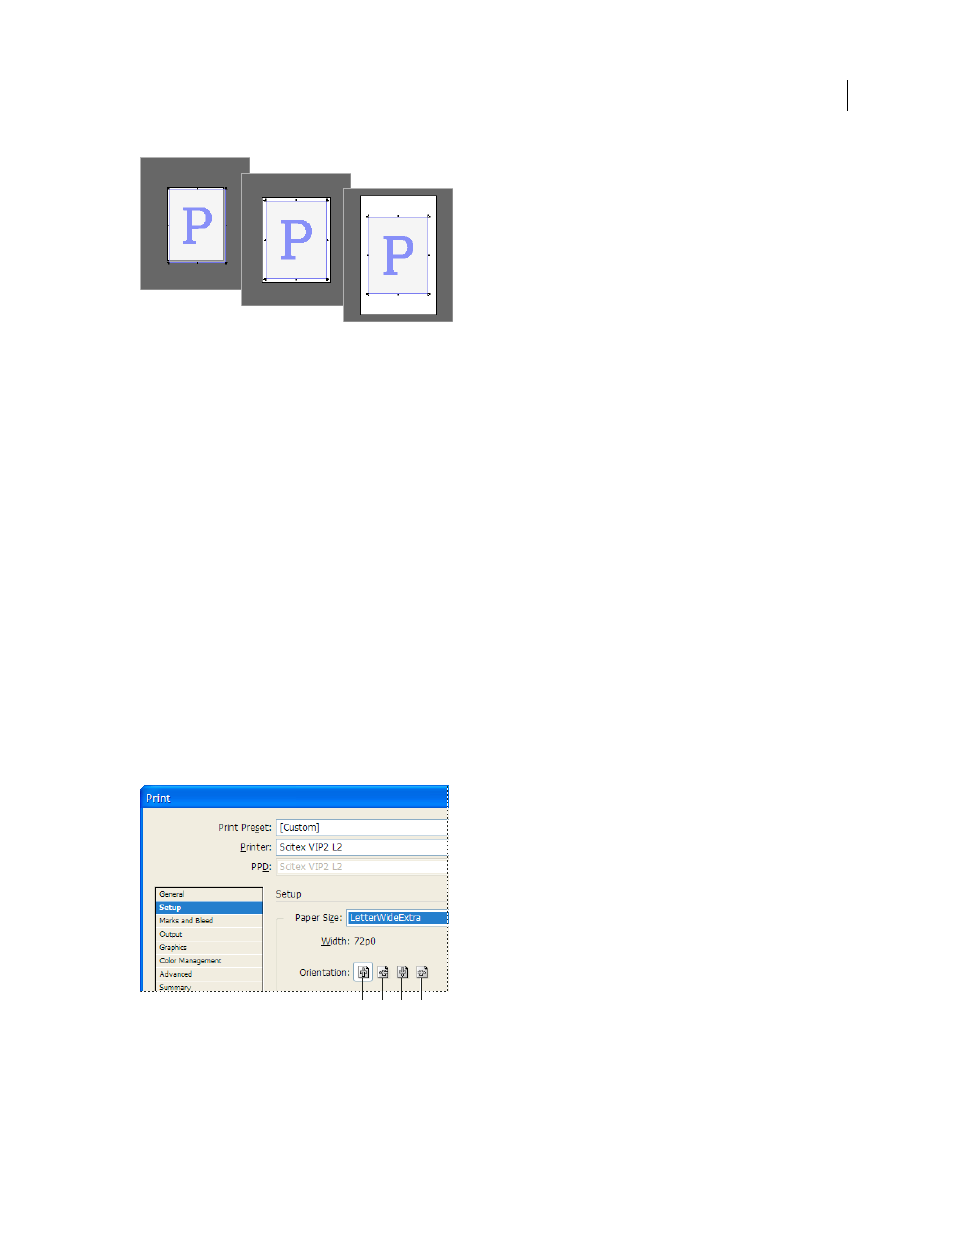
Comparison of printing a letter-size page on Letter, Letter.extra, or Tabloid paper
Note: The preview in the lower left area of the Print dialog box indicates whether you have enough space to include all
printer’s marks and the bleed and slug areas.
See also
“Specify printer’s marks” on page 550
Specify paper size and orientation
1
Choose File > Print.
2
In the Setup area of the Print dialog box, choose an option in the Paper Size menu.
Make sure that your paper size is large enough to contain your document, the bleed and slug areas (if included), and
any printer’s marks. To conserve imagesetter film or paper, however, select the smallest paper size that will accom-
modate your document and the necessary printing information.
3
Click an Orientation button to rotate the document on the media.
In most cases, the page orientation specified in Document Setup (File > Document Setup) and the output orientation
specified in the Setup area of the Print dialog box should be the same (both portrait or both landscape), whether you
print normal or transverse. If you’re printing spreads, you may want to choose a different paper size and orientation
(such as landscape) to fit all pages of a spread on a single sheet.
Orientation buttons
A. Portrait B. Landscape C. Reverse Portrait D. Reverse Landscape
A
B
C
D