Crop using a graphic’s path or alpha channel, Create a clipping path automatically – Adobe InDesign CS3 User Manual
Page 396
INDESIGN CS3
User Guide
389
Crop using a graphic’s path or alpha channel
InDesign can crop an imported EPS, TIFF, or Photoshop graphic using the clipping path or alpha channel saved with
the file. When an imported graphic includes more than one path or alpha channel, you can choose which path or
alpha channel to use for the clipping path.
An alpha channel is an invisible channel that defines transparent areas of a graphic. It’s stored inside a graphic with
the RGB or CMYK channels. Alpha channels are commonly used in video-effects applications. InDesign automati-
cally recognizes Photoshop’s default transparency (the checkerboard background) as an alpha channel. If the graphic
has an opaque background, you must use Photoshop to remove the background, or create and save one or more alpha
channels with the graphic. You can create alpha channels using background-removal features in Adobe Photoshop,
such as layer masks, the Channels panel, the Background Eraser, or the Magic Eraser.
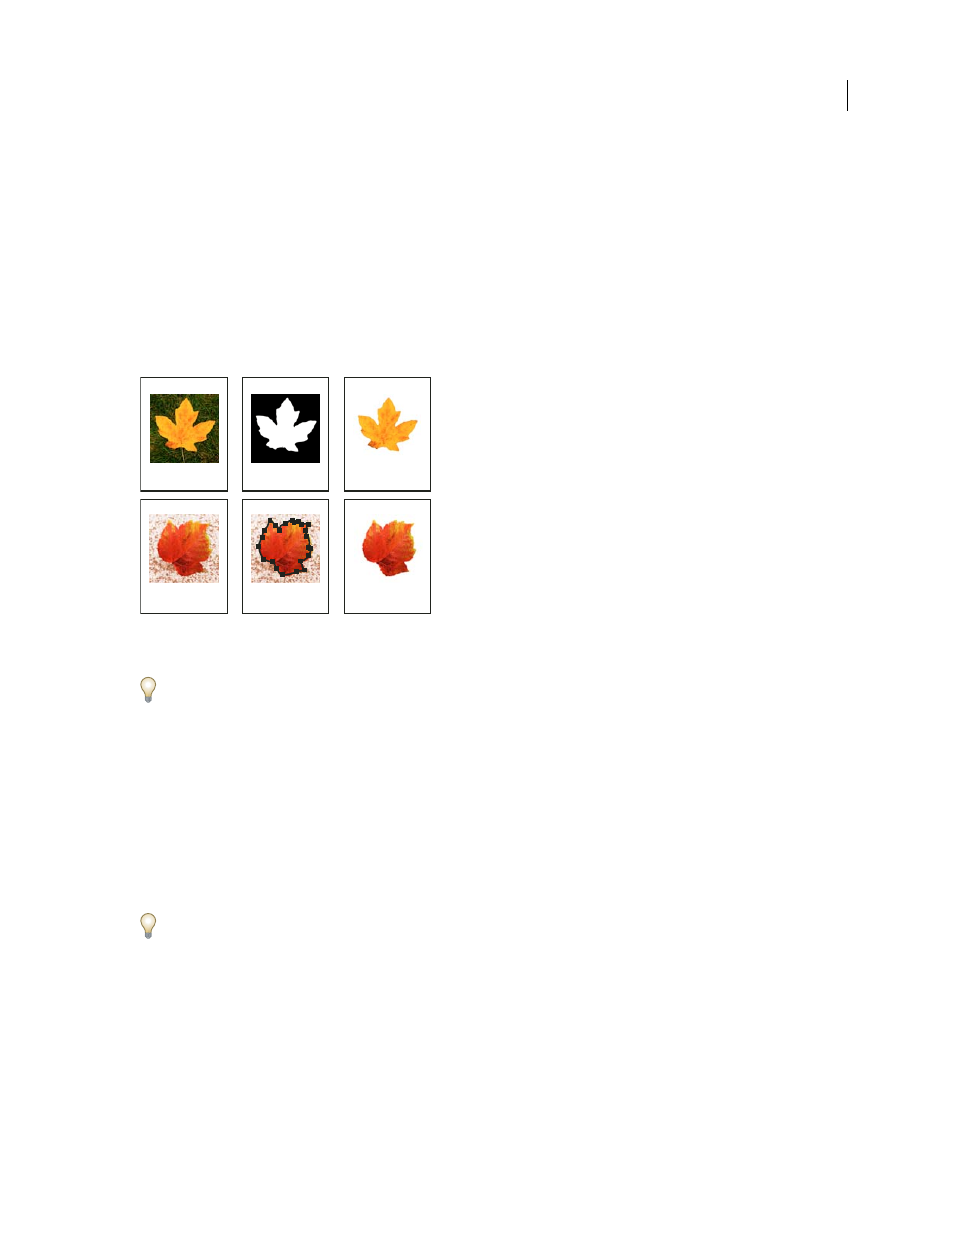
Results of using alpha channels and embedded paths
A. Original graphic B. Alpha channel C. Placed graphic D. Original graphic E. Graphic with embedded path F. Placed graphic
When you place a Photoshop file, the Image Import Options dialog box lets you choose to use the default clipping
path or to select an alpha channel for clipping.
1
Select an imported graphic, and choose Object > Clipping Path.
2
In the Clipping Path dialog box, choose either Photoshop Path or Alpha Channel from the Type menu.
3
Choose the desired path or alpha channel from either the Path or Alpha menu.
Note: If the Alpha Channel menu command is not available, no alpha channels were saved with the graphic.
4
To inset the clipping path, specify a value for Inset Frame.
5
To switch the visible and hidden areas, select Invert.
6
If you chose an alpha channel, specify any other desired clipping path options, and click OK.
To turn off the clipping path, select the imported graphic, and choose Object > Clipping Path. Choose None in the
Type menu, and click OK.
Create a clipping path automatically
If you want to remove the background from a graphic that wasn’t saved with a clipping path, you can do it automat-
ically using the Detect Edges option in the Clipping Path dialog box. The Detect Edges option hides the lightest or
darkest areas of a graphic, so it works best when the subject is set against a solid white or black background.
C
A
B
F
D
E