Adobe InDesign CS3 User Manual
Page 366
INDESIGN CS3
User Guide
359
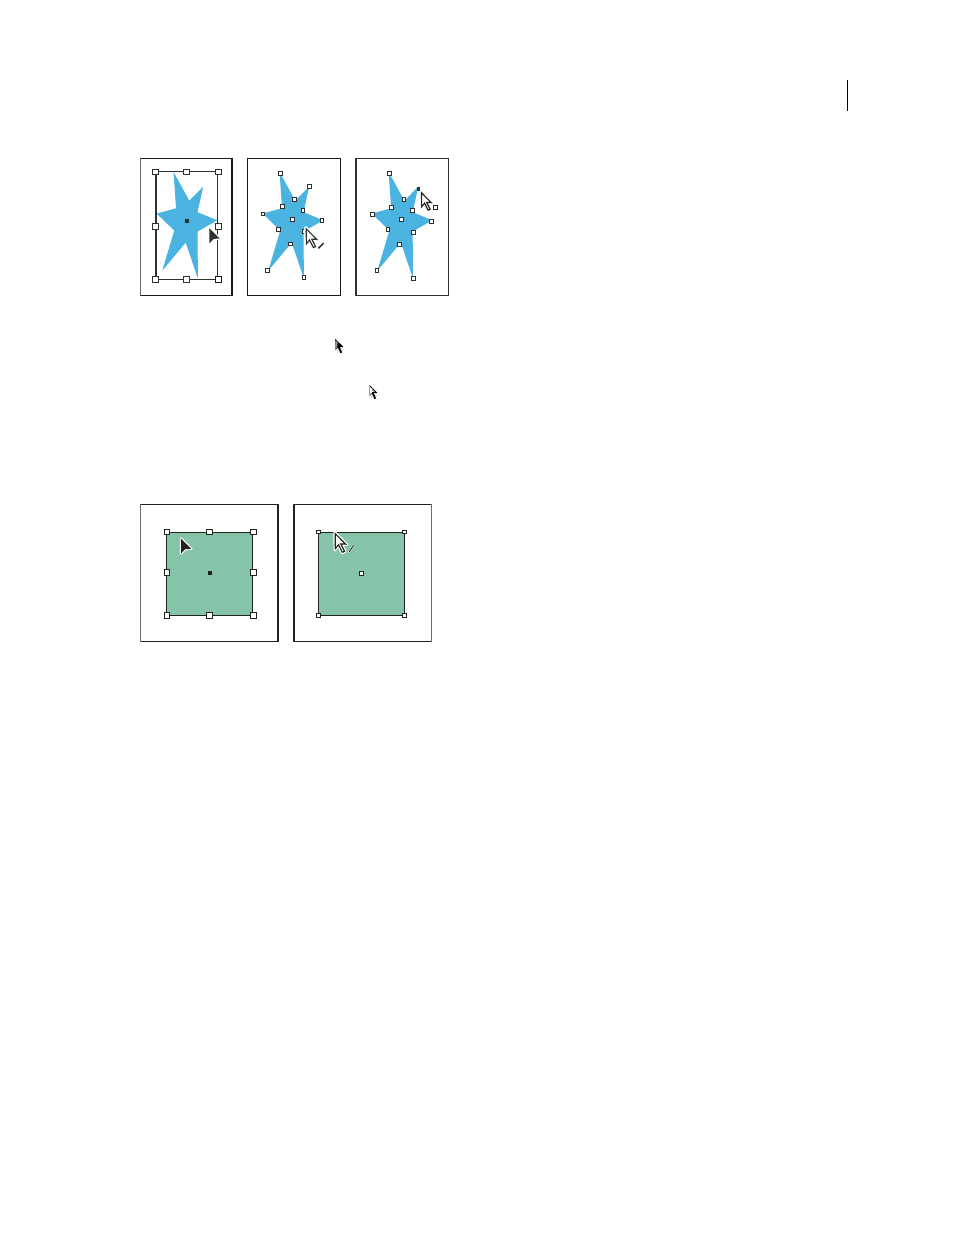
Path with bounding box selected (left), path selected (middle), and path with anchor point selected (right)
•
You can use the Selection tool
to select the object’s bounding box for performing general layout tasks, such as
positioning and sizing objects.
•
You can use the Direct Selection tool
to select the contents of a container (such as an imported graphic) or
individual points on a path for tasks involving resizing imported graphics, drawing and editing paths, and editing text.
Note: An imported graphic is always contained within a frame. It’s possible to select the graphic and its frame, the graphic
only, or its frame only. The frame and bounding box of an imported graphic can be different sizes. To see how InDesign
indicates what’s selected, see “Modifying objects using graphics frames” on page 383.
Bounding box selected (left) compared to rectangular path selected (right)
With rectangular objects, it can be difficult to tell the difference between the object’s bounding box and the path of
the object itself. A bounding box always displays eight large hollow anchor points. A rectangular path always displays
four small anchor points (which can be hollow or solid).
See also
“About paths and frames” on page 75
“Understanding paths and shapes” on page 298
“Select ruler guides” on page 54
“Keys for selecting and moving objects” on page 635
Select a bounding box
For any object, you can select its bounding box—a rectangle that represents the object’s horizontal and vertical
dimensions. (For grouped objects, the bounding box is a dashed rectangle.) The bounding box makes it possible to
quickly move, duplicate, and scale the object without having to use any other tool. For paths, the bounding box
makes it easy to work with an entire object without accidentally altering the anchor points that determine its shape.