3 starting dynamic dns, Starting dynamic dns – CCTV Camera Pros Geovision 8.5 Multicam Digital Surveillance System User Manual
Page 529
Useful Utilities
511
11
11.1.3 Starting Dynamic DNS
After registering a domain name with DDNS service, you can enable the DDNS function on the
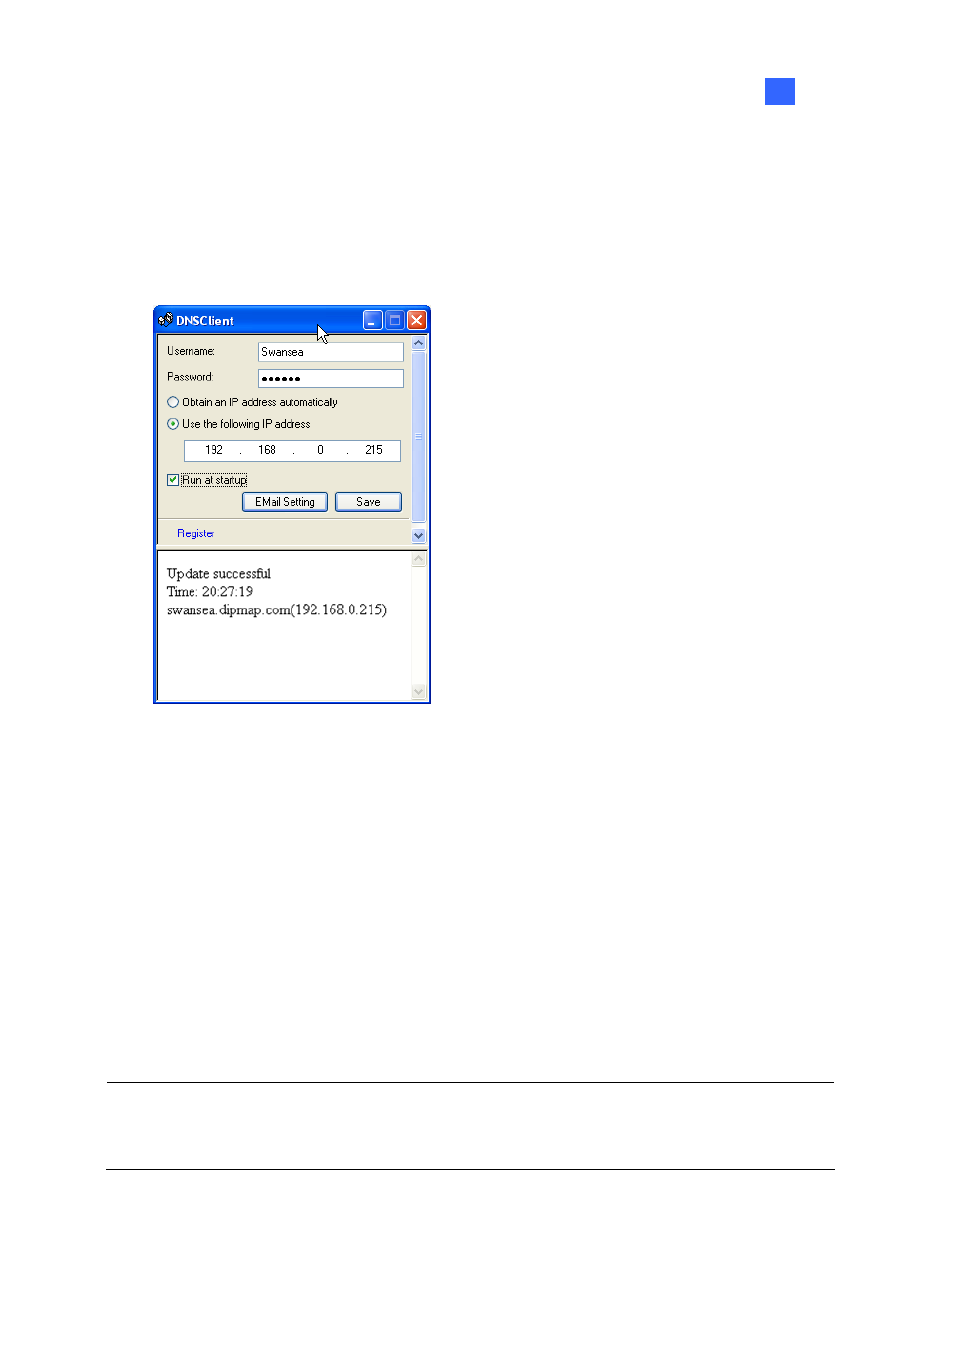
GV-System. Run Dynamic DNS Service from the Windows Start menu. This DNS Client dialog box
will appear.
Figure 11-3
Username: Type the username used to enable the service from the DDNS.
Password: Type the password used to enable the service from the DDNS.
Obtain an IP address automatically: The DDNS server will use any available IP address from
the system or the router.
Use the following IP address: If your system or router has more one IP address, you can
assign one IP address for the communication between the DDNS server and GV-System. It is
highly suggested to assign the fixed IP address. If the assigned IP address is dynamic, the DDNS
will not be able to access your system when the IP address is changed.
Run at startup: Select this option to automatically run the DDNS service at Windows startup.
Save: After above settings, click this button. The connection information will be displayed.
Note: The DNS Client will not upload IP address unless one of the following applications is running:
Main System, Center V2, VSM, Dispatch Server, Twin DVR, and SMS Server. If the IP address of
your GV-System is not updated for more than 30 days, your host name will be deleted automatically.