Promise Technology 2-Year Extended Warranty for VessR2000 RAID Head User Manual
Page 308
281
Product Manual
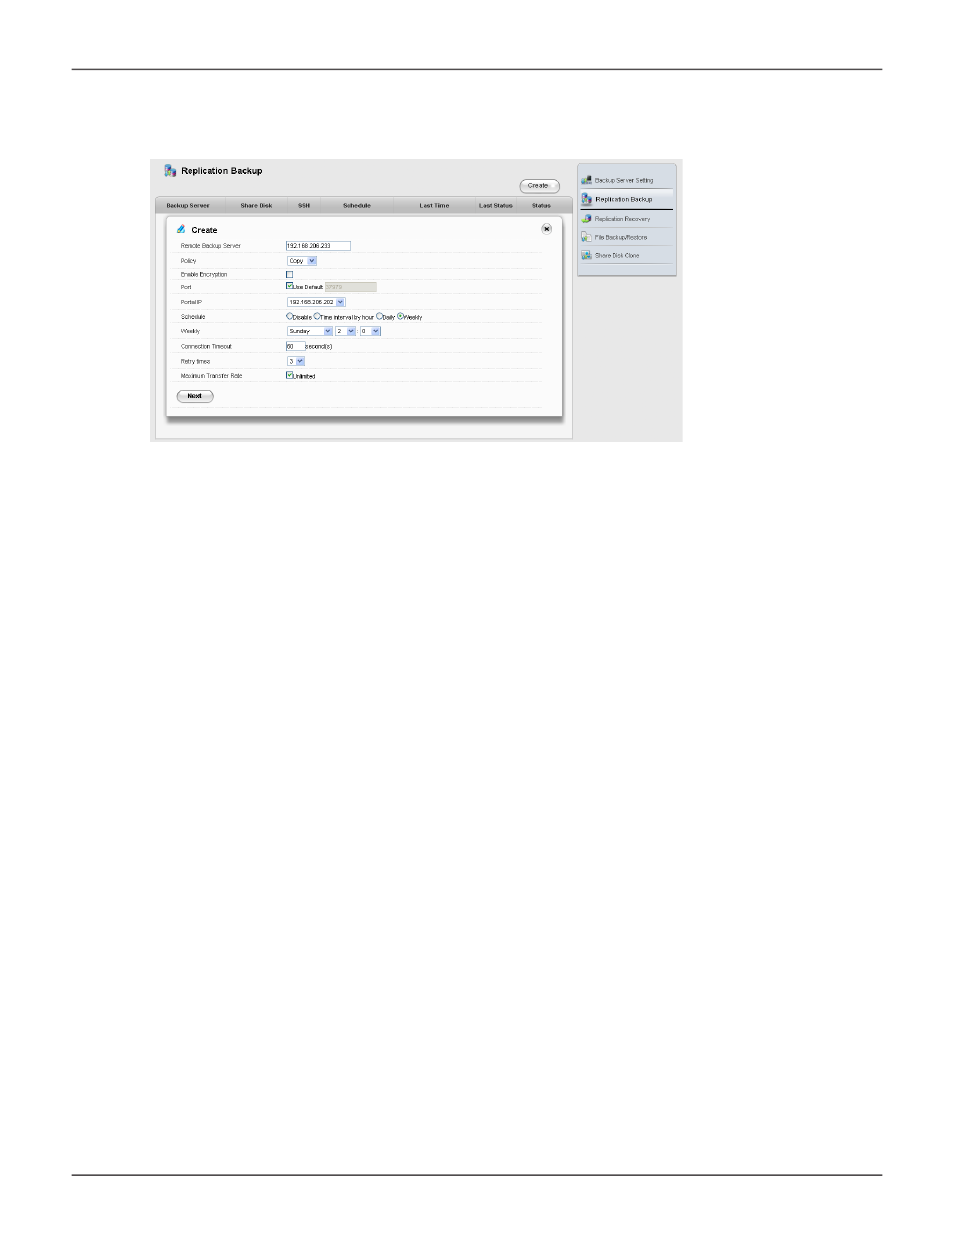
To create a Replication Backup for a Share Disk, follow these steps:
1. In NAS configuration:
Backup > Replication Backup
2. Click the
Create
button, enter configuration settings for the Replication.
• Enter the IP address of the
Remote Backup Server
(a separate NAS)
• Choose a
Policy
for replication:
Mirror Mode
syncs added and modified files
and mirrors file deletion,
Copy Mode
syncs added and modified files and
does NOT delete any files that were deleted on the source Share Disk.
• Optional settings include
Encryption
(check box to enable) changing
the
Port
on the backup server. To change the default Port number,
uncheck the box and type in the port number to use.
• Choose the
Portal IP
for the NAS from the drop-down menu.
• Choose the
Schedule
type to use for syncing. Note that the default value Disable
means the replication is done manually (see “Run Replication Backup” below).
• Choose the number of
Retry Times
, the number of times to try again if the connection fails.
• Connection Timeout
is the time in seconds allowed for the
connection to be idle before disconnecting.
• Change the
Maximum Transfer Rate
if you want to limit the rate at which
the transfer is allowed to proceed. By default, this is unlimited.
3. Click the
Next
button to proceed.
The connection will first be validated.
4. If the connection to the server is made, choose Share Disks with identical names on both ends of the
backup connection, that is, the source and destination Share Disk must have the same name.
5. Click the
Apply
button to create the Replication Backup settings.
Create Replication Backup menu