Promise Technology 2-Year Extended Warranty for VessR2000 RAID Head User Manual
Page 288
261
Product Manual
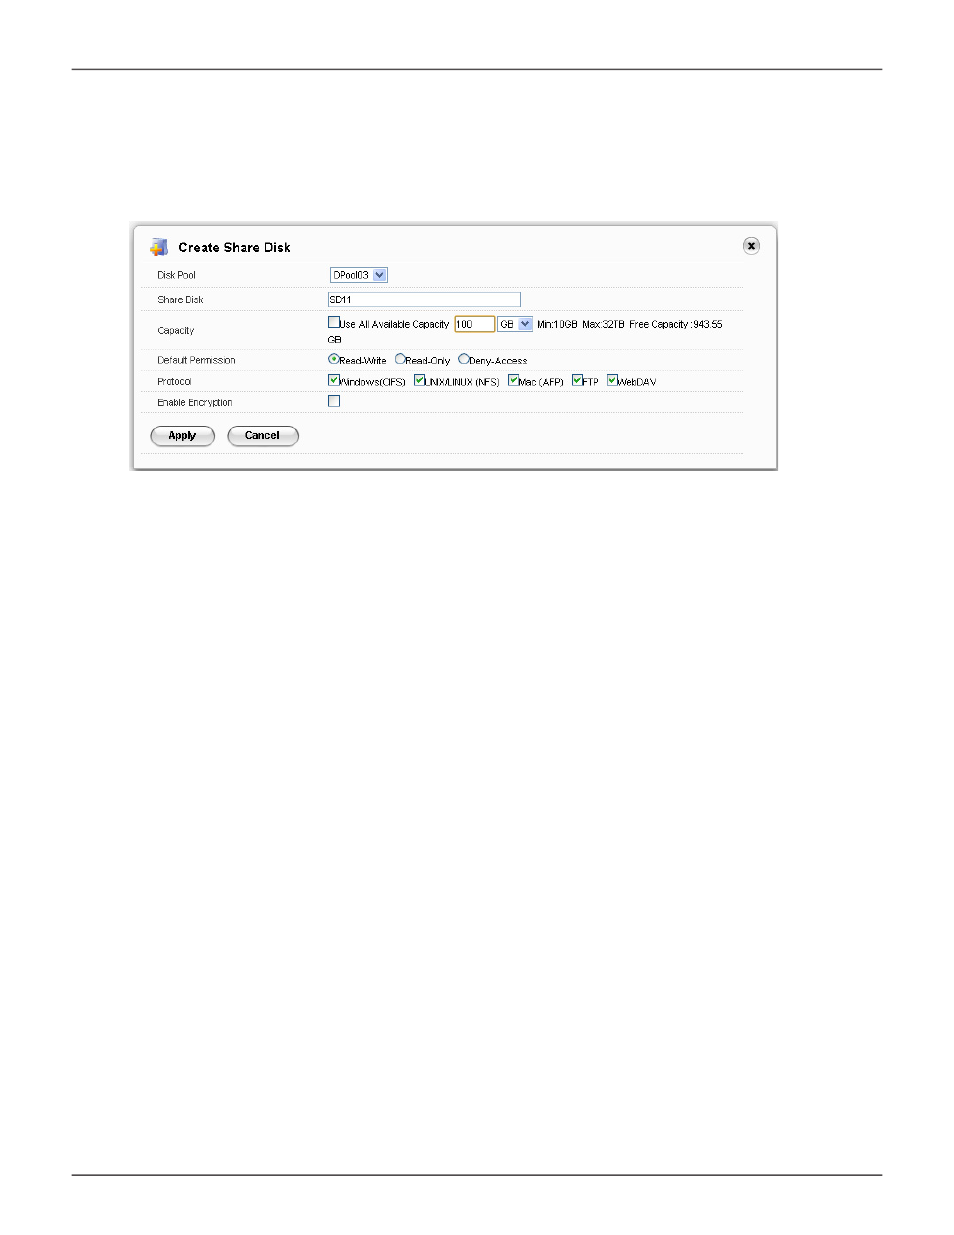
3. Click on the
Create Share Disk
button. A new menu is displayed.
4. Choose the
Disk Pool
that will be used for the Share Disk from the pull-down menu, enter a name for
the
Share Disk
, enter a value for the
Capacity
in GB (gigabytes) or TB (terabytes) to use for the Share
Disk; or click the option to
Use All Available Capacity
to use the capacity remaining on the Disk Pool.
5.
Set the
Default Permission
for read and write privileges for users of the Share Disk.
Note that read
and write permissions for any Share Disk can be changed later. To change permission settings
for an individual or group, go to the Permission menu under the Account menu tab. To change
the permission setting for an entire Share Disk, click on the
Share Setting
button for the disk
you want to change in the Share Disk list.
6. Click to select what protocols will be used for the Share Disk. The available options are
Windows
(CIFS)
,
Unix/Linux (NFS)
,
Mac (AFP)
,
FTP
and
WebDAV
. Protocols must be universally enabled
before they are available for use. By default, they are all enabled. To enable or disable any protocol
system-wide for the NAS, use the
Protocol
menu.
Create Share Disk menu