Step 3 – spare drive creation, Step 4 – summary, 3 – s – Promise Technology 2-Year Extended Warranty for VessR2000 RAID Head User Manual
Page 115: Pare, Rive, Reation, 4 – s, Ummary
s
teP
3 – s
PAre
d
rive
c
reAtiOn
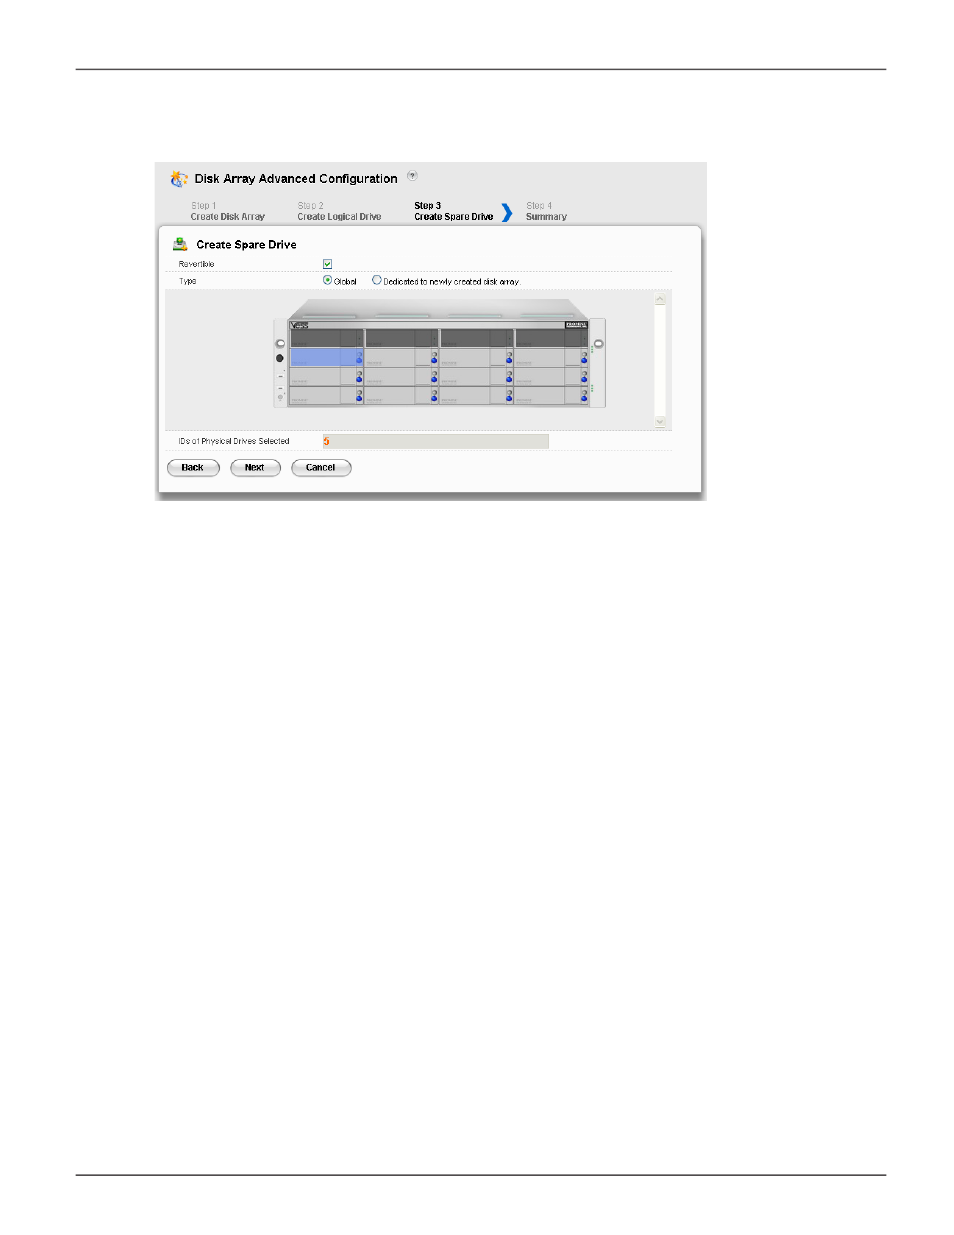
Creating a spare drive is optional but highly recommended.
1. Enter your information and choose your options.
• Check the
Revertible
box if you want this spare drive to be revertible.
• Choose the option for the type spare drive you want.
Global
– Replaces a failed drive in any disk ar ray.
Dedicated
– Replaces the failed drive only in the assigned disk array.
2. Click the enclosure graphic to view information about physical drives.
3. Click a physical drive to select it for your spare drive.
The physical drive’s ID number is added to the Selected list.
4. Click the
Next
button to continue.
s
teP
4 – s
uMMAry
The Summary screen lists the disk arrays, logical drives, and spare drives that you specified.
If you accept these parameters, click the
Submit
button.
If you do NOT accept these parameters, review and modify your selections in the previous steps.
Advanced configuration - create spare drives
88
Vess R2000 Series Product Manual
Promise Technologies