Step 2 – logical drive creation, 2 – l, Ogical – Promise Technology 2-Year Extended Warranty for VessR2000 RAID Head User Manual
Page 114: Rive, Reation
s
teP
2 – l
OgicAl
d
rive
c
reAtiOn
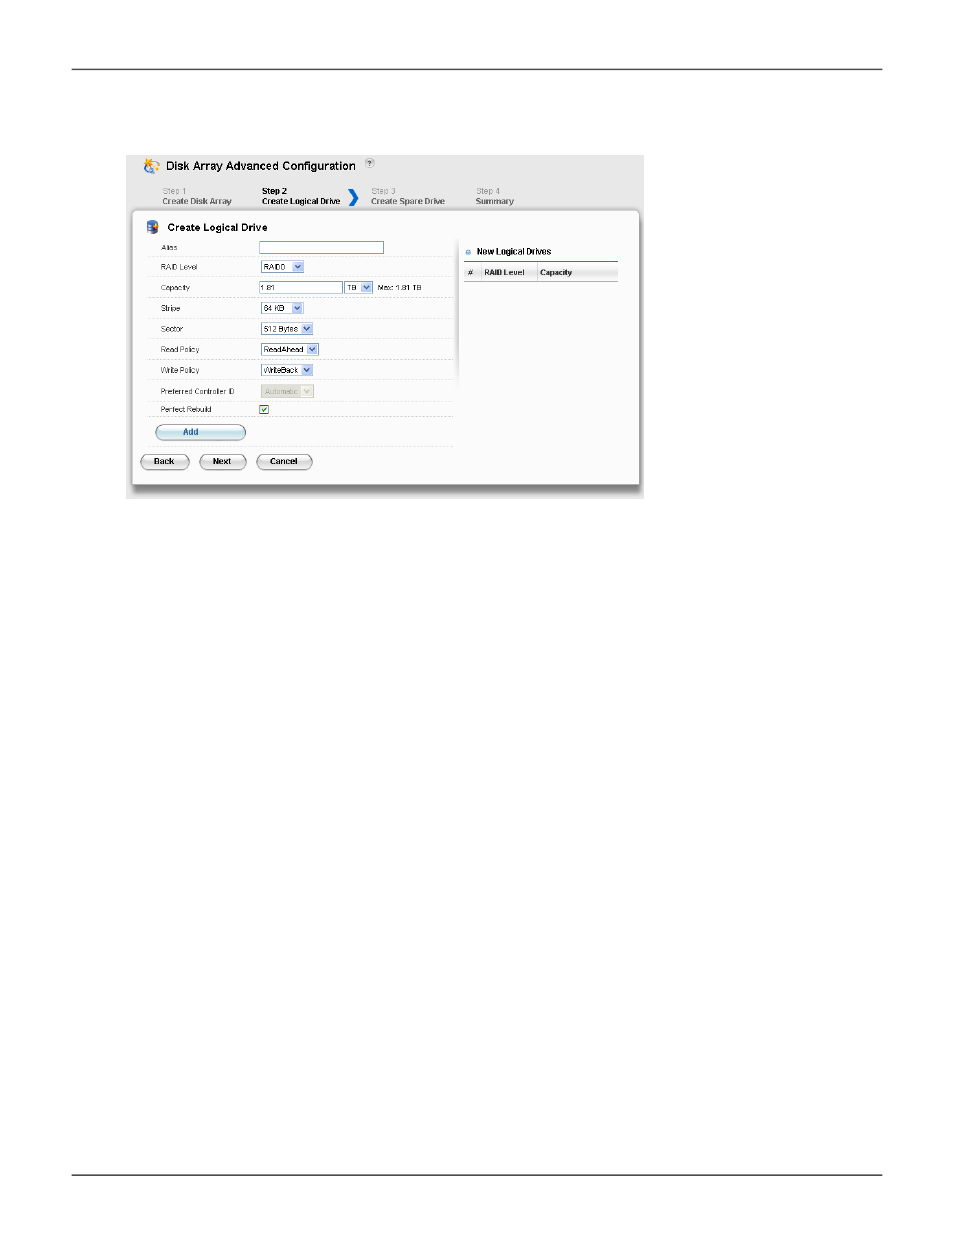
1. Enter your information and choose your options.
• Enter a logical drive alias in the field provided.
• Choose a RAID level from the drop-down menu.
The choice of RAID levels depends on the number of physical drives in your array.
• Note the
Max:
capacity value. Then enter a capacity value the field
provided and choose a unit of measure from the drop-down menu.
• Choose a stripe size from the drop-down menu.
The choices are 64 KB, 128 KB, 256 KB, 512 KB, and 1 MB.
• Choose a sector size from the drop-down menu.
The choices are 512 B, 1 KB, 2 KB, and 4 KB.
• Choose the Read Cache Policy from the drop-down menu
The choices are Read Cache, Read Ahead (cache), and None.
• Choose the Write Cache Policy from the drop-down menu - The
choices are WriteThru (write through) and WriteBack. Write back
requires a Read Cache or Read Ahead Read Cache Policy.
•
Uncheck the Perfect Rebuild check box if do not need perfect rebuild for this LD.
•
Click the
Add
button to continue.
The logical drive you just created appears in the
New Logical Drives
list.
2. Click the
Next
button to continue.
The
Create Spare Drive
screen appears.
Advanced configuration - create logical drives
87
Product Manual
Setup