Figure 6-15. data format dialog box – Gasboy Fleet Head Office System User Manual
Page 101
99
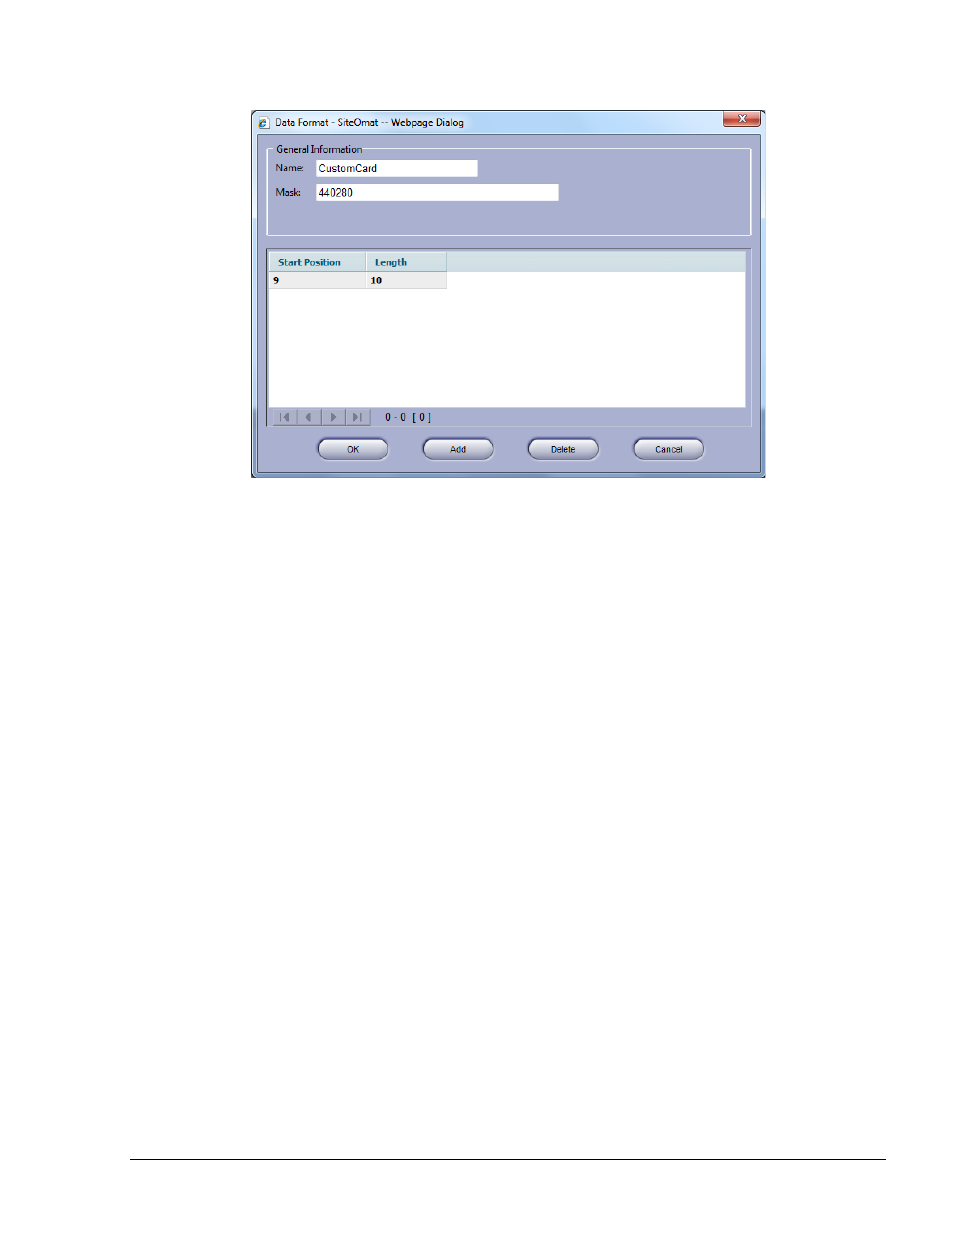
Figure 6-15. Data Format Dialog Box
3. Enter the new format
Name
4. Enter the string
Mask, namely the series of characters used to identify the specific card
format in the system
5. Click on the
Add button to define the position of the Card Number within the string:
a. Double click on the
Start Position row and enter the Card Number start position
b. Double click on the
Length to enter the Card Number length
c. Perform steps a and b again if the Card Number is made up of more than one part
6. Click
OK to save the changes and close the dialog box.
Clicking
Cancel closes the dialog box without saving the changes.
Clicking
Delete deletes the previously selected Card Number definition row from the grid.
For example, the string layout for the "CustomCard" magnetic card is:
=440280=xxxxxxxxxx=yyyyyyyyyyyyyyyyyy==
Where:
a.
= is a field separator
b.
=440280=……….=………………== is the masking (where the dots stand for don't
cares)
c.
xxxxxxxxxx is the ten-character Card Number
d.
yyyyyyyyyyyyyyyyyy is optional information
FMS and FHO User’s Manual - MDE-4821