TeeJet Legacy 6000 CAN Guide User Manual
Page 94
3-24
Chapter 3 - Real-time Setup
Performing a Calibration
Fieldware for the Legacy 6000
Software Version 2.11
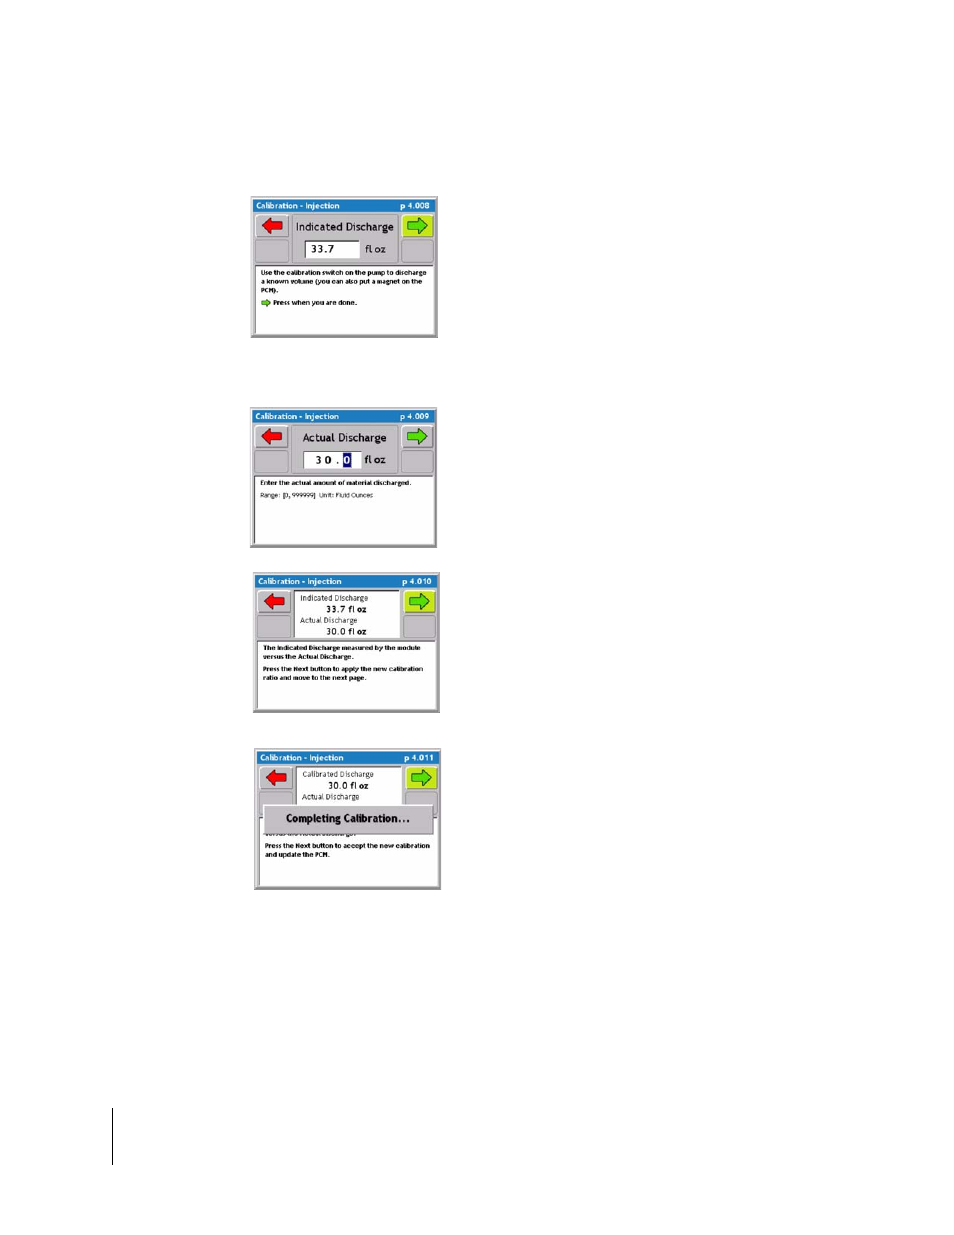
Injection Static Calibration / Continued
4. Place the calibration container under the cali-
bration valve on the pump. Use the Calibration
button on the pump or place a magnet on the
PCM to start discharging product. As product
discharges volume should accumulate on the
Legacy. When a significant amount of material
has been discharged let go of the calibration
button or remove the magnet. Press the green
forward arrow to advance to the next calibration
step.
6. Enter the Actual amount Discharged. This is
the known amount captured in the calibration
container. Press the green forward arrow to con-
tinue to the next calibration step
7. Indicated Discharge Vs. Actual Discharge.
This page is only a information page to show
the operator the Indicated Vs. the Actual. Press
the green forward arrow to automatically recal-
culate the calibration number so the two vol-
umes match.
10. When the two volumes match press the
green forward arrow and the Injection calibra-
tion procedure is complete.