Using the calibration table – TeeJet Legacy 6000 CAN Guide User Manual
Page 191
Fieldware for The Legacy 6000
Software Version 2.11
B-3
Appendix B - Creating a Calibration Table
Using the Calibration Table
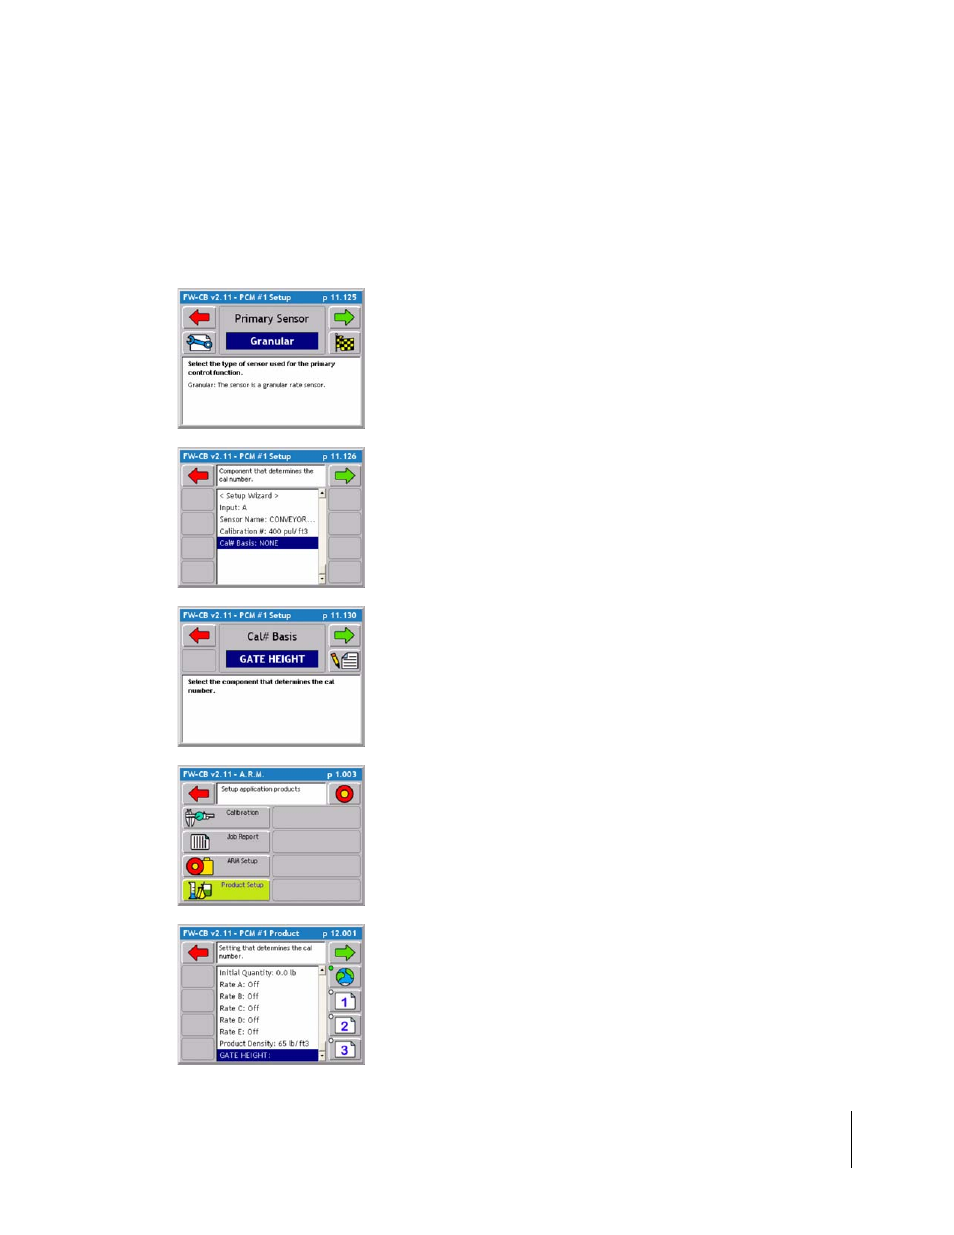
To implement the Calibration table the table must be activated during PCM Primary Sensor setup.
Once activated the Cal# can be changed in Product setup before any application. Midwest Tech-
nologies recommends that each Cal Table setting be calibrated using the calibration procedure
from the ARM Launcher page.
1. Enter PCM Setup and navigate through PCM setup to Primary
Sensor. Select the Tools Button from the Primary Sensor page.
2. Use the Down arrow to highlight Cal# Basis and Press the Enter
button.
3. Select the Cal Table to be used. The Name of the Cal Table is
the Cal Table Identifier (The first column in the brackets when cre-
ating the Cal Table). After the Cal# Basis has been selected con-
tinue forward through PCM setup and Apply the Settings. The
Cal Table is now ready for use.
4. To use the Cal Table enter Product setup from the ARM
Launcher page.
5. Use the Down arrow to highlight GATE HEIGHT (This name is
dependent on the Cal Table Identifier) and press the enter button.
Select the desired gate height or calibration# description. This
selection will automatically change the Cal# in the system.