Nh3 in-field calibration continued, Nh3 in-field calibration continued -22 – TeeJet Legacy 6000 CAN Guide User Manual
Page 92
3-22
Chapter 3 - Real-time Setup
Performing a Calibration
Fieldware for the Legacy 6000
Software Version 2.11
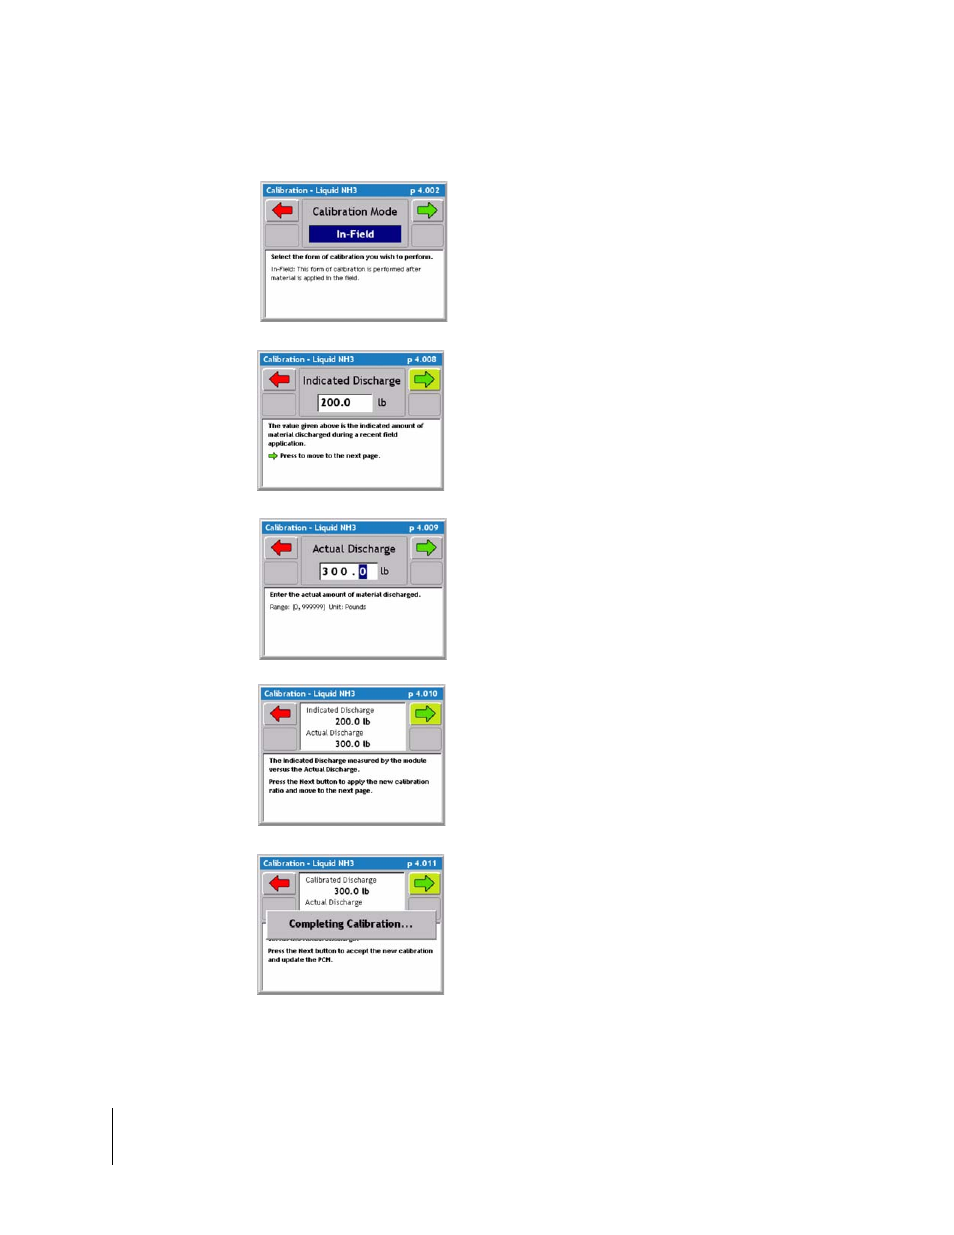
NH3 In-Field Calibration Continued
5. From the Calibration Mode page select In-
Field from the pick list in the middle of the
screen. Press the green forward arrow key to
continue to the next calibration step.
- In Field - Involves driving in a field, simulating
a real time application.
- Static - Does not require the vehicle to move.
This is a stationary test.
6. This is the indicated discharge. This value is
obtained from the accumulated volume during
the real-time application. This is why it is
important to have the volume zeroed before
application starts. Press the green forward
arrow to continue to the next calibration step.
7. Enter the Actual amount discharged. This is
the known amount put in the tank before appli-
cation or know amount discharged by weighing
the tank after application. Press the green for-
ward arrow to continue to the next calibration
step.
8. Indicated Discharge Vs. Actual Discharge.
This page is only a information page to show
the operator the Indicated Vs. the Actual.
Press the green forward arrow to automatically
recalculate the calibration number so the two
volumes match.
9. When the two volumes match press the
green forward arrow and the NH3 Calibration
procedure is complete.