Distance/speed calibration, Distance/speed calibration -9 – TeeJet Legacy 6000 CAN Guide User Manual
Page 79
Fieldware for the Legacy 6000
Software Version 2.11
Chapter 3 - Real-time Setup
3-9
Performing a Calibration
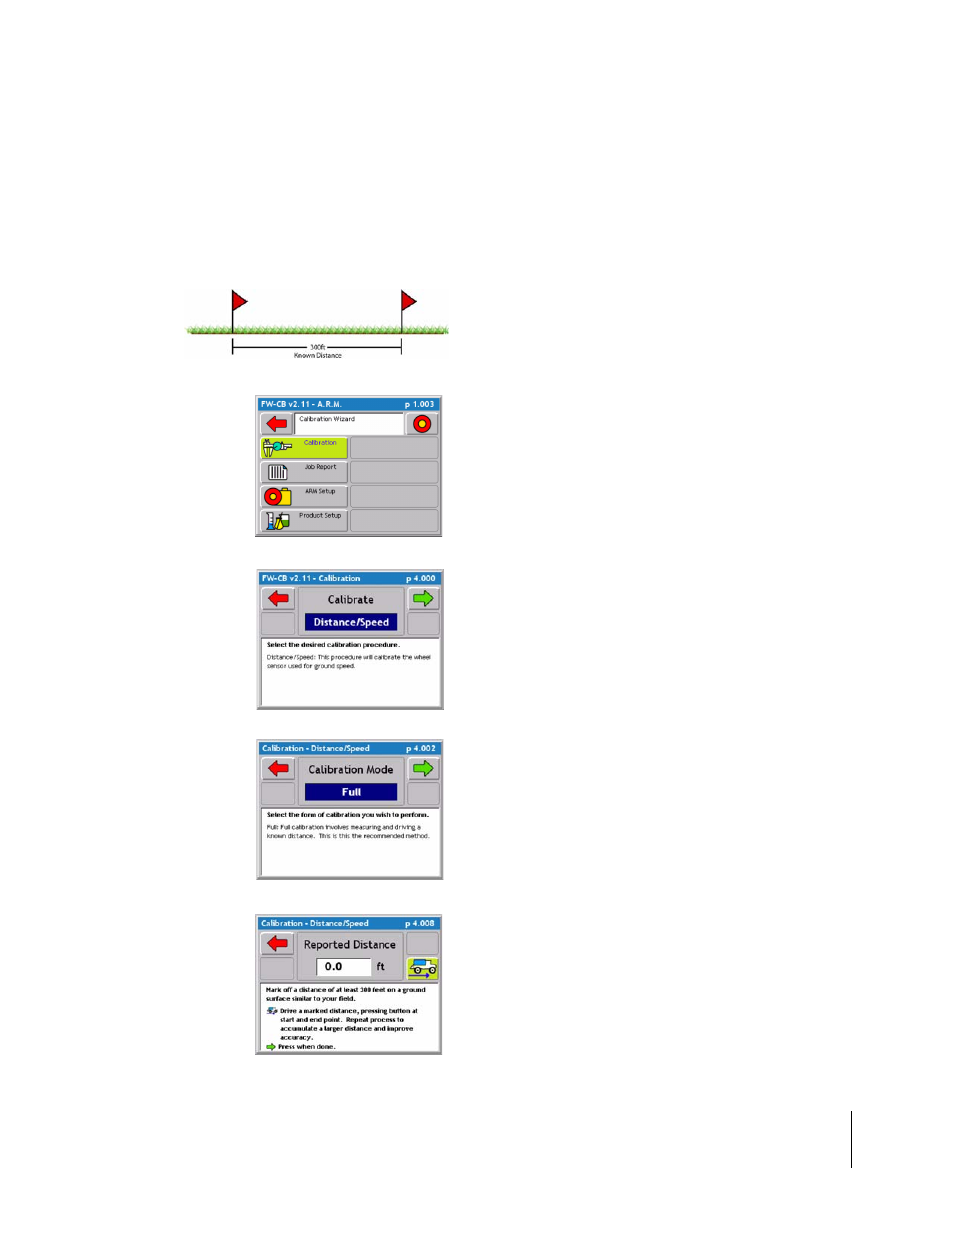
Distance/Speed Calibration
The Distance/Speed calibration process is used to calibrate a wheel speed sensor. When setting
the system up for the first time perform the procedure below and for best results repeat this proce-
dure until the reported distance and known distance match or are very close. To make a Quick
adjustment to the Calibration number follow steps 2-4 and select Quick as the calibration mode.
1. Mark off a known distance of at least 300ft on a
ground surface similar to your field application. Place a
flag to mark your start and end point.
2. From the ARM Launcher page select the Calibration
button by using the function key or by highlighting Cali-
bration and pressing the green enter button.
3. From the Calibration page select the Distance/Speed
option from the pick list in the middle of the screen.
Press the green forward arrow to continue to the next
calibration step.
4. From the Distance/Speed page select Full from the
pick list in the middle of the screen. Press the green for-
ward arrow key to continue to the next calibration step.
- Full - involves driving a known distance. Recom-
mended for first time setup
- Quick - allows the operator to change the calibration
number without driving. This is helpful if quick adjust-
ments need to be made to an existing calibration num-
ber.
5. When driving the marked distance it is best to have
the vehicle close to normal operating speed before
reaching the start point. When the vehicle reaches the
start point press the truck button. The truck button will
begin to flash and feet will begin to accumulate.