Pressure calibration, Pressure calibration -19 – TeeJet Legacy 6000 CAN Guide User Manual
Page 89
Fieldware for the Legacy 6000
Software Version 2.11
Chapter 3 - Real-time Setup
3-19
Performing a Calibration
Pressure Calibration
The Pressure Calibration process is a stationary calibration for a pressure sensor. This procedure
involves the discharge of material for the most accurate calibration. The use of water is recom-
mended when calibrating.Repeating calibration procedure will ensure accurate calibration.
1. Fill machine with enough water to perform calibration
and have a manual pressure gage mounted in-line with
the booms. The most ideal location for a manual pres-
sure gage is as close to the boom delivery point as pos-
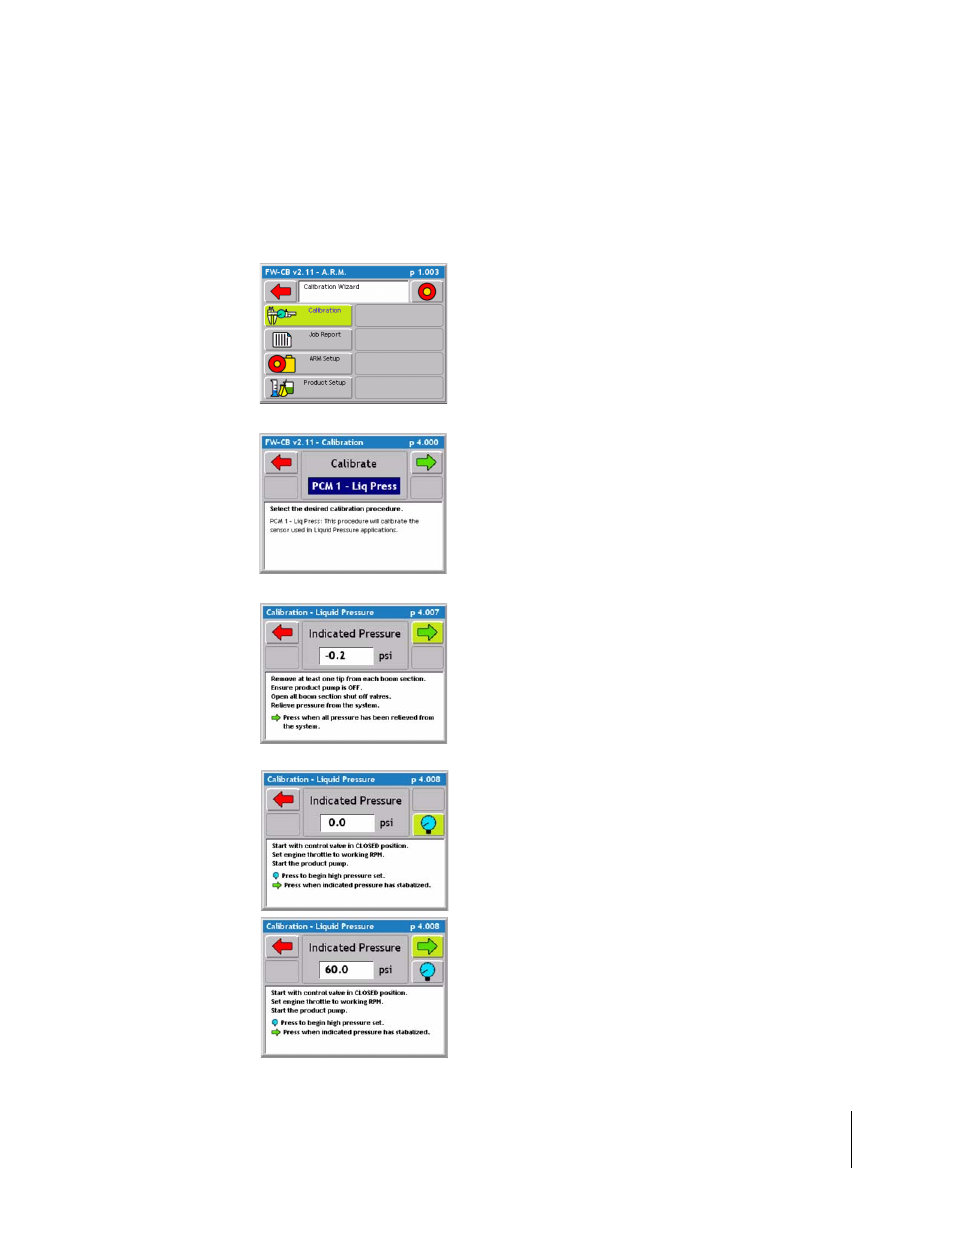
sible. From the ARM Launcher page select the
Calibration button by using the function key or by high-
lighting Calibration and pressing the green enter button.
2. From the Calibration page select the PCM - Liq-
Press option from the pick list in the middle of the
screen. Press the green forward arrow to continue to
the next calibration step.
3. Indicated Pressure low is the current pressure read-
ing on the system. This reading should be zero. With
the product pump off open all boom valves and
remove at least one to relieve pressure from the sys-
tem. When pressure has been relieved press the
green forward to set a zero value and to continue to
the next calibration step.
4. Indicated Pressure high (max operating pressure) is
the high pressure reading at normal operation. Start
with all booms on and the control valve closed. Set
engine throttle to working RPM and start product
pump. Press the blue pressure gage button to begin
high pressure setting, the control valve will fully open
and product will be discharging out the boom. When
the pressure stabilizes, read and record the pressure
from the manual gage, and press the green forward
arrow to continue to the next calibration step.