Starting a job, Creating a new job, Selecting an existing job – TeeJet Legacy 6000 CAN Guide User Manual
Page 74: Creating a job based on an existing job, Starting a job -4
3-4
Chapter 3 - Real-time Setup
Starting a Job
Fieldware for the Legacy 6000
Software Version 2.11
Starting a Job
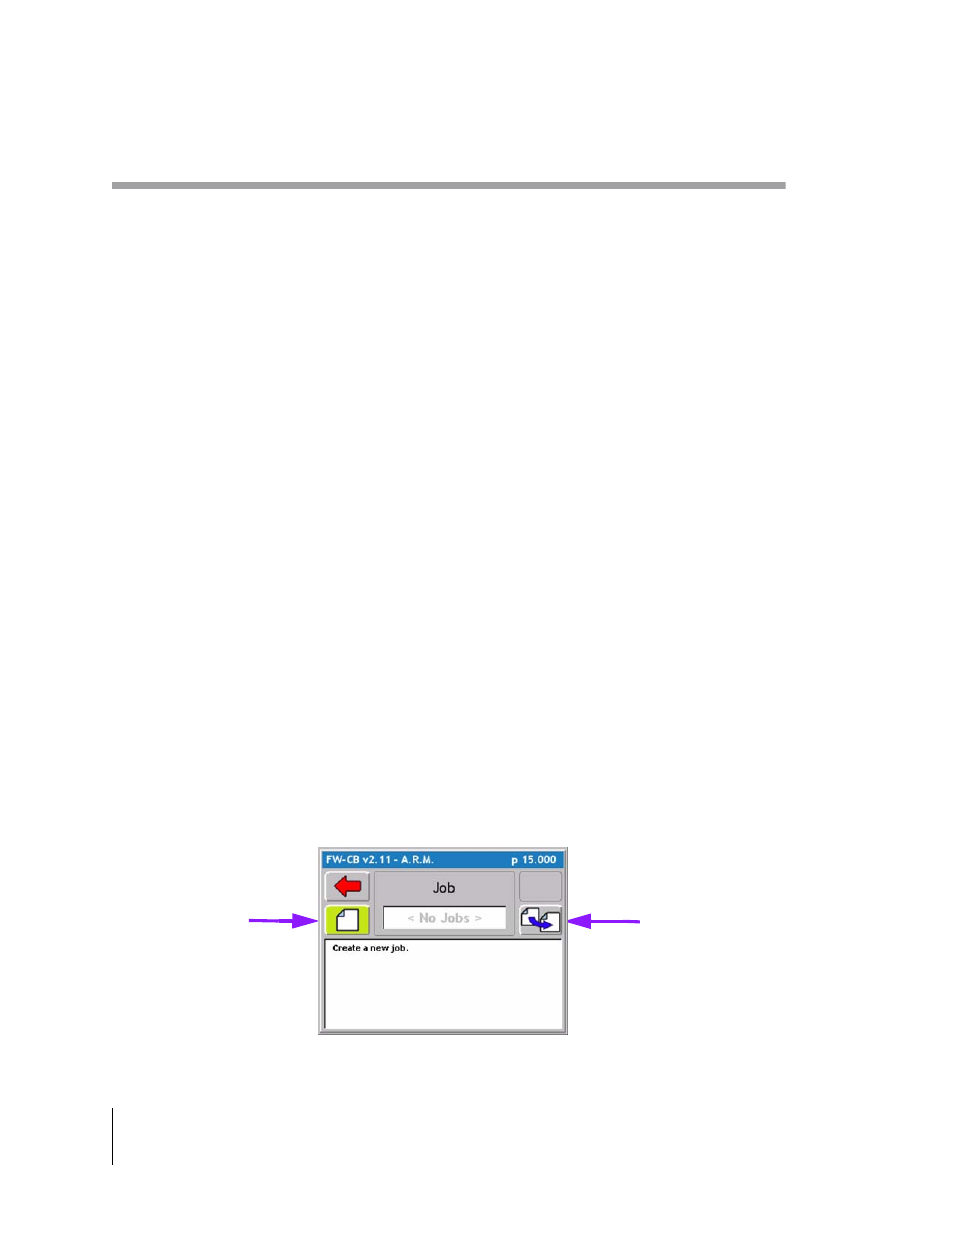
Pressing the Bullseye button in the Fieldware Main Launcher brings up the Job page (Figure 3-2).
If no PC card will be used and the Console Setup PC Card setting is set to NO, (see "Console
Setup" on page 2-8), no Job number is asked for (see "No PCMCIA Card Setup" on page 2-6). A
PC card is necessary in order to have a job number and save files.
When a Job is created a folder is created on the PC card labeled with same name. All files related
to this job (Record, Guideline, Boundary, and Map Object) will be stored in this folder. These files
are talked about in more detail (See “ARM Setup Detailed Description” on page 3-32.)
There are three methods for entering/selecting a job name.
Creating a New Job
To create a new job, press the Create Job button in the Job page (Figure 3-2). This brings up the
Create a Job page. There are two methods of creating a job: manually and automatically (Figure
3-3).
Selecting an Existing Job
From the Job page (Figure 3-2), select an existing Job by using the up and down arrow keys. An
existing Job has an associated file folder located on the PC card. The name of the job folder is the
same as the job name.
Creating a Job Based on an Existing Job
A new job can be created based on the settings of an existing job. This helpful when starting a new
job and no settings need to be changed. This allows the operator to create a new job and GO! To
do this, select the desired job to base the new job from. Press the (Create a job off last job set-
tings) button see (Figure 3-2). Create a new job name or auto name the job and then press the
green forward arrow. All settings from previous job can now be viewed in from the ARM launcher
page or press the ARM bullseye to start application based on last job settings.
Figure 3-2: The Job Page
Create a new Job
Create a Job based
on anotherJob.