Wasp Barcode Inventory Control User Manual
Page 210
InventoryControl Printable Help
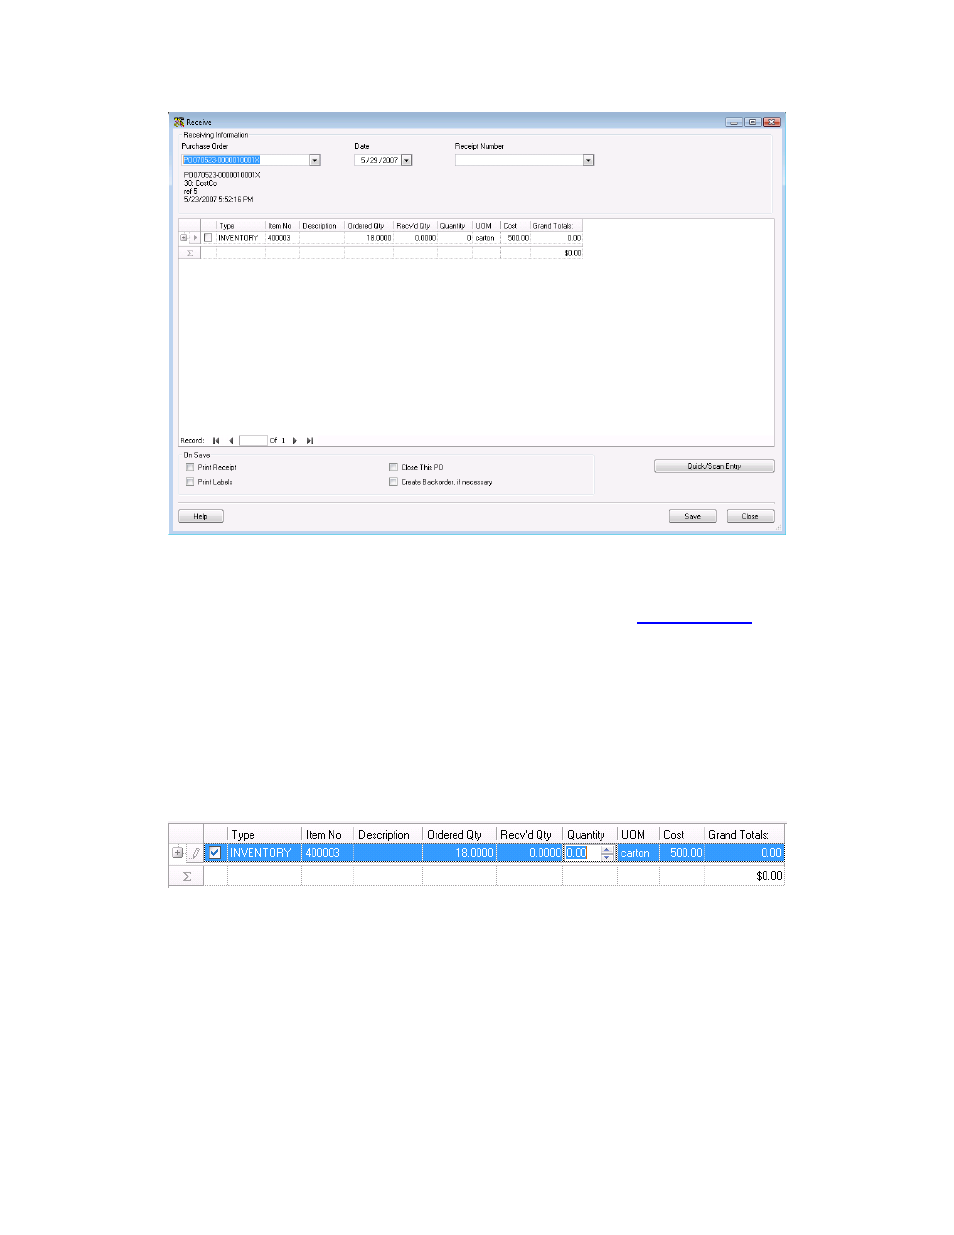
Note: In the example above, the Show Costing Information option is enabled on the Options
screen show costing information is displaying on the Receive screen. If this option was not
enabled, the costing information would not appear on this screen. For more information on
enabling the Show Costing Information option, please refer to the
Options Screen
topic.
4. Enter the date these items were received in the Date field. You can enter previous dates, but not
future dates.
5. You can optionally type in a receipt number in the Receipt Number field. If you receive this order
in more than one shipment, you can partially receive it and enter in each receipt number as you
access the screen. Previously entered receipt numbers, if any, will appear in the Receipt
Number drop down list.
6. Now you can mark the items as received. Select the checkbox next to the item you are receiving:
The Quantity field becomes enabled allowing you to enter the quantity you received. In the
example above, you would enter however many cartons of this item you received.
You must mark these items as received into one or more locations by clicking the plus sign in
front of the listing:
195