Luminex 100 IS Version 2.2 User Manual
Page 211
x
MAP Technology
Installation
PN 89-00002-00-069 Rev. A
A - 5
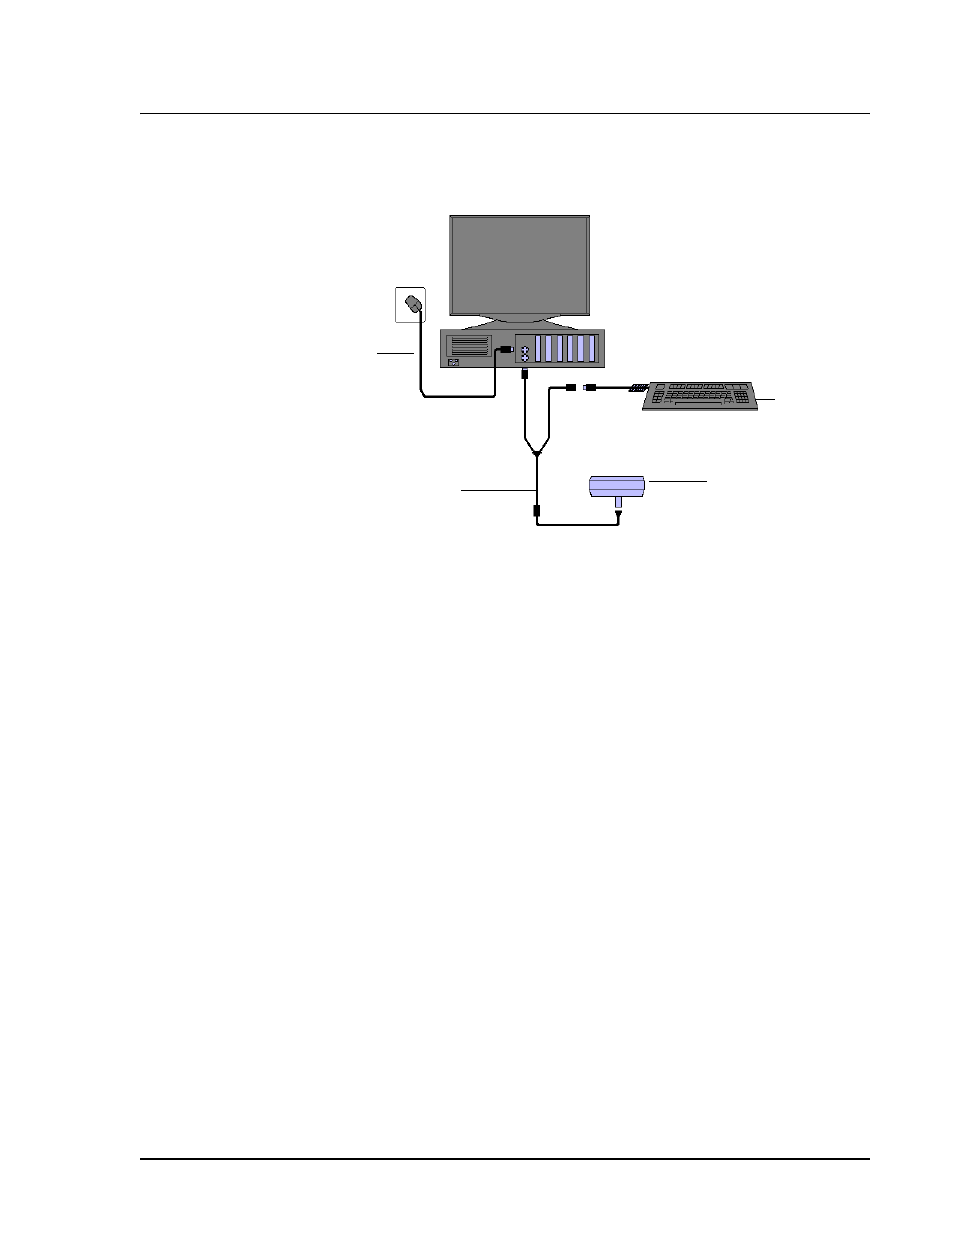
11. Connect the barcode reader, mouse, and keyboard. See
Figure 135.
Figure 135. Connecting the PC, Mouse, Barcode Reader, and Keyboard
12. Fill the sheath bottle with sheath fluid to just below the air intake
fitting. Install the sheath and waste containers to the left side of
the Luminex 100 analyzer and Luminex XYP instrument,
connecting them with tubing to the color-coordinated connectors
on the side of the 1Luminex 100 analyzer.
If your system has the Luminex Sheath Delivery system, refer to
the Luminex Sheath Delivery System appendix for additional
information.
13. Plug the Luminex XYP instrument, Luminex 100 analyzer, PC,
and monitor power cords into approved outlets. We strongly
recommend using an uninterruptible power supply to protect the
system from power variations. Refer to “Recommended
Additional Equipment” on page 3-7 for additional information.
Install and Replace the
Luminex XYP Instrument
Sample Probe
To install the Luminex XYP instrument Sample Probe, which is
longer than the probe shipped with the system:
1. Make sure the Luminex 100 analyzer power switch is off and the
Luminex XYP instrument and Luminex 100 analyzer power
cords are unplugged from the outlet.
1
2
3
4
1. Keyboard
3. Y-Cable
2. Barcode Reader
4. Mouse
Note:
The sheath and waste
containers must be placed on the
same surface as the Luminex XYP
instrument
. Do not place the
containers on top of the Luminex
100
analyzer
.