Initiating the system, Limited wcc3 installation – WattMaster WM-WCC3-TGD-01B User Manual
Page 72

2. INITIATING THE SYSTEM
WCC III Technical Guide
2-4
WCC III Limited Installation Software
- DM1WC012-01X
Please note: Your user name must have
suffi cient rights to install these WCC III Limited
programs onto your computer’s hard drive.
Step 1:
Insert the WCC III Limited Program Setup CD
(DM1WC012-01X) into your computer’s CDROM/DVD drive.
Step 2:
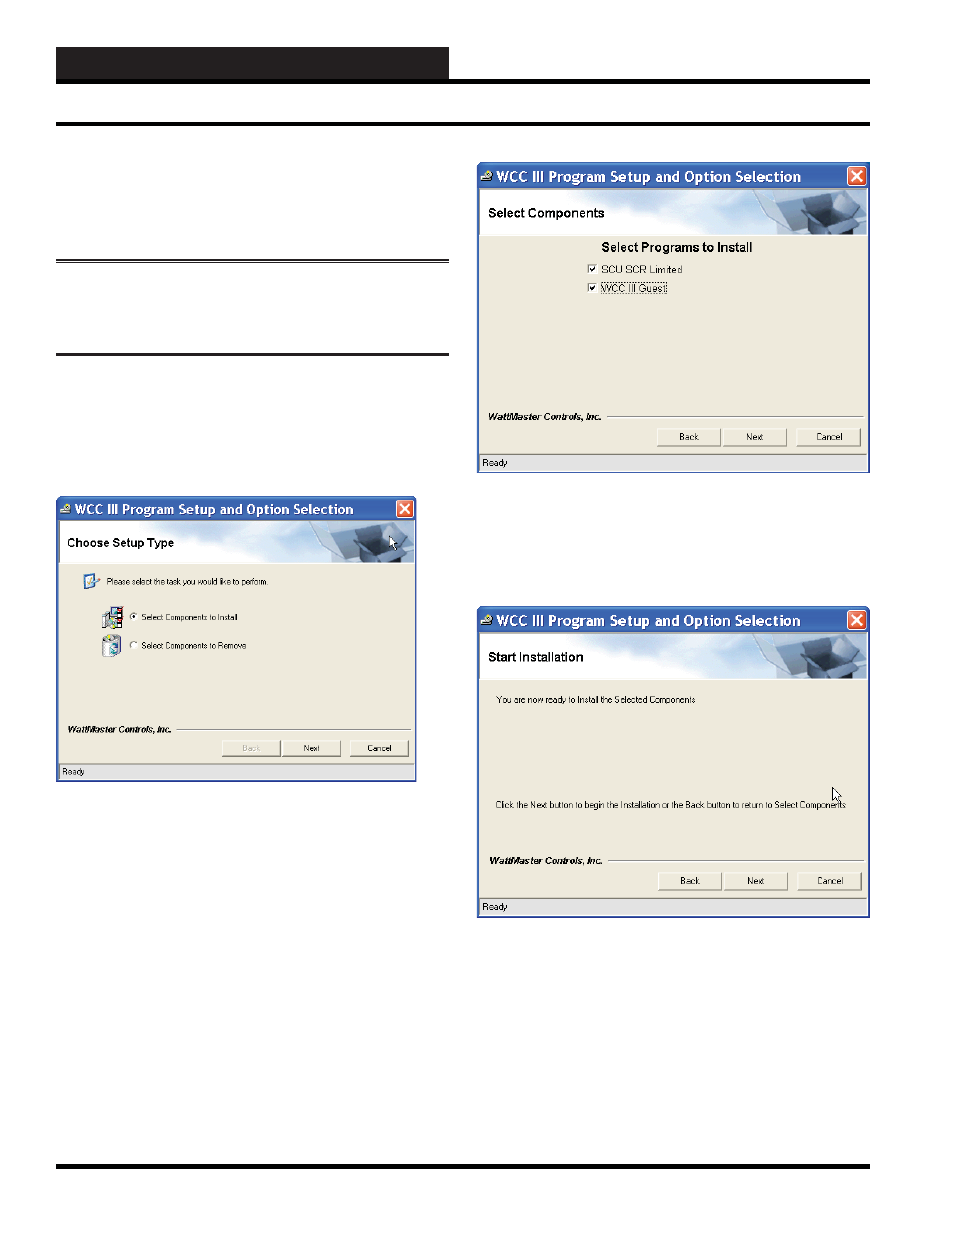
This disk should “autorun” and start the installation
process and then display the WCC III Limited Program Setup and
Option Selection Screen.
The WCC III Limited Program Setup and Option Selection Screen
will allow you to select the installation or removal of the various
WCC III component programs onto the WCC III Front end
computer’s hard drive.
Step 3:
Choose either “Select Components to Install” and left-
click the
button to continue with the WCC III program
installation or choose “Select Components to Remove” and left-
click the
button to continue with the WCC III program
removal process.
The
button will take you back one screen and the
button will allow you to cancel the WCC III Program
Setup installation.
The instructions that follow describe the installation process. The
removal process closely follows the installation procedure, but
instead of installing the various WCC III component programs, it
will uninstall them.
Step 4:
Using your left mouse button, select the desired check
boxes to the left of the programs you wish to install and then left-
click the
button to continue with the installation of these
program(s) onto the WCC III Front end computer’s hard drive.
Step 5:
The screen will ask you to click the
button to
begin installation. After again verifying that you really want to
install these WCC III programs, please left-click the
button.
The
button will take you back one screen and the
button will allow you to cancel the WCC III Program
Setup installation.
Limited WCC3 Installation
