Initiating the system – WattMaster WM-WCC3-TGD-01B User Manual
Page 106
2. INITIATING THE SYSTEM
WCC III Technical Guide
2-38
Step by Step Instructions
To get the “Network Connections” icon you must be able to
navigate to the control panel settings so that you can proceed with
the IP modifi cations for connecting a computer to the WCC III –
MCD with an Ethernet crossover cable.
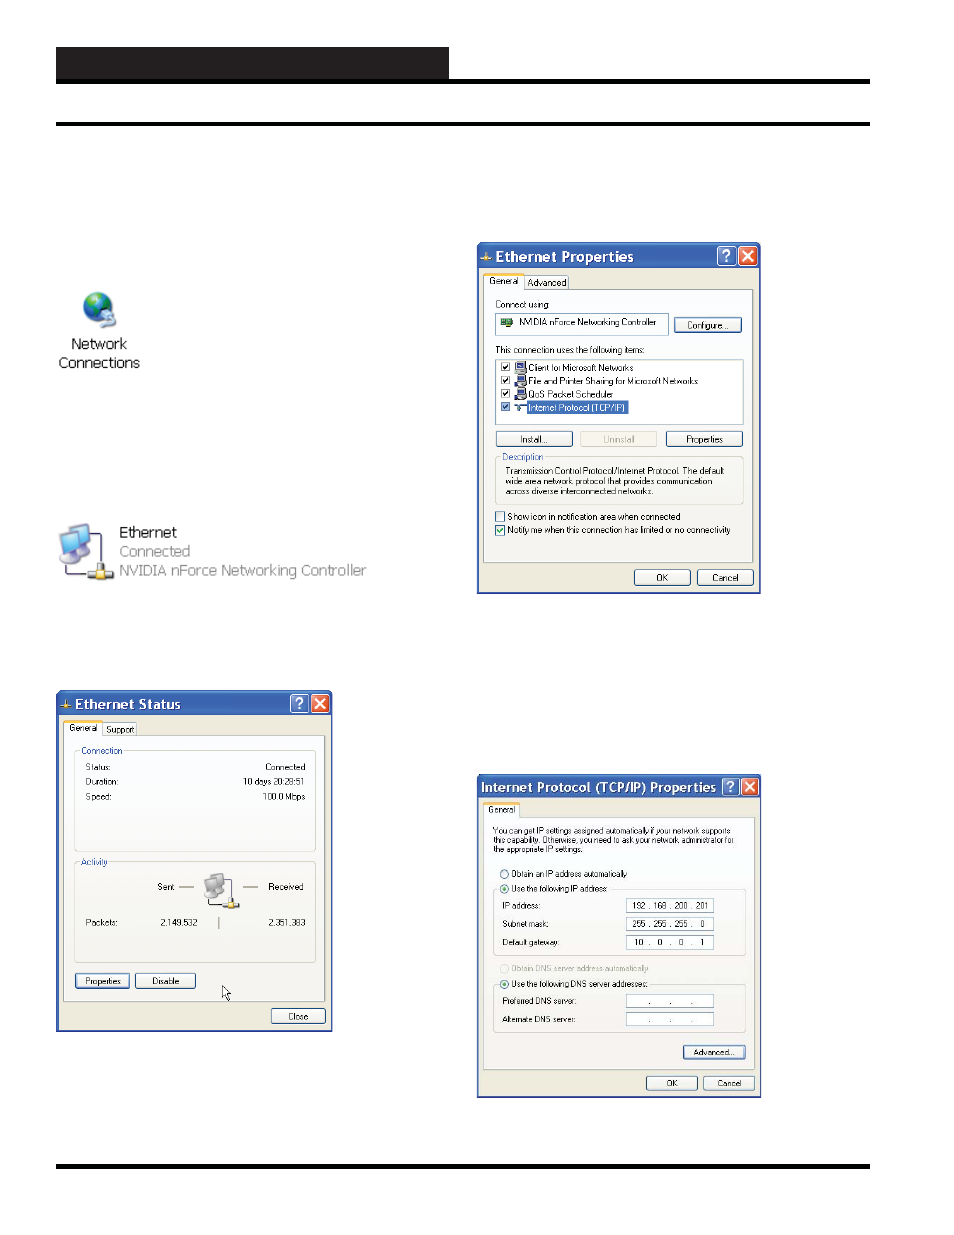
The Network Connections Icon
The Network Connection icon is used as an initial setup point for
IP settings. Double left click on the Network Connections icon with
your mouse button. This should have now taken you to the Network
Connections dialog screen with the “The Ethernet Icon”.
The Ethernet Icon
Network Connection settings. Double left click on the Ethernet
icon with your mouse button. This should have now taken you to
the Ethernet Status dialog screen.
Ethernet Status dialog screen
At the Ethernet Status dialog screen select the “Properties”
button by double left clicking on the “Properties” button with
your left mouse button. This should have now taken you to the
“Ethernet Properties” dialog screen.
Ethernet Properties dialog screen
At the Ethernet Properties dialog screen select the “Internet
Protocol (TCP/IP)” choice fi eld with a single left click of the
mouse to highlight the “Internet Protocol (TCP/IP)” choice fi eld.
Next, using your mouse, double left click on the “Properties”
button. This should have now taken you to the Internet Protocol
(TCP/IP) Properties dialog screen.
Internet Protocol (TCP/IP) Properties dialog screen
Setting Up a Direct Connection from a Stand-Alone Computer