Initiating the system – WattMaster WM-WCC3-TGD-01B User Manual
Page 107
2. INITIATING THE SYSTEM
WCC III Technical Guide
2-39
At the Internet Protocol (TCP/IP) Properties dialog screen you
must select the “Use the Following IP address” radio button by a
single left click of the mouse to select the radio button to the left of
the “Use the Following IP address”.
You are required to enter the IP address, Subnet mask, and Default
gateway at this point. These standard values are used so that you
can easily connect to the WCC III – MCD with the minimal amount
of IP confi guration setup.
These are the correct values that should be entered for the IP
address, Subnet mask, and Default gateway.
IP address
192.168.200.201
Subnet mask
255.255.255.0
Default gateway
10.0.0.1
The OK button
Remember to hit the “OK” button with a single left click of the
mouse to save these values. It will also take you back to the previous
Ethernet Properties dialog screen. You should now be done setting
up the IP confi guration for the “How to setup a Windows-based
local user’s computer for WCC3 with direct connection (Ethernet
Crossover cable) to the WCC III – MCD computer”. You will have
to hit the “OK’ button again on the “Ethernet Properties” dialog
screen with the left button of your mouse, which will then take
you back to the “Ethernet Status” dialog screen. At the “Ethernet
Status” dialog screen you should now hit the “Close” button on the
Ethernet Status dialog screen with the left button of your mouse to
close this screen. At this point, any other open Windows screens
(Network Connections and Control Panel) should be closed out or
shut down with the close down box in the upper right hand corner.
It is good practice to restart the computer at this point for these
settings to be applied. Also, make sure that the Ethernet crossover
cable is connected from this computer to the WCC III – MCD at
this point.
The Cancel button
The Cancel button is used to cancel the IP changing operation of
this screen. It will also take you back to the previous Ethernet
Properties dialog screen.
The Advanced button
The Advanced button is used to access the Advanced TCP/IP
Setting screen.
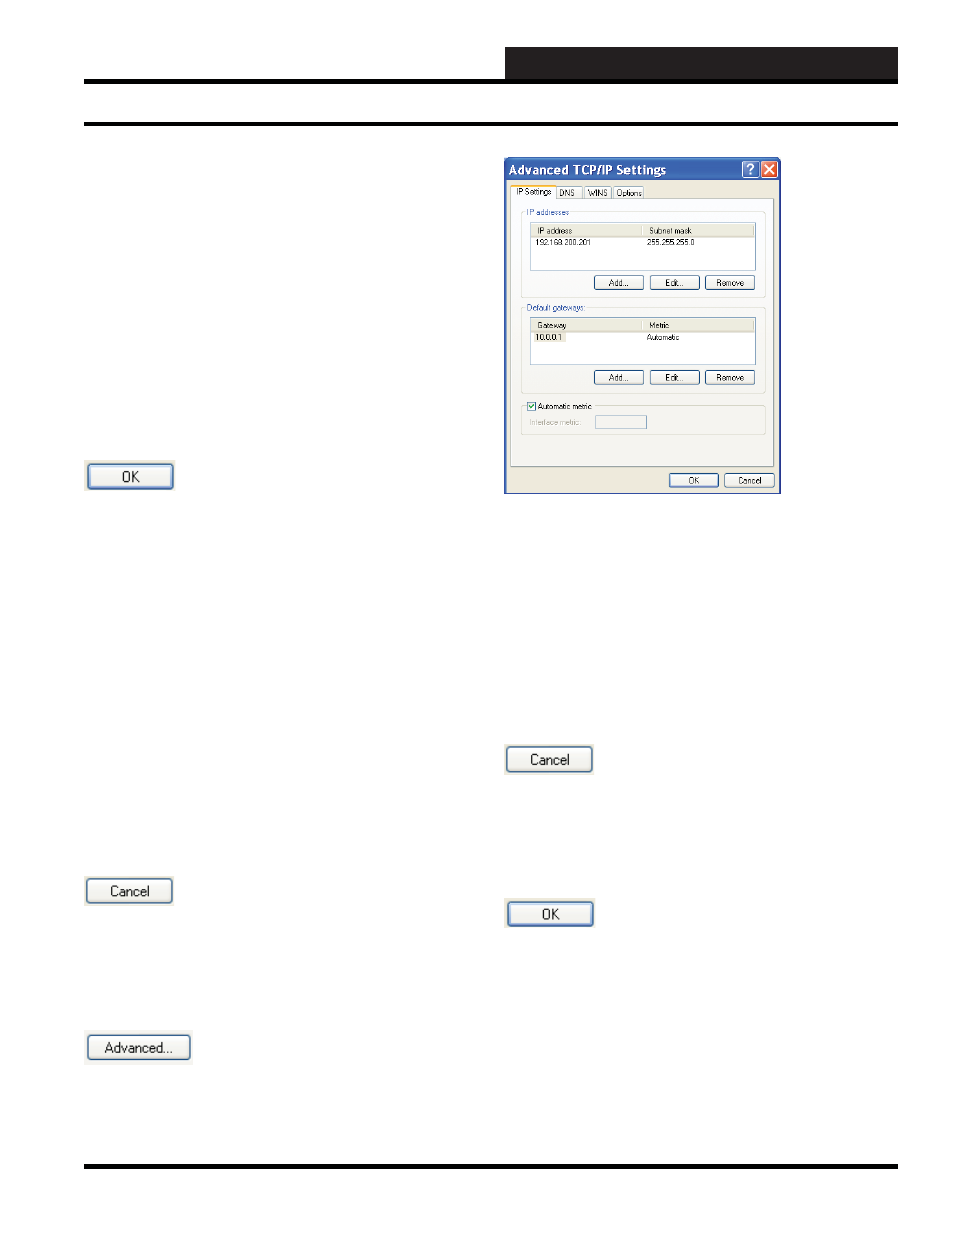
Advanced TCP/IP Settings Dialog Screen
An IT person may also want to visit this “Advanced TCP/IP Settings
Dialog” screen to add or remove other unwanted IP addresses and/
or Default gateways with this screen. There are situations where
you can have multiple IP addresses with multiple gateways. This
would require advanced knowledge of how the internet / intranet
works.
Additionally, there are “Tabs” for DNS, WINS, and OPTIONS
settings. These are typically not used on this confi guration of
connection to the WCC III - MCD.
The Cancel button
The Cancel button is used to cancel the IP changing operation of
this screen. It will also take you back to the previous Ethernet
Properties dialog screen.
The OK button
Remember to hit the “OK” button with a single left click of the
mouse to save these values. It will also take you back to the
previous Internet Protocol (TCP/IP) Properties dialog screen.
Setting Up a Direct Connection from a Stand-Alone Computer