Removal of front drive shaft – Cub Cadet 4 x 4 Volunteer User Manual
Page 99
Chapter 3 - Drive System: Drive Shafts and Differentials
95
REMOVAL OF FRONT DRIVE SHAFT
NOTE: If the universal joints exhibit enough play
to indicate that they are worn, or if the front
driveshaft is identified as the source of a drive-
line vibration, replace the driveshaft as an
assembly.
NOTE: Both driveshafts are constantly engaged.
To identify vibration in one drive shaft, the other
must be disconnected. If the vibration goes
away when the shaft is disconnected, it is the
most likely source of the vibration.
1.
Remove any front-mounted accessories from
the vehicle.
2.
Lift and safely support the vehicle to provide
easier access to the bottom of the front differen-
tial.
NOTE: This procedure can be done on the
ground.
3.
Remove the hood from the front of the vehicle to
provide easy access to the top of the front differ-
ential. See Figure 3.16.
3a. Open the hood
3b. Disconnect the headlights where the har-
ness plugs into the bulb holder, leaving
the bulb holder in the lamp.
3c. Remove the two internal cotter pins that
hold the hood panel to the hood brackets.
3d. Disconnect the check cables from the
hood using a 3/8” wrench.
3e. Slide the hood to the left of the vehicle to
disengage it from the brackets, and
remove it.
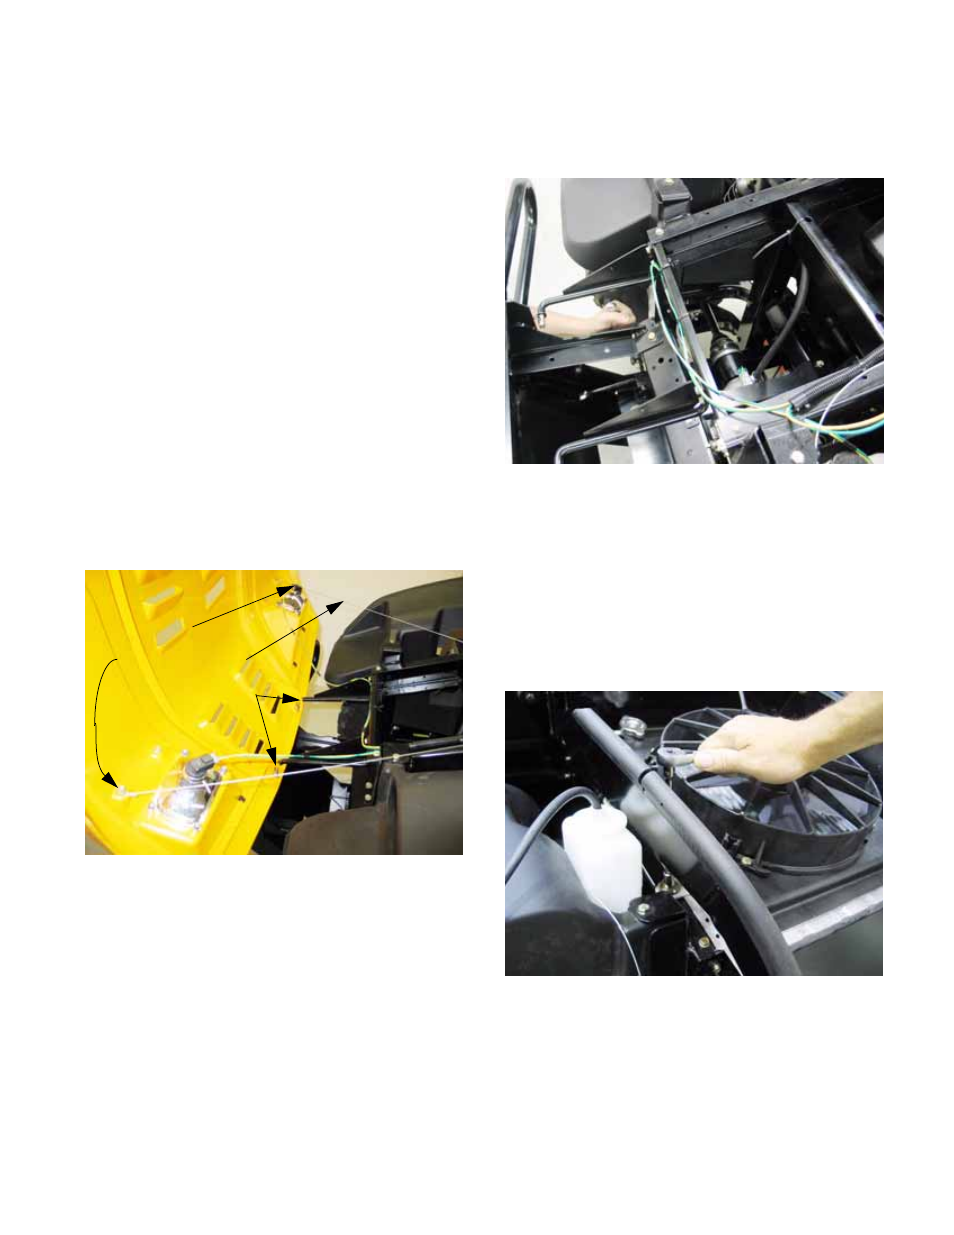
Figure 3.16
Disconnect:
hood check cables
headlights
hairpin clips / hinges
4.
Remove the six nuts and bolts that hold the
brush guard to the front of the frame, and
remove the brush guard. See Figure 3.17.
5.
Diesel only: Move radiator for access.
5a. Disconnect the tube that leads to the radi-
ator over-flow bottle from the filler neck of
the radiator.
5b. Remove the four bolts that hold the cool-
ing matrix assembly (radiator, shroud,
cooling fan) to the frame using a 7/16”
wrench. See Figure 3.18.
Figure 3.17
Figure 3.18