Cub Cadet 4 x 4 Volunteer User Manual
Page 115
Chapter 3 - Drive System: Drive Shafts and Differentials
111
5.
Disconnect the top of the rear hub from the
upper control arm using a pair of 9/16”
wrenches.
NOTE: To hold the upper control arm out of the
way while working, loosen the bolts that hold it to
the frame. Tilt the arm up out of the way and
tighten one of the bolts to hold it there. Return
the arm to it’s static position on assembly.
6.
Tilt the hub out from the upper control arm, pro-
viding support so that it does not stress the
brake line.
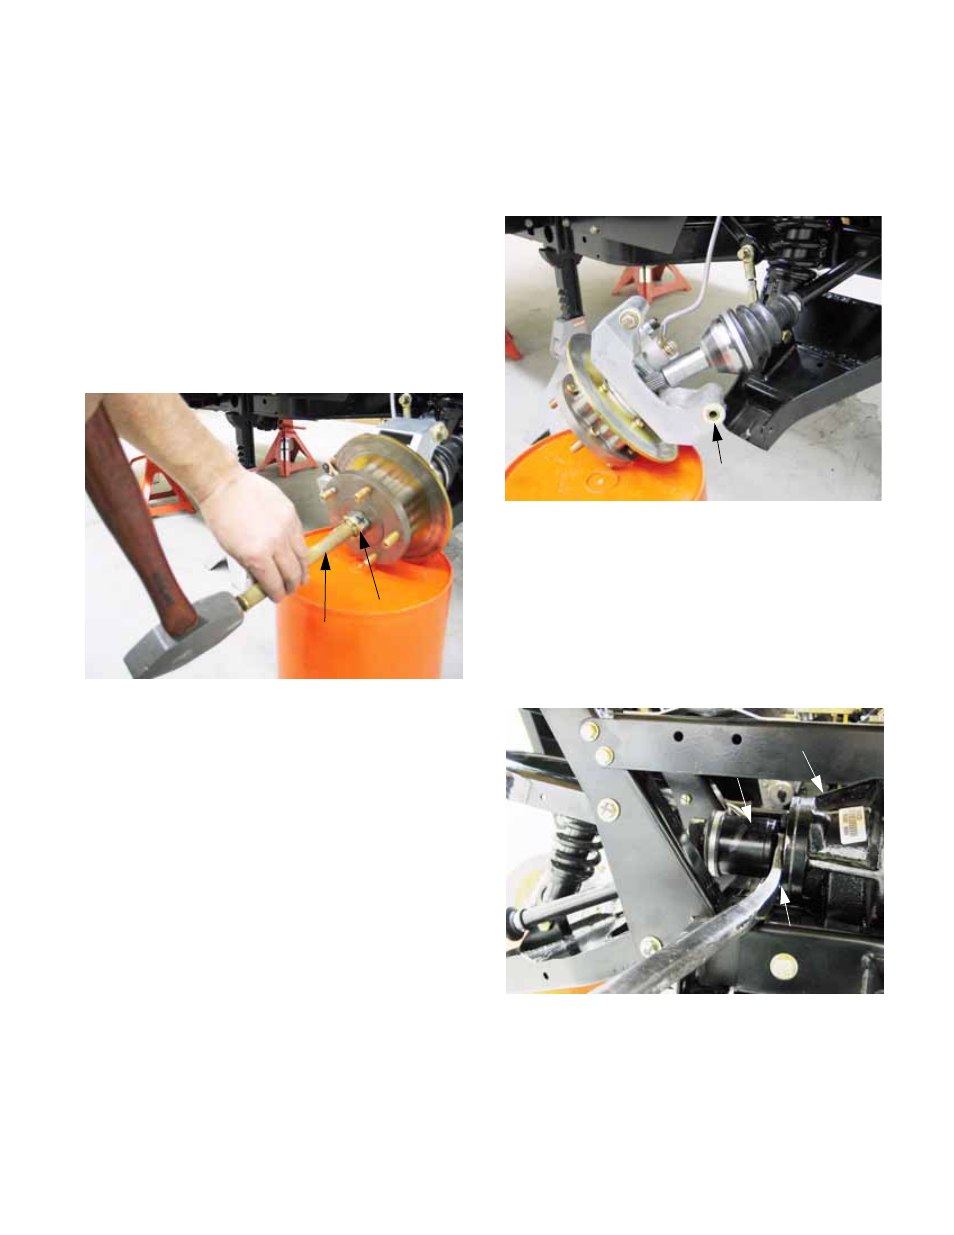
7.
Use a soft drift and a heavy hammer to drive the
axle loose from the hub. See Figure 3.58.
8.
Disconnect the hub from the lower control arm
using a pair of 9/16” wrenches.
Figure 3.58
Brass drift
Axle nut
protecting
end of
threads
9.
Carefully pivot the hub forward, pushing in on
the end of the axle. This will separate the hub
from the axle. Once separated, support the hub
so that it does not stress the brake line.
See Figure 3.59.
NOTE: The inner joint is easier to work with if
the outer joint is free of the hub.
10.
Clean the area around the connection point
between the axle and the differential. Position a
drain pan beneath the differential.
11.
Carefully use a pry bar to pull the inner end of
the axle out of the differential. See Figure 3.60.
NOTE: The inner constant velocity joint is held
into the differential by a hog ring. A light “pop”
with the pry bar should release it. On assembly,
it should lock-in with similar force pushing
toward the differential.
Figure 3.59
Spacer and bushings
Figure 3.60
Differential
Inner C.V. joint
Pry bar