Chapter 5 - rear suspension – Cub Cadet 4 x 4 Volunteer User Manual
Page 176
Chapter 5 - Rear Suspension
172
SWAY BAR AND LINKS
Sway Bar and Bushings service intent:
•
If the sway bar bushings show signs of wear,
replace them.
•
If the ball joint in the sway bar links have play,
replace the sway bars links.
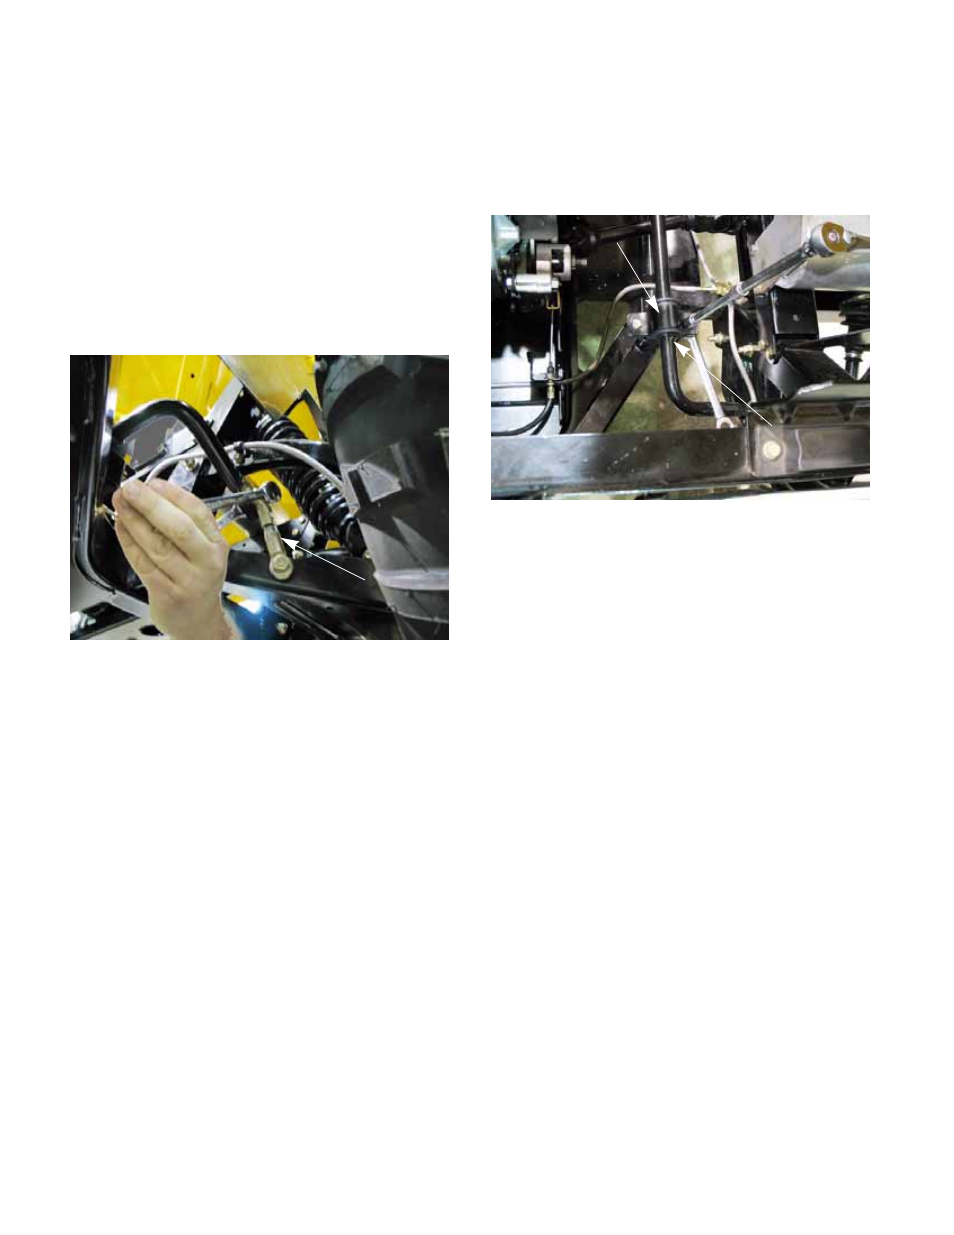
Replacement of the sway bar links:
1.
Remove the nut and bolt that connects the sway
bar link to the sway bar using two 9/16”
wrenches. See Figure 5.32.
2.
Remove the bottom nut and bolt using two 9/16”
wrenches.
3.
Adjust the new link to the same length as the old
link.
4.
Install following the above steps in reverse order.
5.
Test drive the vehicle in a safe area before
returning it to service.
Sway bar and bushings removal:
1.
Remove the sway bar links as described above.
2.
Remove the sway bar bushing mounts using a
pair of 1/2” wrenches. See Figure 5.33.
3.
Remove the sway bar from the vehicle.
4.
Slide the old bushings off of the sway bar.
5.
Slide the new bushings onto the sway bar.
NOTE: A small amount of soapy water can be
used as a lubricant to slide the bushings onto the
sway bar.
6.
Install the sway bar following the above steps in
reverse order.
7.
Test drive the vehicle in a safe area before
returning it to service.
Figure 5.32
Sway bar link
Figure 5.33
Sway bar mount
Sway bar bushing