Cub Cadet 4 x 4 Volunteer User Manual
Page 155
Chapter 4 - Front Suspension and steering
151
Steering Gear
Refer to the INSPECTION section of this chapter
for information on when to replace the steering
gear.
If there is a problem with the steering rack, it is to
be replaced as a complete unit.
Steering racks will arrive complete with tie rod
ends attached and pre-adjusted, though align-
ment should be checked after installation.
Steering racks are not serviceable.
1.
Lift and safely support the front of the vehicle as
described in the INTRODUCTION section of this
manual. The vehicle should be supported by the
frame.
2.
Remove the front wheels using a 3/4” wrench.
3.
Separate the tie rod ends from the hubs as
described in the Tie Rod Ends section of this
chapter. See Figure 4.67.
4.
Remove the hood for easy access:
4a. Open the hood.
4b. Disconnect the headlights
4c. Disconnect the check cables using a 3/8”
wrench.
4d. Remove the hairpin clips that hold the
hood to the hinge pins, slide the hood to
the operator’s left, and lift it off of the vehi-
cle.
Figure 4.67
Tie rod end
Two-jaw puller
5.
Remove the pad from the brake pedal using a 9/
16” wrench.
NOTE: Diesel models: The radiator, bracket,
fan, and shroud (cooling matrix) assembly may
get in the way of removing the hardware that
holds the kick panel in place. The assembly can
be unbolted and moved out of the way without
completely disconnecting and removing it.
CAUTION: allow the engine to cool completely
before working on or around the cooling system.
6.
Diesel only: Disconnect the tube that leads to
the radiator over-flow bottle from the filler neck
of the radiator.
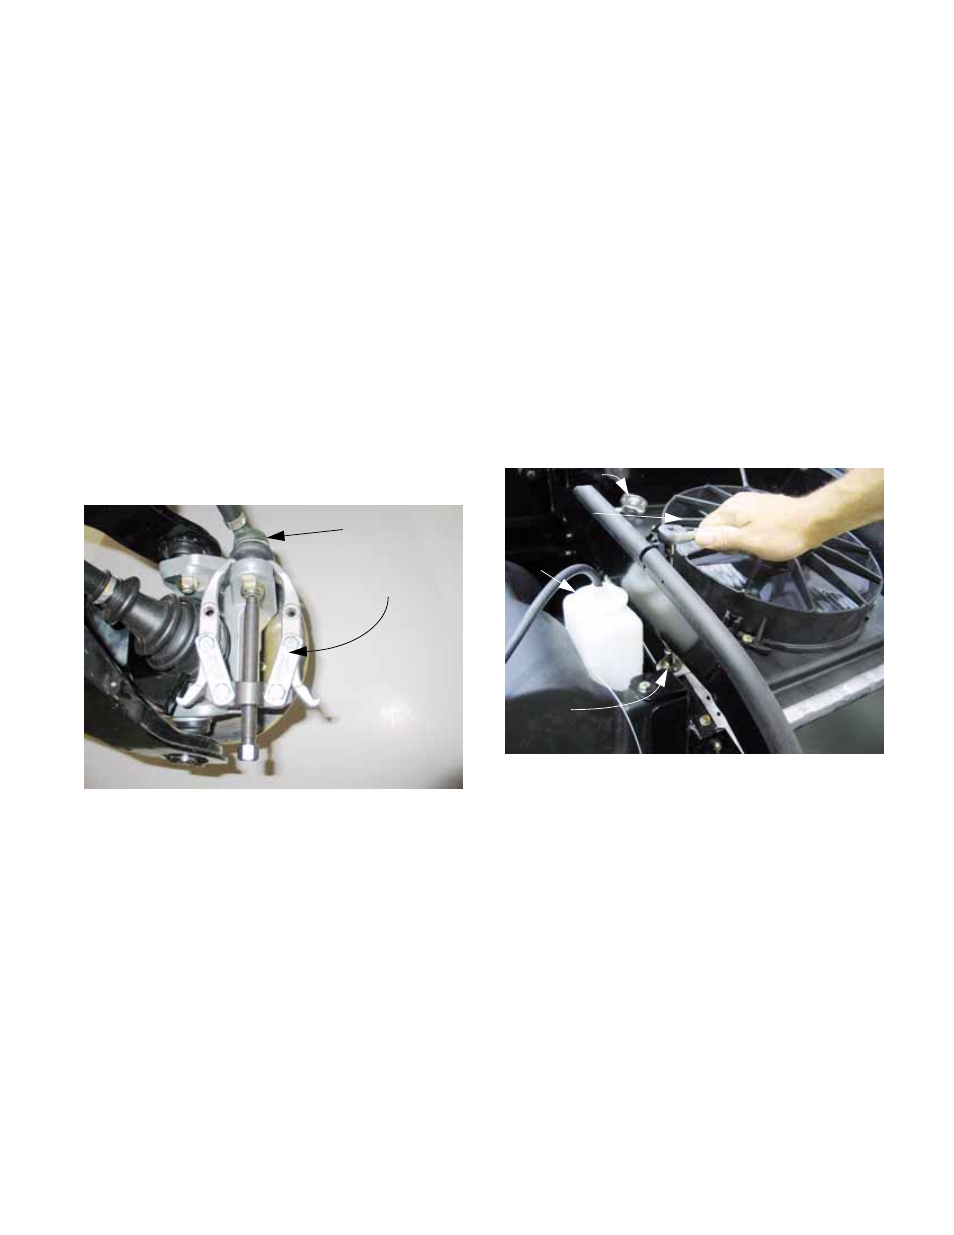
7.
Remove the four bolts that hold the cooling
matrix assembly to the frame using a 7/16”
wrench. See Figure 4.68.
NOTE: The bolts pass through rubber bushings
and spacer tubes that isolate the cooling matrix
from vibration and frame movement.
Figure 4.68
Radiator cap
Cooling fan
Over-flow
reservoir
Radiator
mounting bolt