Cub Cadet 4 x 4 Volunteer User Manual
Page 104
Chapter 3 - Drive System: Drive Shafts and Differentials
100
2.
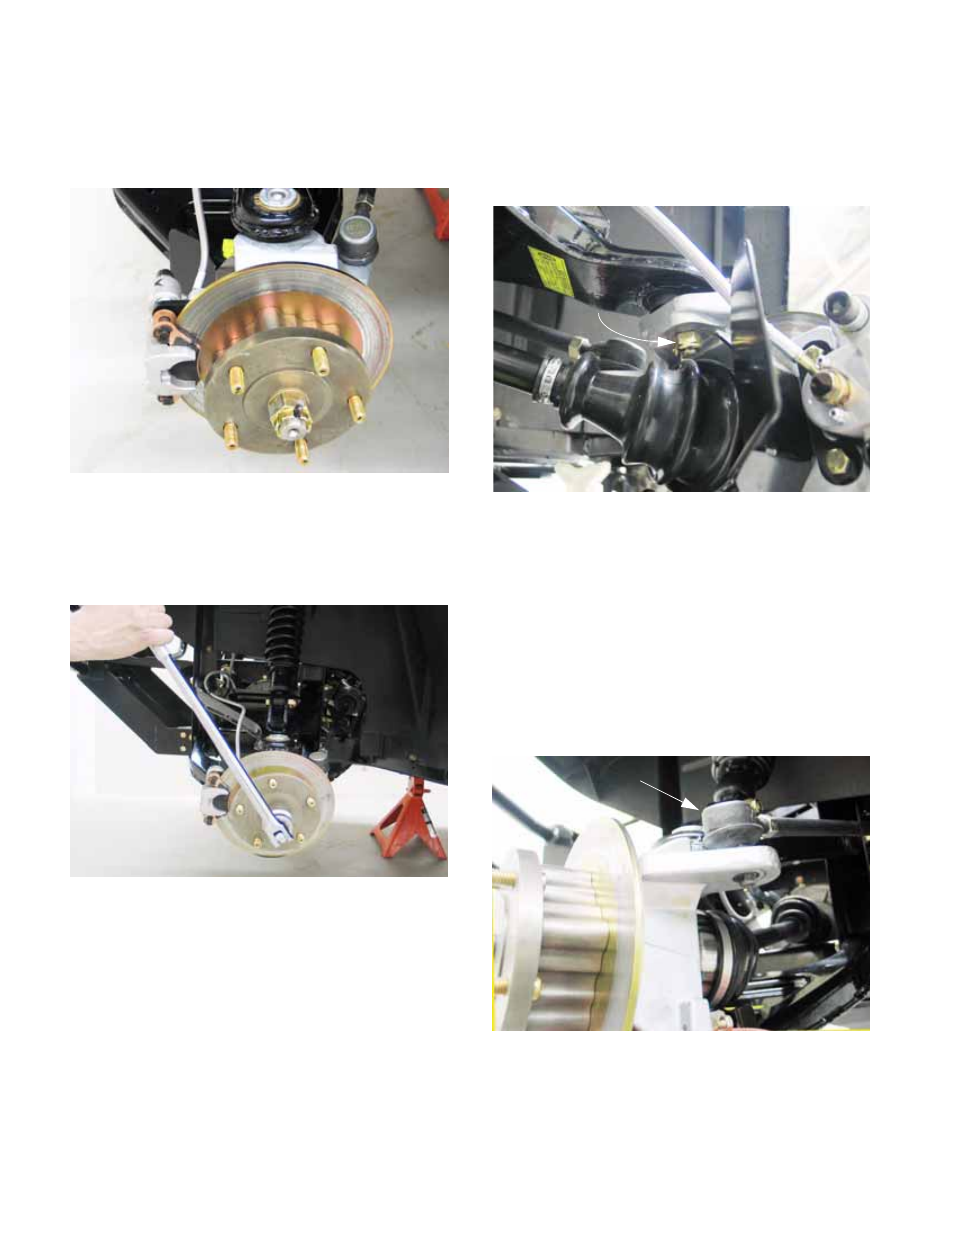
Remove the axle nut
2a. Remove and discard the cotter pin that
locks the axle nut. See Figure 3.29.
2b. Apply the brakes or block the hub from
rotating, then remove the axle nut and flat
washer using a 1-5/16” wrench.
See Figure 3.30.
3.
Disconnect the upper ball joint and tie rod end
3a. Loosen the nut that holds the upper ball
joint to the front hub as far as possible
using a 19mm wrench. See Figure 3.31.
NOTE:
NOTE: When removing nuts with nylon locking
rings that are installed on taper fit studs, loosen
the nut far enough to disengage the locking fea-
ture before separating the tapered joint.
3b. Loosen the nut that holds the tie rod end to
the front hub using a 19mm wrench.
3c. Separate the tie rod end from the hub. A
two-jaw or three-jaw puller will separate
the tie rod end without damaging the hub
or the tie rod end. See Figure 3.32.
CAUTION: Do not strike the hub casting to
release the tie rod end.
Figure 3.29
Figure 3.30
Removing front
hub nut
Figure 3.31
Upper ball joint nut
Figure 3.32
Tie rod end