Chapter 6 - hydraulic brakes – Cub Cadet 4 x 4 Volunteer User Manual
Page 197
Chapter 6 - Hydraulic Brakes
193
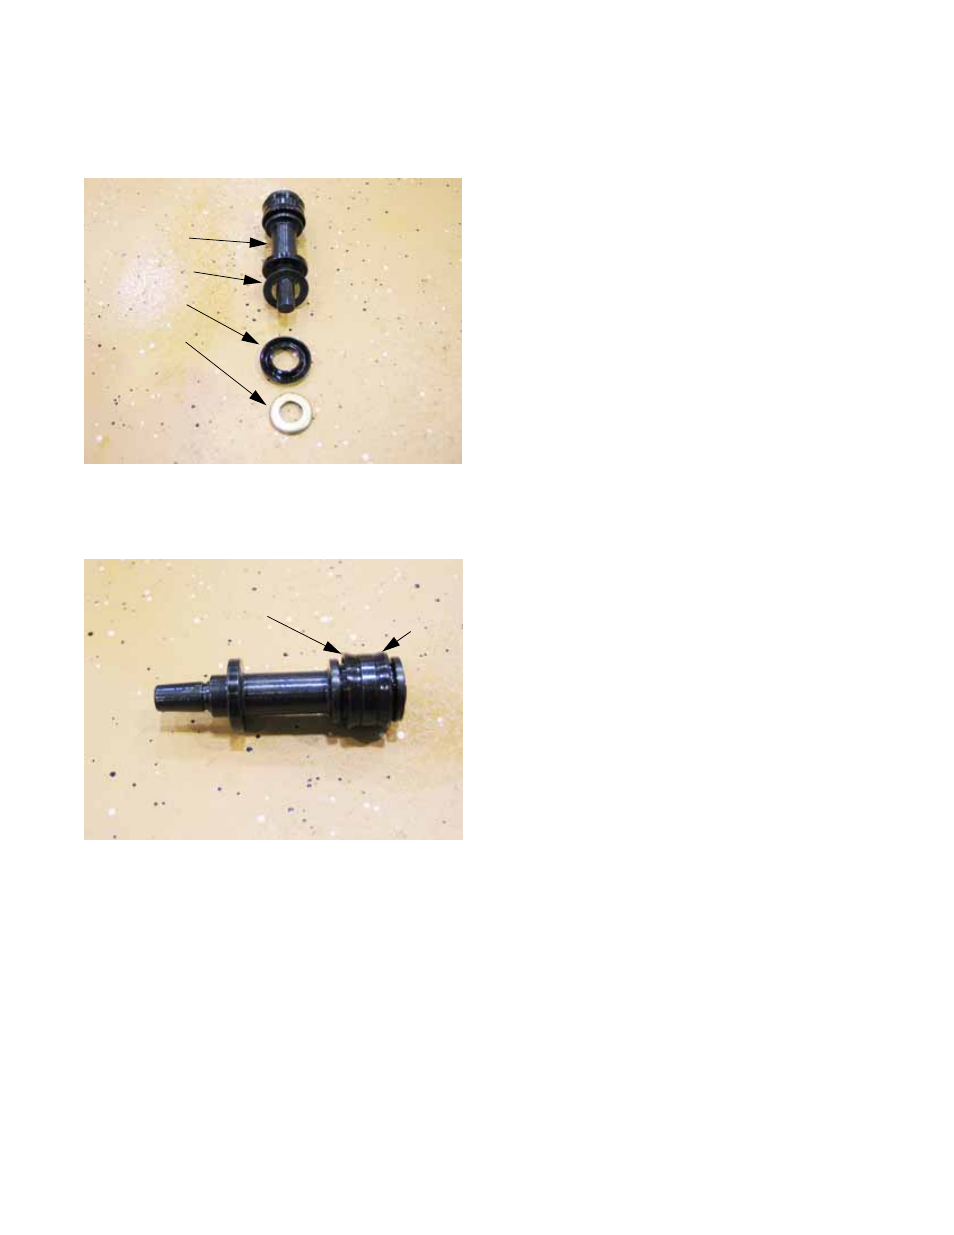
9b. Remove the power seal and flat washer
from the front end of the front piston.
See Figure 6.54.
9c. Remove the isolator seal from the rear end
of the front piston. See Figure 6.55.
9d. Remove the makeup seal from the second
seal land in from the rear end of the front
piston.
NOTE: The open side (lip) of the power seal and
the make up seal both face the spring (front) end
of the front piston.
The open side (lip) of the isolator seal, which is
located at the rear end of the front piston, faces
the rear of the piston.
Figure 6.54
Front piston
Flat washer
Power seal
Spring seat
Make-up ports
in flange
behind flat
washer are
sealed under
load.
On return, the
flat washer lifts
off the ports,
allowing fluid
transfer
Figure 6.55
Isolator seal
Makeup
seal
10.
Inspect the bore of the master cylinder.
•
If the bore is undamaged, clean it thoroughly
and continue with assembly.
•
If the bore is slightly worn or scored, it may be
honed using a BRM® flex-hone according to the
manufacturers instructions.
11.
Clean all parts that are to be assembled.
11a. Initial cleaning may be done with Stod-
dard solvent.
11b. Final cleaning should be done using hot
soapy water (dish washing detergent is
suitable), a nylon brush and a nylon bore-
bush.
11c. Rinse and dry all parts thoroughly.
12.
Assemble the pistons using the new parts con-
tained in the kit, installed as described in the dis-
assembly process.
NOTE: Use a small amount of thread locking
compound such as Loctite® 242 (blue) on the
shouldered screw that fastens the transfer
spring, cup, and spring seat to the rear piston.
13.
Lubricate the bore of the master cylinder with
brake fluid. Lubricate the pistons with brake fluid
or a suitable brake assembly lubricant such as
Sil-Glyde®, available from NAPA® auto parts
(p/n:765-1351).
CAUTION: Do not get brake fluid on painted sur-
faces. Brake fluid dissolves or damages many
types of paint.
14.
Carefully insert the front piston, spring end first,
into the bore of the cylinder.
15.
Fixture the master cylinder into a vise as was
done for disassembly.
16.
Carefully insert the rear piston, spring end first,
into the bore of the cylinder.