Chapter 9 - electrical – Cub Cadet 4 x 4 Volunteer User Manual
Page 312
Chapter 9 - Electrical
308
4e. If the battery is being checked indepen-
dently of the equipment it powers, mea-
sure and note the battery voltage while it
is disconnected, over a three-day period.
4f. There should be less than a .2 volt drop in
the readings. If there is more than a .2 volt
drop, the battery is bad.
5.
Storage of batteries
5a. Always store a battery with a full charge
(unless the battery is a dry battery and the
electrolyte has not been added yet). This
may require periodic re-charging.
5b. Take measures to prevent the battery from
freezing in cold weather. The electrolyte
in a fully charged battery has a lower
freezing point than the electrolyte in a bat-
tery with a lower state of charge.
5c. Store the battery in a cool, dry place.
5d. If storing multiple batteries (primarily store
stock), rotate the stock so that the oldest
battery goes out first. This will increase
the life of the batteries.
6.
Troubleshooting
6a. The first step in troubleshooting is to
always verify the complaint. Defining and
verifying the problem reduces the possi-
bility of misunderstanding and helps clar-
ify the diagnostic approach.
6b. The next step is to check the simple stuff
first:
•
Check the fuse or fuses. Some models have
ground side fuse. Failure of any fuse is an indi-
cation that there is a problem of some sort in the
circuit that the fuse protects.
•
Look for obvious physical damage.
•
Use the hour meter and indicator lamps as a
guide to direct the search.
As an example, when diagnosing a “no-crank”
condition on a lawn tractor with a PTO safety
switch: if the PTO light is lit on the hour meter
but the technician has visually verified that the
PTO clutch is not engaged, the PTO circuit
would be a reasonable place to check for prob-
lems.
•
Check the battery. A valid diagnosis of many
systems cannot be made without full system
voltage applied.
6c. Take a methodical approach to finding the
problem.
As a rule of thumb, start at one end of the
circuit and work to the other.
6d. The next step is to decide what method to
use to troubleshoot the circuit.
•
If checking a safety circuit that grounds the mag-
neto, use Ohms to test for continuity.
•
If checking a safety circuit that enables a starter
motor or accessory, us a volt meter to confirm
the presence of power at each junction in the
system.
•
If a circuit does not work at all, look for a short or
an open.
•
If the circuit works slowly or intermittently, look
for resistance by doing a voltage drop test.
NOTE: In all diagnosis, it is very important to
understand the circuit that is being checked.
The use of a schemantic is recommended, even
if a technician is thoroughly familiar with the sys-
tem.
7.
Testing for opens/shorts
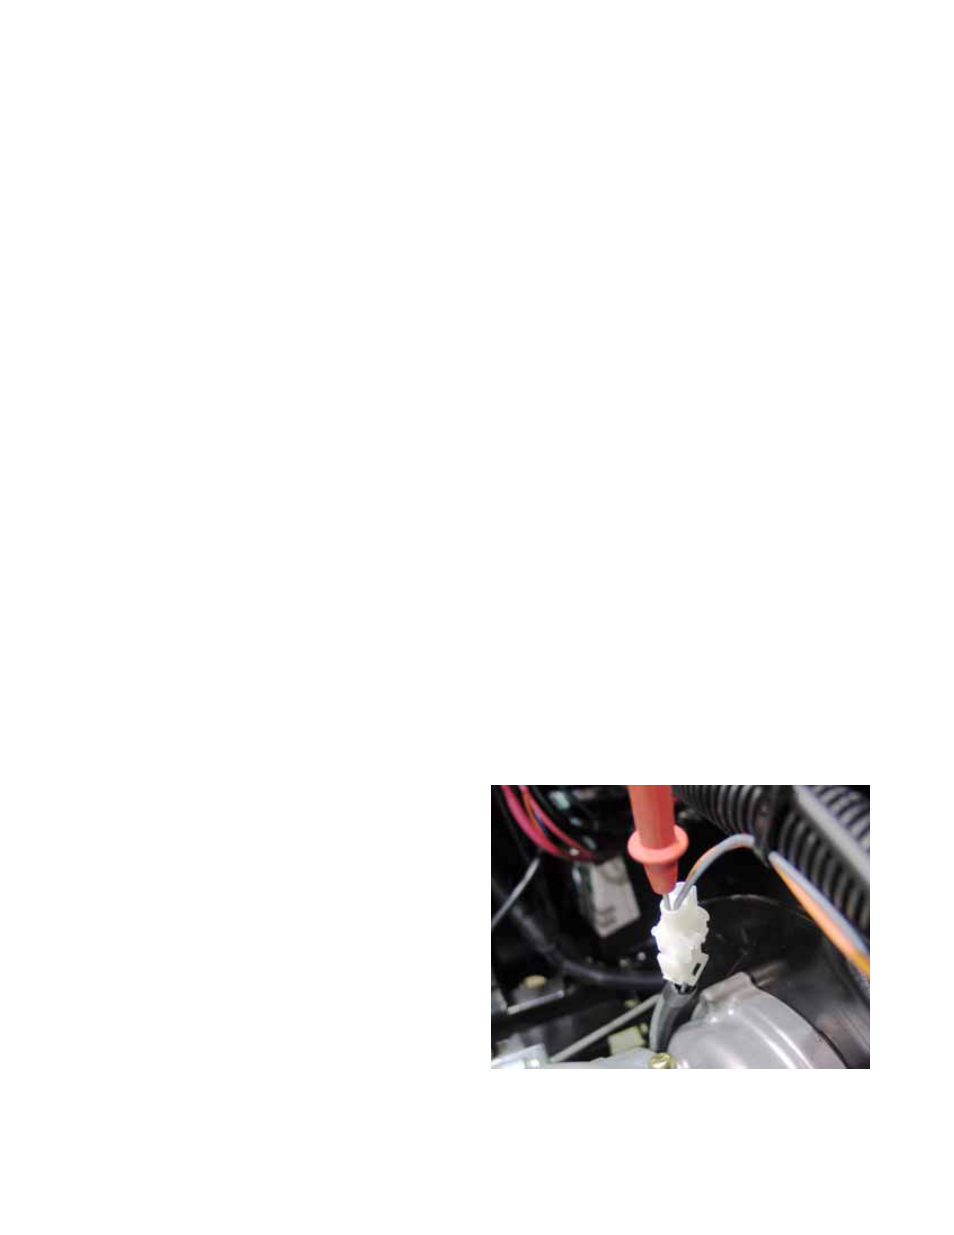
NOTE: When checking circuits for continuity,
disconnect the circuit at the nearest plugs and
use the metal terminals of the plug as a connec-
tion point for the test probes. DO NOT STAB
THE WIRES.
NOTE: When checking circuits for voltage,
back-probe the terminals nearest the point to be
checked. DO NOT STAB THE WIRES.
See Figure 9.68.
Figure 9.68