Cub Cadet 4 x 4 Volunteer User Manual
Page 101
Chapter 3 - Drive System: Drive Shafts and Differentials
97
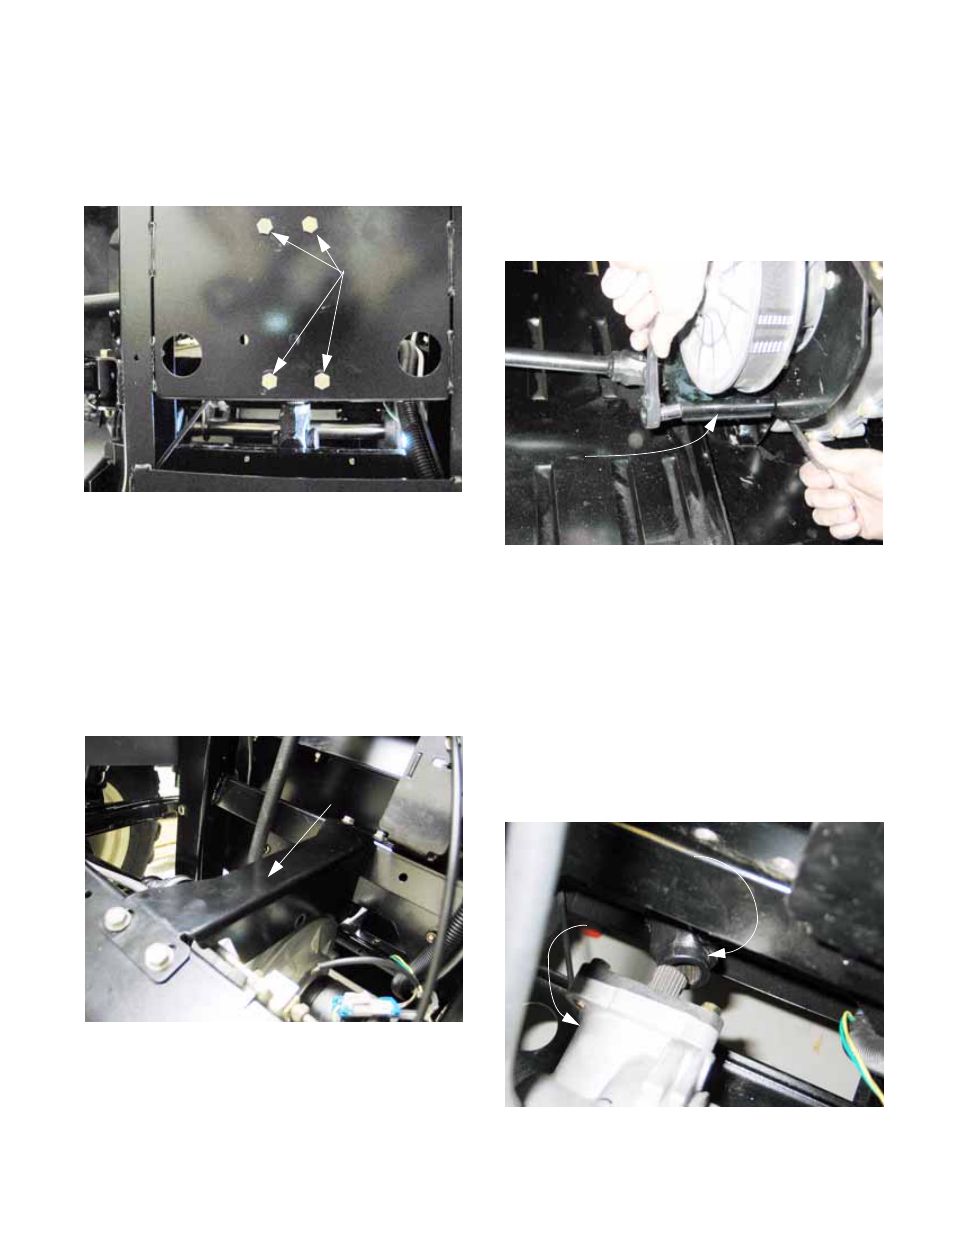
8.
Loosen the front differential.
8a. Remove the four bolts that hold the bottom
of the front differential to the frame using a
9/16” wrench. See Figure 3.22.
8b. Remove two bolts that hold the differential
housing to the torque bracket using a 1/2”
wrench.
NOTE: The bracket for the wires that control the
differential lock attaches to the fore-most bolt
between the bracket and the differential housing.
8c. Remove the front differential torque
bracket from the frame using a 1/2”
wrench. See Figure 3.23.
8.4.
Tilt the cargo box and driver’s seat up.
Figure 3.22
Front differential
mounting bolts
Access from
beneath the
vehicle
Figure 3.23
Torque
bracket
9.
Release the Camloc® fasteners that secure the
tool bin under the driver’s seat, and remove the
tool bin.
10.
Remove the guard between the driven element
of the CVT and the universal joint on the front
driveshaft using a pair of 1/2” wrenches.
See Figure 3.24.
NOTE: The mounting tubes are on the top side
of the guard. The radius provides clearance
around the universal joint.
NOTE: The lower nut is most easily reached
from beneath the vehicle.
11.
Final removal:
11a. Carefully slide the front differential for-
ward far enough to disengage the front
end of the drive shaft from the differential
pinion shaft. See Figure 3.25.
Figure 3.24
Front driveshaft
universal joint
guard
Figure 3.25
Front driveshaft
front differential
disengaged from