Chapter 2- drive system: cvt and transfer case – Cub Cadet 4 x 4 Volunteer User Manual
Page 23
Chapter 2- Drive System: CVT and Transfer Case
19
NOTE: Methodology: start at the source (the
transfer case), and work toward the control input
(the gear selector).
5.
Operate the gear selector through its full range
of motion (high range forward, low range for-
ward, neutral, and reverse). Look for the follow-
ing issues: See Figure 2.26.
•
Lost motion
•
Loose hardware
•
Mechanical interference
•
Unintended bends in the linkage
•
Excessive linkage bowing under load
•
Engagement of the gear that is selected
6.
Correct any of these initial problems before pro-
ceding with adjustment.
NOTE: It is possible to make a damaged linkage
work better by compensating for the damage
with adjustment. This should not be considered
complete repair.
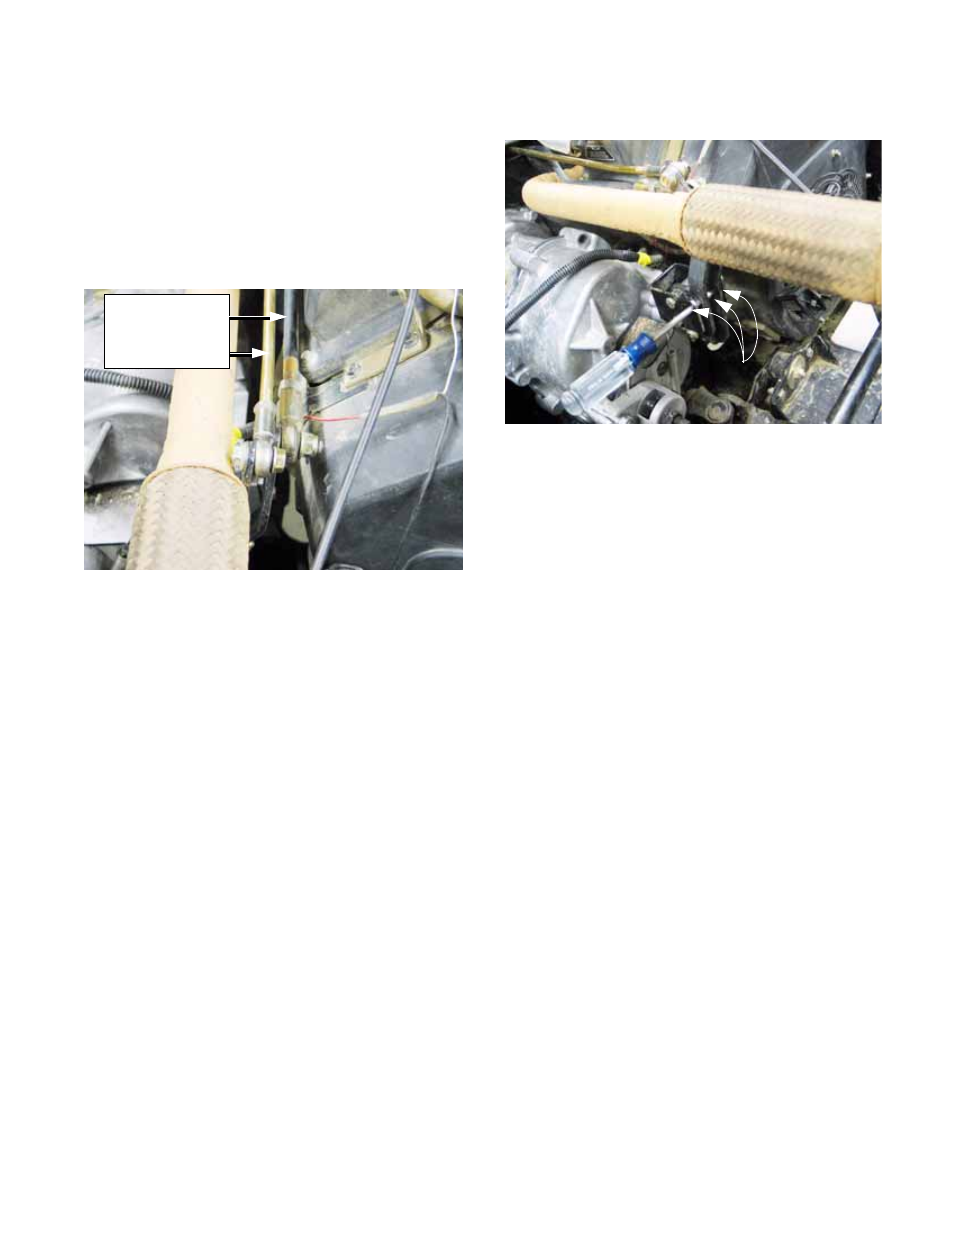
Figure 2.26
Forward-Neutral-
Reverse rod
Low-range rod
7.
Centering the linkage: See Figure 2.27.
7a. With the linkage disconnected, the shift
forks are centered in the neutral position
by detent springs.
7b. At this point the shift arms can be locked
into the neutral position by inserting a 3/
16” (or 5mm) dowel rod through the align-
ment holes in the shift lever bracket and
shift arms located on the back of the
transfer case housing.
7c. The center-point of neutral position at the
Hurst gear selector lever corresponds
with the center of the range where the
shift lever can move from the high-neutral-
reverse gait into the neutral-low gait.
7d. Find the point were the Hurst lever moves
left and right between the two gates. This
is the center-point of it’s range of travel.
Figure 2.27
Neutral
alignment
holes