Cub Cadet 4 x 4 Volunteer User Manual
Page 255
Chapter 8 - Caterpillar Engine and Related Systems
251
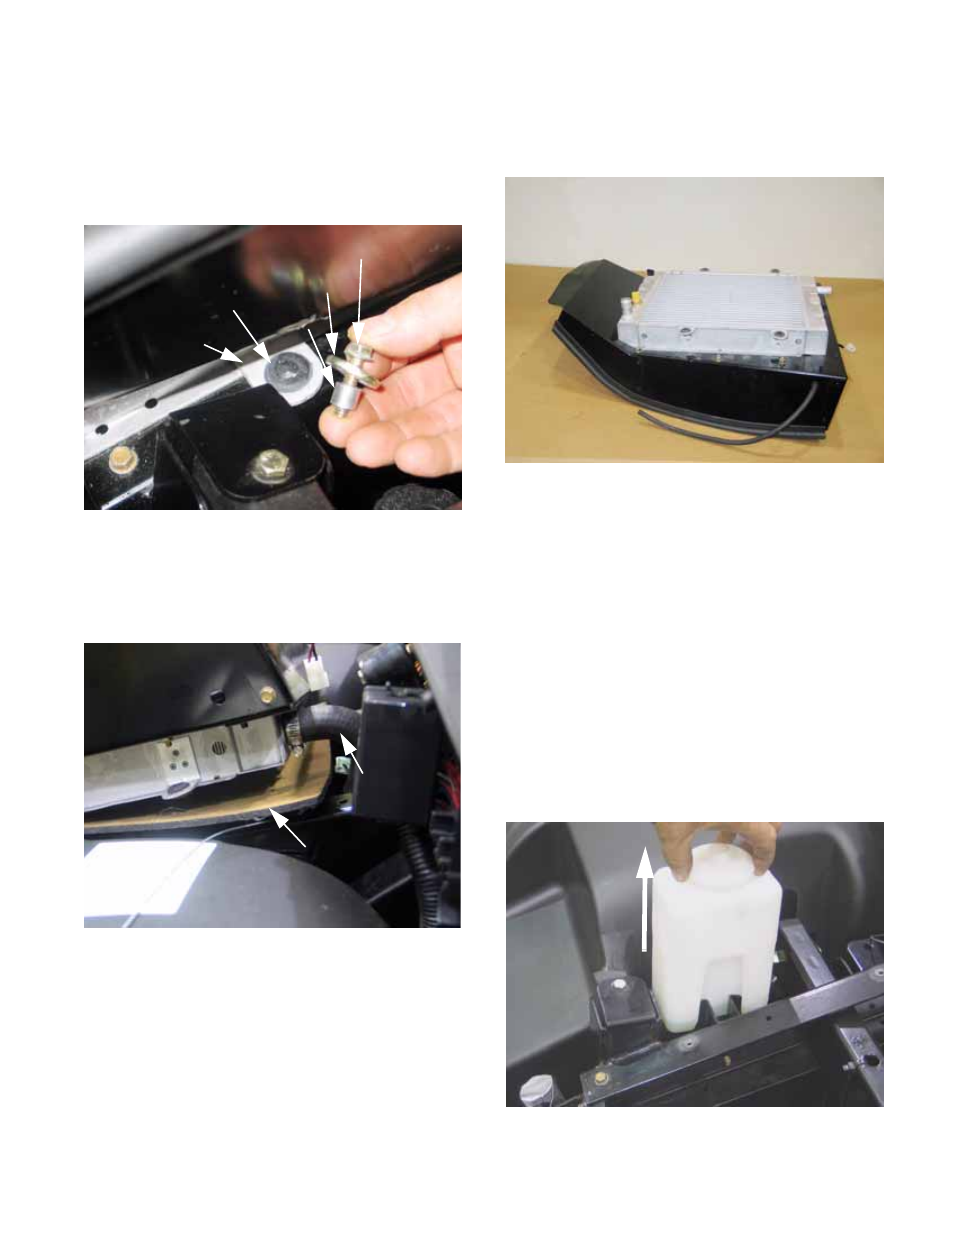
NOTE: Each screw passes through a heavy flat
washer and a spacer, providing controlled com-
pression of the rubber mounting bushings.
See Figure 8.80.
11l. Slip a protective pad under the radiator,
and lift it high enough to provide easy
access to the upper / rear radiator hose
and clamp. See Figure 8.81.
NOTE: Corrugated cardboard cut in an 18”
(46cm) square works well as a protective pad.
Figure 8.80
Mounting screw
Flat washer
Spacer
Rubber grommet
Mounting ear
Figure 8.81
Protective pad
Upper / rear
radiator hose
11m. Loosen the hose clamp, disconnect the
hose, and remove the cooling matrix to a
clear workbench. See Figure 8.82.
11n. Any further disassembly can be done eas-
ily on the bench.
NOTE: If the radiator is to be replaced, it is nec-
essary to drill-out the pop rivets that fasten the
air baffle to the radiator. Replace them with
locally-purchased 3/16” X.450” steel pop-rivets.
11o. Install the radiator by reversing the
removal process.
11p. Top-up and pressure test the cooling sys-
tem as described in the Draining and Fill-
ing Coolant section of this chapter before
returning the vehicle to service.
12.
Cooling system component removal: reservoir
See Figure 8.83.
Figure 8.82
Disassembly is easiest on the bench
Figure 8.83
Lift straight-up
to remove
NOTE: tight fit