Cub Cadet 4 x 4 Volunteer User Manual
Page 147
Chapter 4 - Front Suspension and steering
143
4.
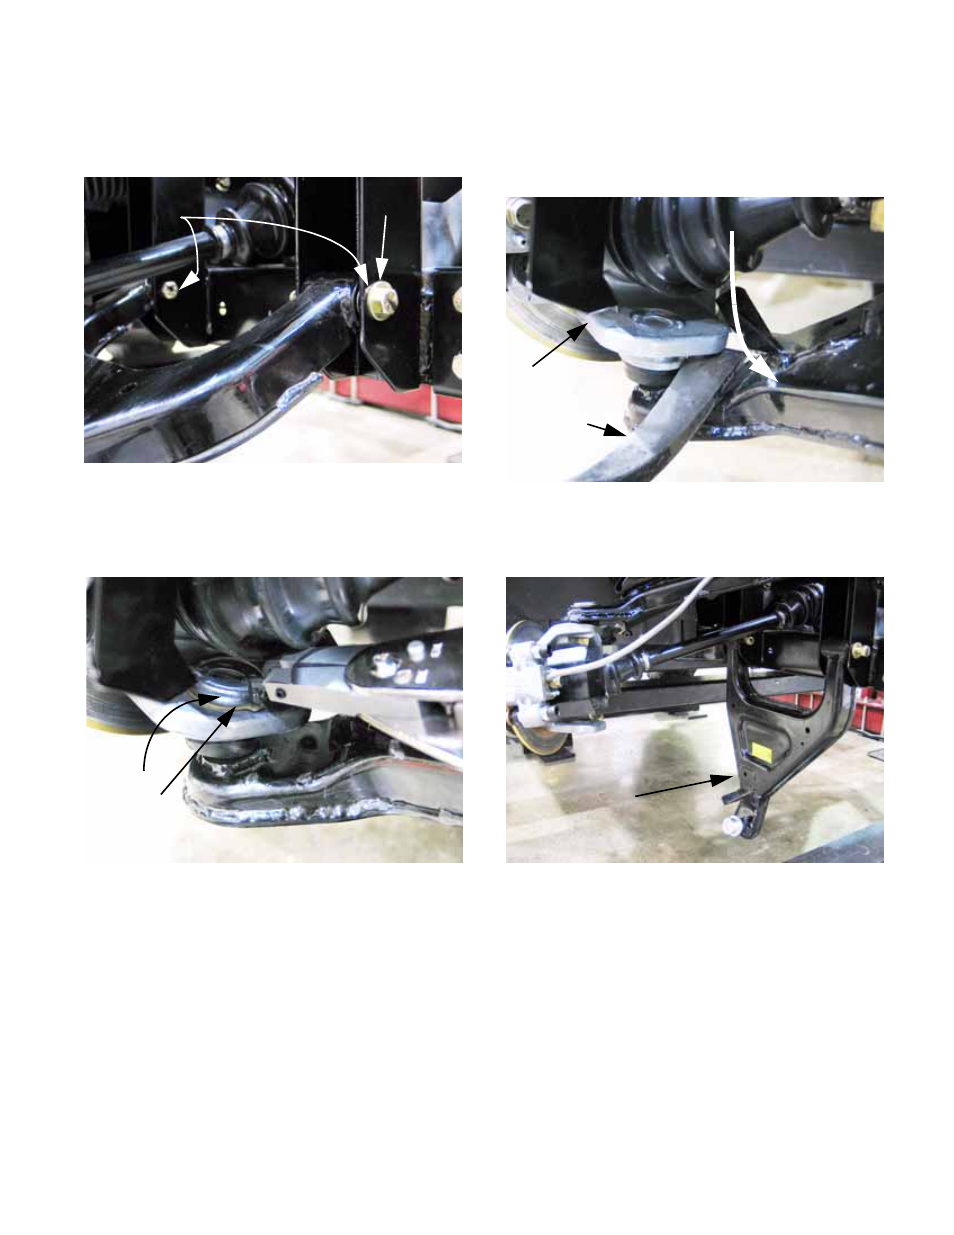
Loosen the bolts (one turn) that hold the lower
control arm to the frame using a 9/16” wrench.
See Figure 4.44.
5.
Remove the retaining ring that holds the lower
ball joint into the hub assembly using a pair of
90° snap ring pliers. See Figure 4.45.
Figure 4.44
Bolts attaching
lower control
arm to frame
Washer
(front)
Figure 4.45
Lower
ball joint
Retaining ring
6.
Carefully pry or drive a wedge between the
lower control arm and the hub assembly to pull
the ball joint down, out of the hub.
See Figure 4.46.
7.
Swing the lower control arm free of the hub
assembly, as the two separate. See Figure 4.47.
8.
Remove the nuts and bolts securing the lower
control arm to the frame, and remove the arm
from the vehicle.
Figure 4.46
Hub assembly
Lower ball joint
and
lower control arm
Pry bar
Figure 4.47
Lower control arm
and ball joint
- G1332 (20 pages)
- i1046 (36 pages)
- i1046 (32 pages)
- 54M (28 pages)
- 980 (20 pages)
- 949 (20 pages)
- Time Save (28 pages)
- 990 (24 pages)
- 997 (36 pages)
- V469 (20 pages)
- 4 Fabricated Deck (36 pages)
- 4 Fabricated Deck (32 pages)
- 6 Fabricated Deck (28 pages)
- 4 Fabricated Deck (32 pages)
- 4 Fabricated Deck (32 pages)
- 6 Fabricated Deck (36 pages)
- M48-M60-KW (28 pages)
- 4 Fabricated Deck (32 pages)
- 6 Fabricated Deck (32 pages)
- CC 500 BAT (30 pages)
- CC 22 (20 pages)
- CC 949 (13 pages)
- 33" Wide Area (29 pages)
- Z-Wing (88 pages)
- TANK S Series: Electrical System (9 pages)
- TANK S Series: Hydraulic Drive & Steering System (12 pages)
- TANK S Series: Steering System Adjustments (11 pages)
- 640 (24 pages)
- 640 (20 pages)
- 641 (24 pages)
- 641 (20 pages)
- J466 (32 pages)
- Series C460 (28 pages)
- 435A (24 pages)
- 642 (24 pages)
- 414 (24 pages)
- M465 (28 pages)
- Fun Runner (117 pages)
- 4 x 2 Big Country - Steel Bed (38 pages)
- 4 x 2 Big Country - Poly Bed & Steel Bed (82 pages)
- 6 x 4 Big Country (121 pages)
- CC 4BP 32cc (29 pages)
- 2518-48 (60 pages)
- 1525 (39 pages)