Cub Cadet 4 x 4 Volunteer User Manual
Page 71
Kohler Enclosed CVT Addendum
67
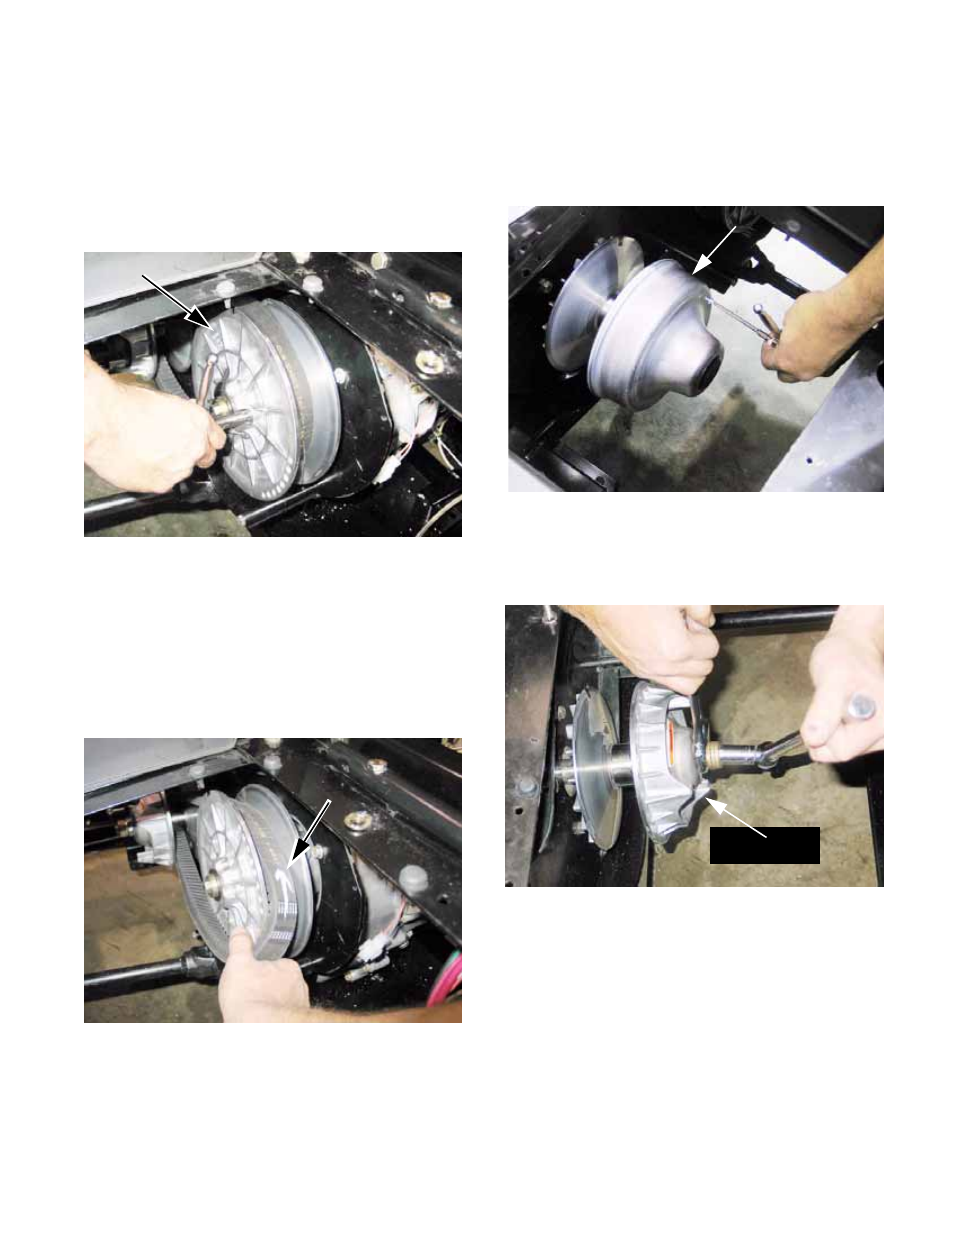
3c. Lubricate the screw with a small amount of
grease or motor oil, then thread the screw
into the tapped hole in the outer sheave of
the driven element.
The end of the screw will press against
the inner half of the sheave, spreading the
two apart. See Figure 2a.11.
3d. Mark the direction of rotation on the belt.
It must be reinstalled so that it rotates in
the same direction.
3e. As the sheaves are spread, the tension on
the belt will be relieved, and the belt can
be rolled-off of the driven element (pulley).
See Figure 2a.12.
Figure 2a.11
Install screw
to spread sheaves
Driven pulley
Figure 2a.12
orientation
Arrow to maintain
4.
REMOVE THE CVT PULLEYS
4a. Remove the three screws holding the
cover in place using a T-20 driver, then
remove the cover. See Figure 2a.13.
4b. Hold the large nut with a 30mm wrench
while loosening the crankshaft bolt with a
5/8” wrench. See Figure 2a.14.
Figure 2a.13
Cover: driving pulley
Figure 2a.14
Driving pulley