Chapter 6 - hydraulic brakes – Cub Cadet 4 x 4 Volunteer User Manual
Page 194
Chapter 6 - Hydraulic Brakes
190
Component Repair: Master Cylinder
NOTE: Master cylinder repair will not be avail-
able during the initial year of production.
•
Pending availability, this section of the manual
will provide guidance repairing the master cylin-
der.
•
If repair parts are not available, this section will
help the technician further understand the work-
ings of the master cylinder, which may aid in the
diagnosis of a brake hydraulic problem.
1.
Remove the master cylinder from the vehicle, as
described in the To Replace a Master Cylinder
section of this manual. See Figure 6.43.
2.
Drain and properly dispose of any residual fluid.
3.
Remove the 2 shouldered screws that secure
the plastic reservoir. See Figure 6.44.
4.
Remove the busings that seal the reservoir to
the cylinder housing. See Figure 6.45.
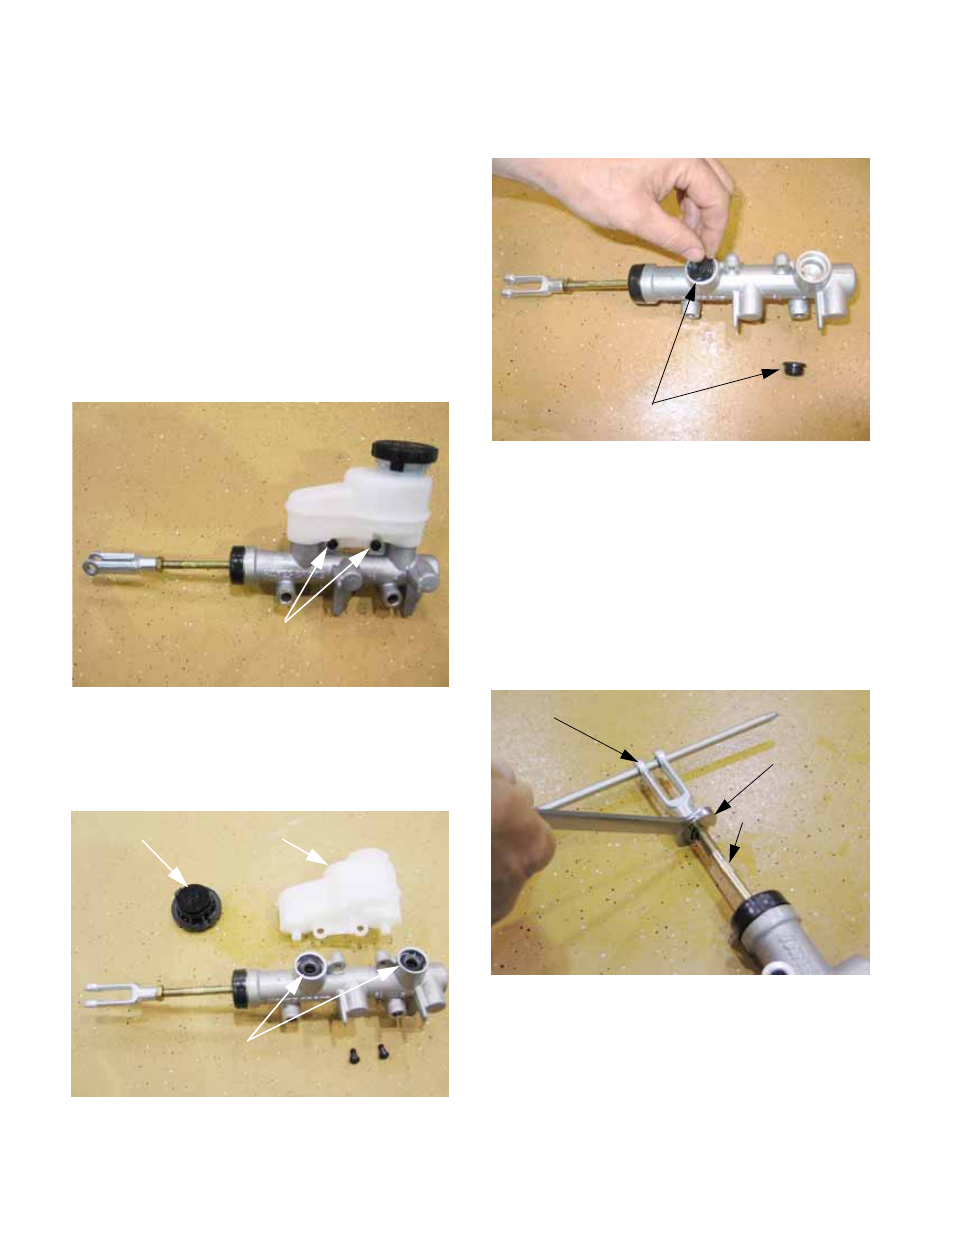
5.
Remove the push rod.
5a. Mark the threads on the push rod to main-
tain brake adjustment.
5b. If the jam nut was not loosened in the
removal process, hold the push rod with a
1/4” wrench, or brace the yoke using a
length of 5/16” round stock, and loosen
the nut using a 1/2” wrench.
See Figure 6.46.
5c. Remove the yoke and jam nut.
Figure 6.43
Master cylinder, complete
Screws securing reservoir
Figure 6.44
Cap Reservoir
reservoir and master cylinder
Bushings create seal between
Figure 6.45
Push rod
Reservoir seal bushings
Figure 6.46
Yoke
Jam nut
Flat