Cub Cadet 4 x 4 Volunteer User Manual
Page 100
Chapter 3 - Drive System: Drive Shafts and Differentials
96
5c. Carefully slide the cooling matrix straight
forward. Do not allow the radiator core to
come into contact with anything that might
damage it. See Figure 3.19.
NOTE: A piece of corrugated cardboard may be
placed under the radiator for protection. Failure
to remove the cardboard when the radiator is re-
mounted can result in engine over-heating and
extensive damage.
6.
Remove the driveshaft cover: See Figure 3.20.
6a. Remove the four bolts that hold the drive-
shaft cover to the floor of the passenger
compartment using a 1/2” wrench.
6b. Pry-up the push-in fasteners that secure
the front of the driveshaft cover.
6c. Lift the rear of the cover, and draw it back
to disengage the locating tabs at the front
edge. Remove the driveshaft cover.
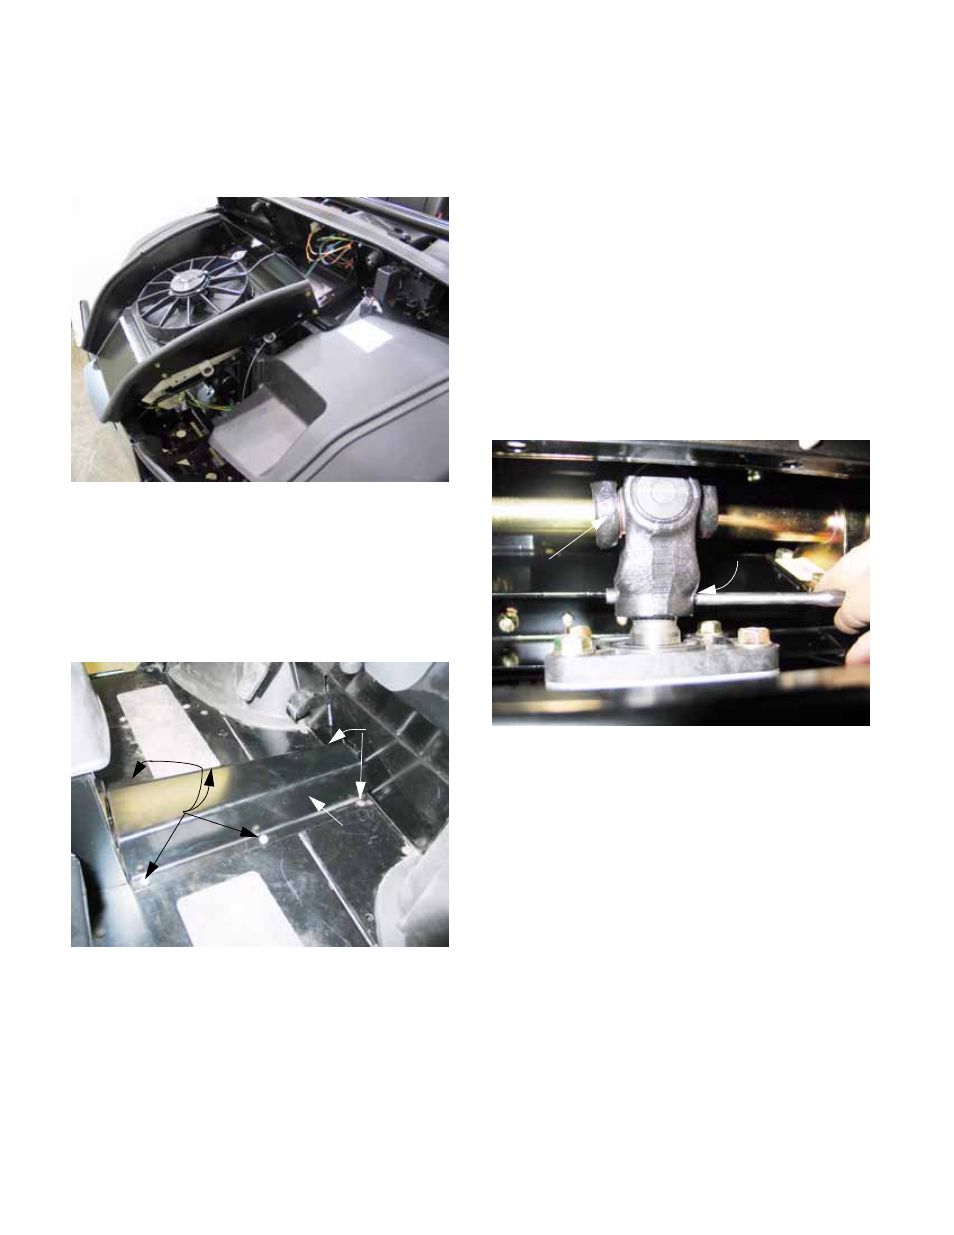
7.
Disconnect the driveshaft from the front differen-
tial:
NOTE: The front of the drive shaft is secured to
the pinion shaft on the front differential by a ten-
sion pin.
7a. Rotate the driveshaft as necessary to
reach the tension pin, maintaining enough
clearance to drive the tension pin out the
opposite side of the joint.
7b. Drive the tension pin out of the joint using
1/4” (6.5mm) flat-nosed drift.
See Figure 3.21.
NOTE: Dispose of the tension pin, and replace it
with a fresh 5/16” X 1-1/4” tension pin.
Figure 3.19
Figure 3.20
fasteners
Push-in
Driveshaft
cover
Mounting
screws
Front driveshaft
Tension
pin
Figure 3.21