Cub Cadet 4 x 4 Volunteer User Manual
Page 75
Kohler Enclosed CVT Addendum
71
6d. Check the alignment of the two pulleys:
Place the alignment tool over the hub of
the driven pulley so that it lays flat against
the front surface of it.
The furthest corner of the thick end of the
tool should meet-up with the inner lip of
the fixed sheave on the driving pulley
See Figure 2a.25.
NOTE: The outer sheave of the driving pulley
moves inward to clamp the belt as engine RPMs
increase.
6e. Adjust the number of shims behind the
driven pulley to achieve correct alignment.
Use the three .800” (2 cm) I.D. flat wash-
ers that are included in the kit, if neces-
sary.
6f. Once alignment is correct, install the
driven pulley screw with thread locking
compound such as Loctite®
262 (red),
and tighten it to 32-36 ft-lb. (43-49 N-m).
Figure 2a.25
Critical
corner
Alignment
tool
Shims behind
driven pulley
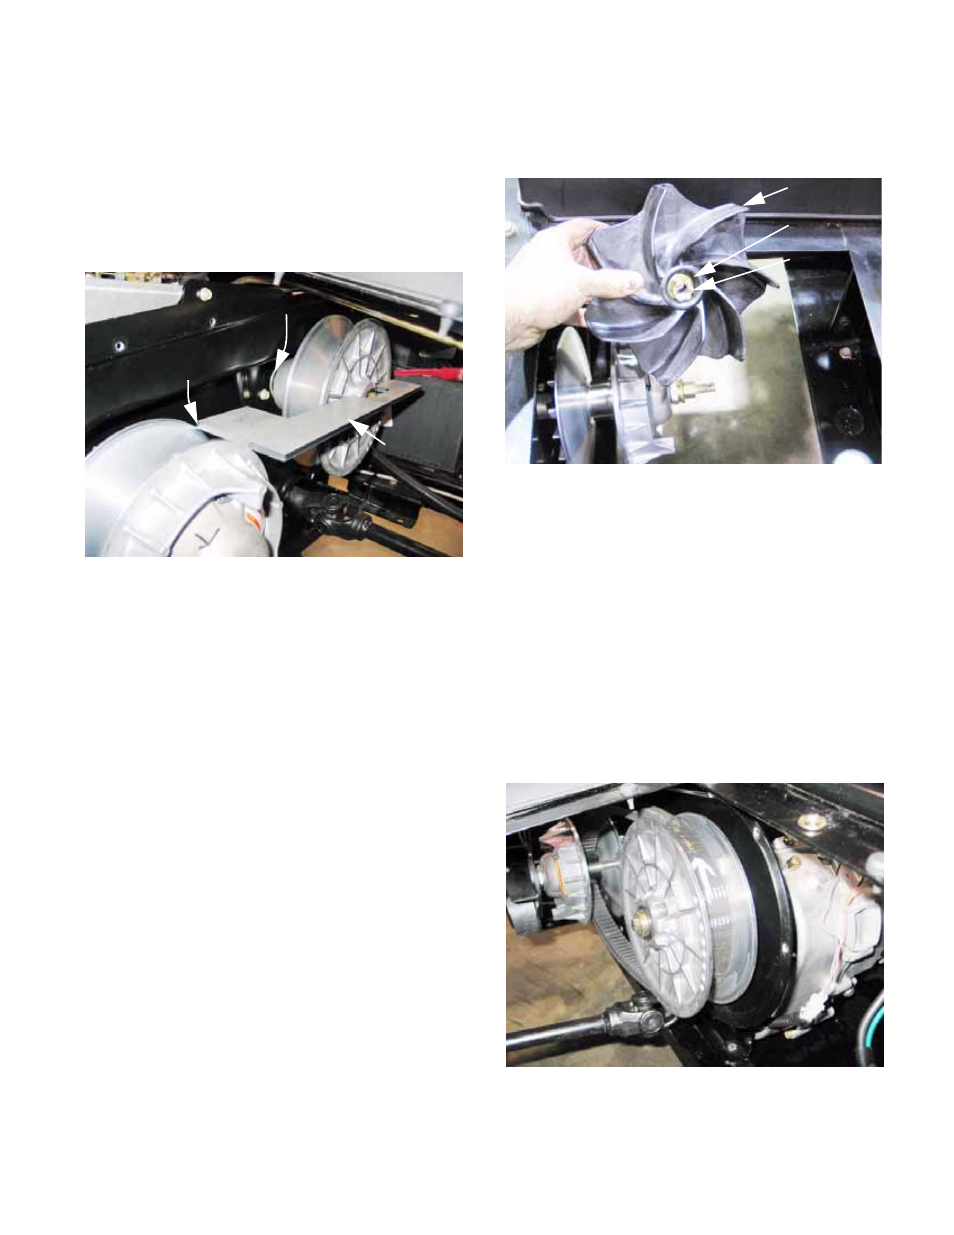
6g. Install the cooling fan on the driving pulley,
securing it with the flat washer and castle
nut. See Figure 2a.26.
6h. Tighten the nut to a torque of 22-25 ft-lbs.
(30-34 N-m), then secure it using the cot-
ter pin.
6i. Inspect the drive belt. If it is worn to less
than 1.20” (30.5mm) across the flat back
surface of the belt, or if is shows signs of
burning or checking, replace it with a new
belt.
6j. Roll the drive belt back onto the pulleys.
Refer to the marks made before the belt
was removed, to confirm that the direction
of rotation has not been changed.
See Figure 2a.27.
Figure 2a.26
Fan
Washer
Castle nut
Figure 2a.27