Chapter 4 - front suspension and steering – Cub Cadet 4 x 4 Volunteer User Manual
Page 148
Chapter 4 - Front Suspension and steering
144
9.
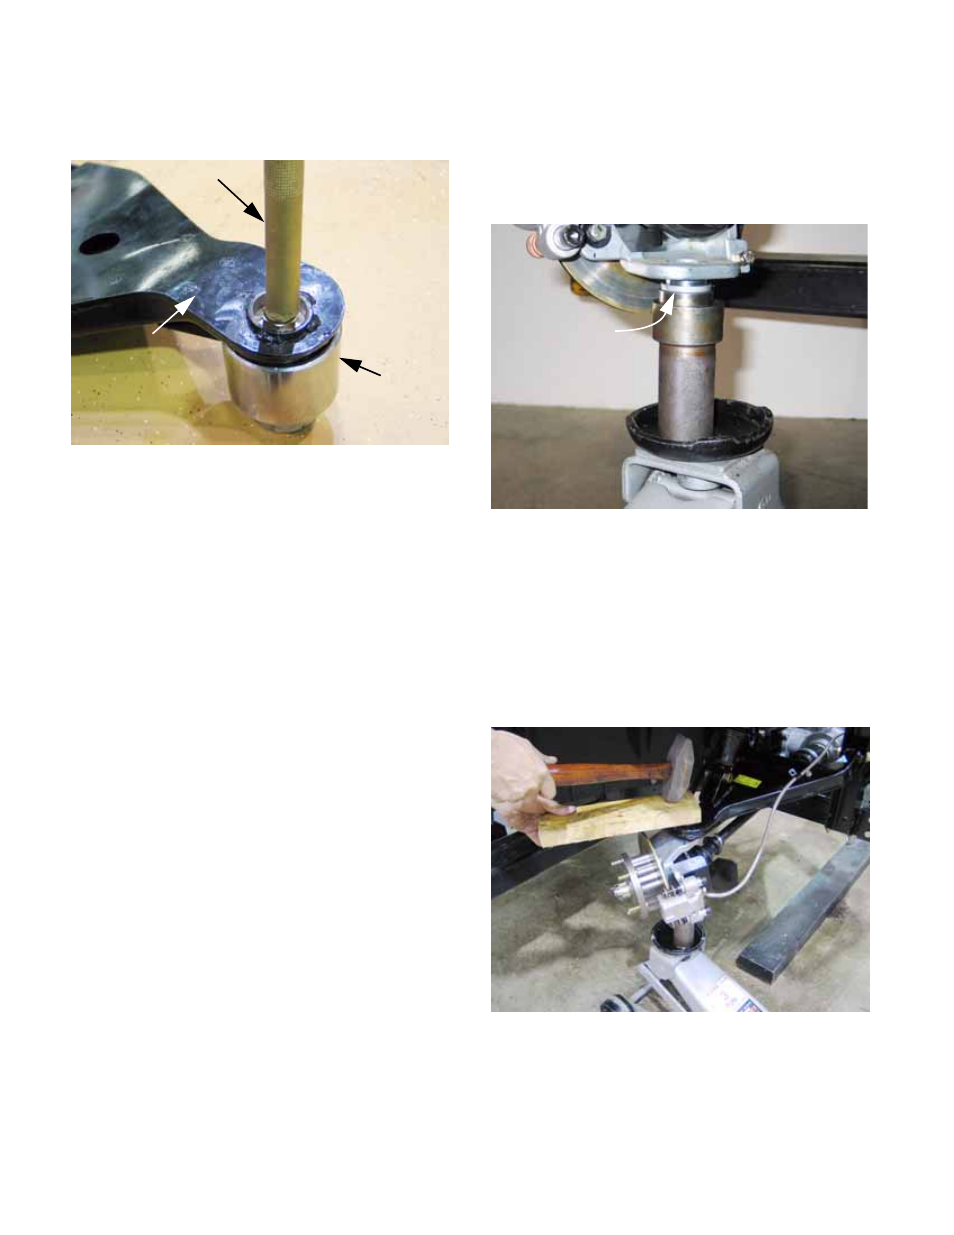
To separate the lower ball joint from the control
arm: See Figure 4.48.
9a. Position the lower control arm upside-
down, supported by and arbor or a length
of tubing, with the body of the ball joint
free to move.
9b. On a firm workbench, the ball joint can be
driven out with a heavy hammer and a
soft drift.
9c. Alternatively, a hydraulic press can be
used to force the tapered stud of the ball
joint out of the arm.
9d. Once broken-loose, remove the nut and
remove the ball joint.
10.
Clean, inspect, and lubricate the ball joint bore in
the hub assembly.
11.
To install the new ball joint into the hub:
11a. Position the new ball joint under the hub,
with the metal shoulder of the ball joint
supported by a seal driver or a length of
tubing. See Figure 4.49.
11b. Support the lower ball joint firmly, and
carefully align the body of the ball joint
with the bore that it fits into in the hub
assembly.
11c. Using a block of wood to prevent damage
to the upper control arm and ball joint,
drive the hub assembly down to seat the
new ball joint. See Figure 4.50.
Figure 4.48
Drive ball joint into
the hollow of the
socket
Soft drift and
nut protect
threads
Brass drift
Socket
Lower control
arm
Figure 4.49
Lower ball joint
firmly supported
by shoulder
Figure 4.50
Drive hub
assembly
down over
ball joint